California Title 24 Energy Standards Explained for Home Remodels
California Title 24 sets the energy rules you must meet when remodeling a home. You’ll trigger requirements for windows, insulation, ducts, lighting, HVAC, and electrical systems based on the scope of work, not every repair. The 2025 code tightens standards with more duct sealing, stronger ventilation, and new electrification options, plus solar and battery mandates for many projects. You’ll use HERS testing and California-certified energy models to demonstrate compliance before permits. If you keep reading, more specifics await.
What California Title 24 Covers for Home Remodels
California Title 24 sets the rules for what counts as a remodel from an energy-efficiency standpoint, so you’ll want to know when changes trigger its requirements.
In short, certain renovations activate compliance, while some repairs do not. If you replace or enlarge windows and doors, upgrade HVAC systems, modify ducts, or alter insulation, you’re facing Title 24 compliance.
Lighting changes in kitchens, bathrooms, and garages, plus water heater upgrades, also count toward energy upgrades.
Distinctions matter: alterations, which modify energy usage, require full compliance certification, whereas simple repairs don’t.
Distinctions matter: alterations require full energy-compliance certification, while simple repairs do not.
Building envelope work—roofs, exterior walls, and insulated floors—can trigger standards, especially when you add space or change usage.
Permits and pre-construction documentation often formalize these compliance challenges before any work begins.
Key Changes for 2025 Energy Code Adoption
The 2025 Energy Code adoption brings notable shifts that affect nearly every project, from new builds to alterations.
You’ll face more stringent requirements across buildings, reflecting a roughly 30% increase in stringency versus 2022 standards. The scope now covers new construction, additions, and alterations for residential and nonresidential buildings, with single-zone heat pump baselines expanded.
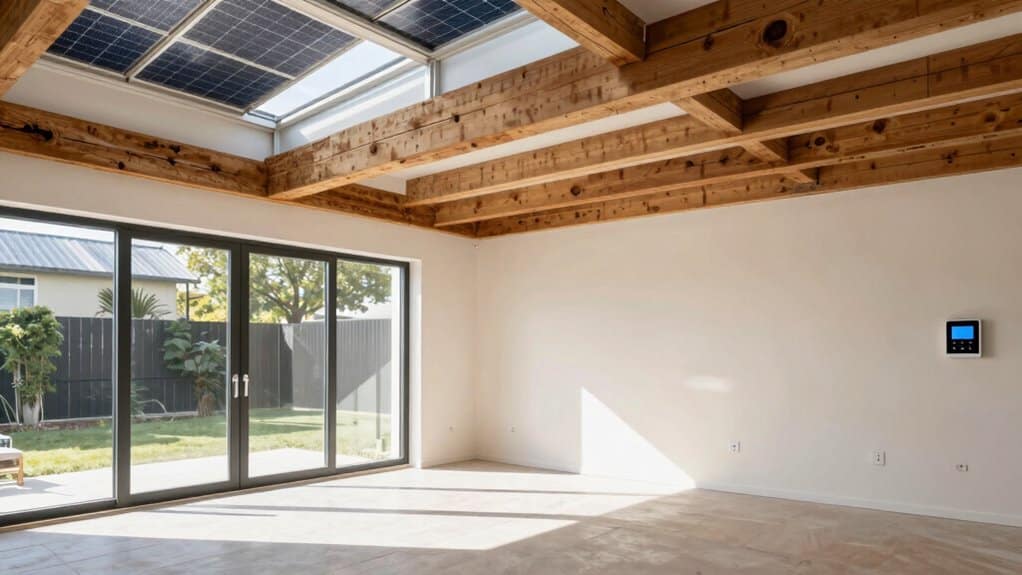
HVAC and envelope rules tighten, including mandatory duct sealing, an R-22 (or 0.043 U-factor) ceiling/roof insulation, and reduced whole-house fan and attic vent area.
Electrification expands options for space heating, water heating, cooking, and pool heating, accelerating the shift from natural gas.
PV and battery mandates grow, promoting energy resilience. Expect enhanced lighting controls and sensors, all aligning under energy efficiency goals within the building codes framework.
How Ventilation and Heat Pumps Impact Remodels
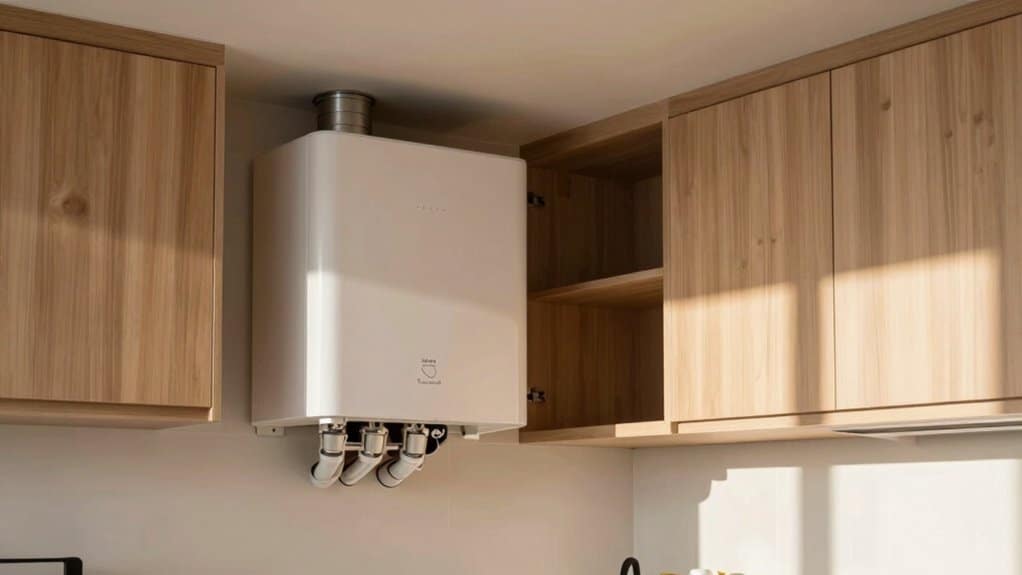
As the 2025 Energy Code expands, ventilation and heat pump requirements increasingly shape remodel projects.
You’ll see the minimum ventilation volume rise to 1 cfm per 100 sq. ft. plus 7.5 cfm per occupant, with occupants based on bedrooms. A 3-bedroom, 1,800 sq. ft. townhouse needs about 48 cfm continuous ventilation, and the new formula uses the larger of occupant-based or area-based rates.
Whole-house ventilation becomes mandatory, via a continuous bathroom fan or central HVAC supply/return. In multifamily buildings, balanced ventilation is required, and HERV paths may apply to improve cost-effectiveness.
Whole-house ventilation becomes mandatory via continuous bathroom fan or central HVAC supply/return; balanced ventilation required in multifamily buildings.
Heat pump efficiency matters, with updated VRF options and prescriptive verification by HERS raters. Expect stronger duct sealing, testing, and upgraded airflow controls as you remodel.
Ventilation strategies and heat pump efficiency matter.
Solar, Batteries, and Electric-Ready Requirements
Solar, Batteries, and Electric-Ready Requirements are shaping how you plan new residential, commercial, and multifamily projects.
Title 24 mandates solar PV systems for new builds, sized by floor area and occupancy factors, with calculations like kWPVdc = (CFA × A) / 1000.
New 2025 updates raise PV capacity in certain occupancies and apply to nonresidential and high-rise multifamily projects.
Battery storage is now required alongside PV for many commercial properties, sized by Section 140.10 equations, with a 25% PV size reduction when paired with qualifying storage.
You’ll use tools such as the Solar PV Calculator and California Solar Shade Analysis to verify access and sizing.
Compliance may apply from January 1, 2026, for permits issued afterward.
solar panel integration, battery storage requirements.
Compliance Tools and Resources for Remodel Projects
Compliance tools and resources for remodel projects keep you aligned with Title 24 requirements at every stage.
You’ll use HERS verification for mechanical changes, additions, and major remodels to confirm post-installation efficiency, performed by certified HERS raters.
Title 24 calculations happen before permits, with energy models submitted by your energy consultant and generated through California Certified Energy Reading programs.
Title 24 calculations precede permits, using energy models crafted via California Certified Energy Reading programs.
CEC-approved tools, like EnergyPro and CBECC, simulate envelope, lighting, HVAC, and water heating performance, ensuring official permit documents are valid.
Compliance forms help identify the right Part 6 forms, while MAEDbS lists approved luminaires your designer must specify.
Local AHJs verify JA-marked products and forms, guiding your permitting, planning, and post-construction commissioning alongside energy consultants for continued compliance.
Wrapping It Up
You’ll find California Title 24 remodeling rules clearer than you’d expect, with practical steps you can take now. As codes evolve, focus on energy efficiency, ventilation, and the growing role of heat pumps, solar, and storage. Keep plans aligned with 2025 changes, verify requirements for electric-ready spaces, and use available compliance tools to stay on track. By staying proactive and organized, you’ll simplify approvals, save energy, and deliver a safer, more comfortable home renovation.
How to Estimate Your Remodel Budget (And Avoid Cost Surprises)
To estimate your remodel budget, start by clearly defining scope and priorities for each room, then ground every cost in local prices. create per-room budgets with distinct line items for materials, labor, permits, and contingency. Expect 20–40% of costs for labor and keep a 10–20% contingency for surprises. Compare multiple licensed quotes and watch materials’ share, typically 40–50%, plus a 15% price-buffer. If you keep this approach, you’ll stay on track and uncover more practical tips to follow.
Understanding Your Scope and Priorities

Understanding your scope and priorities starts with a clear plan of what you want to achieve and why it matters. In this phase, you define scope clarity by outlining tasks, goals, and expectations for the remodel, room by room and task by task.
You’ll decide where to focus efforts first, establishing project priorities that guide decisions when conflicts arise. A well-defined scope sets boundaries, answering what, where, when, why, and how, so everyone stays aligned before construction begins.
Document details like cabinet style, materials, color, and installation steps to prevent interpretation gaps. By documenting goals, specific tasks, and timelines, you reduce confusion, delays, and unexpected costs, making outcomes more predictable and your budgeting more accurate. Allocate extra funds in your budget for unexpected expenses to ensure financial resources are sufficient to complete the project.
Researching Local Costs and Comparable Projects
To estimate your remodel budget accurately, you’ll need to ground your plan in real local costs and solid comparisons. Researching local costs helps you account for regional labor rate variations, material availability, and price differences, so your numbers stay credible. Use local pricing data to frame per-square-foot expectations and tailor quotes to your area. Compare projects that resemble yours—kitchens, baths, or additions—to understand typical scopes and costs in your region. Choosing the right contractor can further refine your budget by ensuring quality work that avoids costly errors. Project comparisons also reveal which upgrades yield strong value in your market, guiding decisions before you commit. Keep an eye on benchmarks and historical data to avoid surprises, and lean on reputable sources to refine your budget. This approach reduces risk while delivering a realistic, regionally grounded plan.
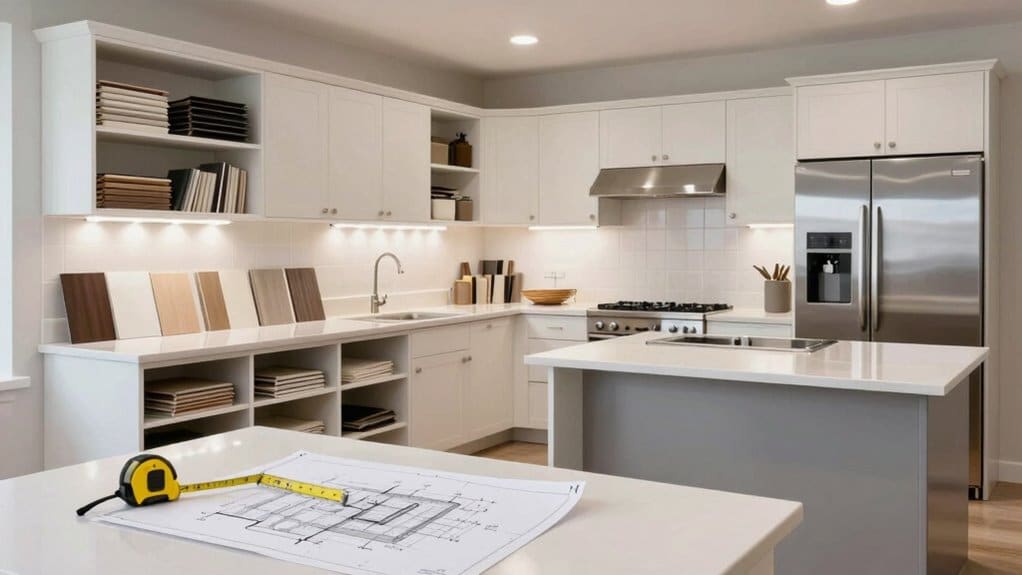
Choosing Materials and Finishes Wisely

Choosing materials and finishes wisely means balancing cost, durability, and style from the start. You’ll decide how material types align with your budget and daily use, recognizing that materials occupy 40%-50% of the total remodel. For kitchens, expect $100-$250 per square foot, with low-end options at about $15 and high-end choices around $150. Finish quality matters: laminate countertops save money compared with quartz, while vinyl flooring challenges hardwood for cost. Plan for a 15% buffer against price shifts, since tariffs and inflation push up costs. Remember that strategic selections can boost resale value, especially exterior upgrades. Investing in energy-efficient appliances can reduce utility bills by 10-50%, providing long-term savings.
Getting Professional Estimates and Multiple Quotes
To get reliable estimates, you should gather multiple quotes from licensed professionals and compare their cost breakdowns side by side. Vet contractor credentials and track record to guarantee you’re selecting firms with solid references and appropriate insurance. Remember that labor costs in remodeling typically range from 20% to 40% of total project costs, so understanding this aspect is crucial for budget planning. This approach helps you spot pricing gaps, align expectations, and move toward a clear, accurate budget.
Get Multiple Quotes
Gather several professional estimates to get a clear picture of your remodel cost. To start, arrange site visits with contractors, architects, or designers for custom price estimates based on project details.
Consult multiple professionals directly for tailored estimates, avoiding broad averages. Use technology-driven tools for instant estimates from real renovation data before contractor visits, then compare contractor quotes against data-driven estimates to identify misaligned pricing.
Solidify the scope of work and product specifications after each estimate to proceed smoothly to a contract price. Seek competitive pricing by gathering bids from several remodelers and gathering sub-quotes from specialists during a 4-6 week estimate assembly.
Don’t skip getting second opinions to confirm accuracy and guard against surprises. Consider choosing a home improvement service that emphasizes a client-centric approach to ensure the remodel meets your exact specifications.
Compare Cost Breakdowns
When you compare cost breakdowns, start with getting professional estimates and multiple quotes to anchor your expectations in real numbers. This step helps you see how cost allocation aligns with your project scope, from structural changes to finishing touches. You’ll notice interior components like drywall, flooring, and cabinetry carry labor-heavy costs, while systems upgrades and windows or doors push the total higher. Use the ranges provided by professionals to frame your budget: whole-home remodels rise quickly with high-end finishes, yet smaller, partial upgrades can keep you within a tighter band. Compare line items for kitchen and baths, then consider how painting, flooring, and insulation contribute to the overall mix. Balancing scope, materials quality, and contingencies keeps your estimate realistic and actionable. In San Diego, the average kitchen remodel costs range from $40,000 to $80,000, so planning your finances early is crucial to avoid any surprises.
Vet Contractor Credentials
Vet contractor credentials by getting professional estimates from at least three licensed contractors and verifying everything before you compare numbers.
You’ll want to confirm credentials cover the required trades and check for active status, classifications, and any disciplinary actions. This is your opportunity for a thorough credential assessment and solid contractor verification before you shortlist bids.
- Gather each contractor’s license number, HIS registration if applicable, and business name
- Verify licenses on state boards and note any limitations or cancellations
- Collect documentation proving four years of journey-level experience per CSLB standards
- Review insurance, bonds, and references beyond basic licensing
- Request detailed, written estimates from three licensed contractors and compare them carefully
The average remodeling costs in San Diego start at approximately $10,000, which should be considered when reviewing estimates for your project. Carefully document every verification step to protect your project from unqualified hires and surprises.
Breaking Down Costs by Room and Category
As you break down costs by room and category, you’ll see how bedroom, bath, and kitchen line items stack up against overall project totals, helping you prioritize essentials over nice-to-haves.
By separating line items—materials, labor, permits, and contingency—you can compare ROI indicators and spot where savings or investments matter most.
This structured view sets the stage for informed decisions that keep your remodel on track and within budget.
Room Cost Breakdowns
Room cost breakdowns help you see where money goes in a remodel, so you can plan more accurately and avoid surprises. You’ll discover kitchen budgets dominate the bill, with kitchens often taking 15-30% of the total and base projects starting high in expensive markets.
Likewise, bathroom upgrades span a wide range, reflecting scope and fixtures, yet still influence overall budgeting. By breaking costs into rooms, you can compare tradeoffs and set priorities before you shop.
Consider how labor, materials, and layout changes shift expenses per space, and use this as a planning compass.
- Kitchen budgets
- Bathroom upgrades
- Bedroom and living space costs
- Small area and ancillary space investments
- Whole-house and systems considerations
Category Cost Insights
Category cost insights come from breaking costs down by room and category, which helps you compare where money goes and make smarter tradeoffs.
You’ll see cabinets drive most costs, with flooring and countertops following closely. Countertops span affordable to luxury options, potentially pushing total up to $65,000 in full remodels.
Flooring updates show up in interior upgrades for whole-home projects, varying by material quality. Paint and wallpaper offer budget-friendly cosmetic options for low-end changes.
Windows range from $300–$1,200 each, while full replacements run $4,500–$20,000. Labor spans from $20,000 in a bedroom project to higher rates with wall alterations and king-size homes.
Permits, inspections, and system work affect totals; central air, furnace, and electrical updates shape category costs, guiding kitchen budgeting and flooring choices.
Planning for Permits, Contingencies, and Hidden Fees

Planning for permits, contingencies, and hidden fees starts with understanding how costs flow from your project’s size, location, and complexity.
You’ll learn how permit types influence the bottom line, and why hidden fees can surprise you if you don’t plan ahead. Here’s what to contemplate:
- Permit types vary by scope, from small electrical or plumbing permits to larger building approvals.
- Location matters: costs differ by city and state, and regulations can add to your budget.
- Contingencies typically range 10-20% to cover regulatory surprises and price shifts.
- Hidden fees may include expedite charges, valuation-based fees, or flat versus percentage-based assessments.
- Compare permits and valuations across estimates to verify accuracy and avoid overpaying.
With this awareness, you’ll plan a realistic, resilient budget.
Creating a Realistic Timeline and Monitoring Budget
Creating a realistic timeline starts with a clear, structured plan and a practical understanding of how long each phase will take. You’ll map phases from pre-construction to finishes, using a well-ordered sequence that prevents work overlap and delays.
Timeline management means recognizing typical durations: minor updates in 2-3 weeks, full projects 3-6 months, and specific tasks like bathrooms or kitchens in 8-12 weeks or 6-12 weeks.
Plan for permits, design finalization, and material ordering early to avoid snags. Regular check-ins help you monitor progress, adjust schedules, and keep contractors accountable.
Budget tracking runs parallel, noting that backorders and delivery times can extend timelines. Advance material choices and prompt decisions prevent costly overruns, ensuring your project stays on track and within your financial target.
Wrapping It Up
You now know how to estimate a remodel budget without the surprises. Start by defining your scope and priorities, then research local costs and compare projects. Choose materials wisely and collect multiple professional estimates. Break costs down by room, plan for permits and contingencies, and track progress with a realistic timeline. Stay flexible but disciplined, monitor changes, and adjust as needed. With careful planning and clear communication, you’ll complete the project confidently and within your budget.
How to Prepare Your Home for a Remodeling Project (Room by Room Checklist)
Begin with a clear plan and budget, then secure permits. Start room by room: in the kitchen, check layout, storage, and finishes; in the bathroom, verify plumbing, fixtures, and ventilation; in the living areas, inspect flooring, lighting, and any needed structural checks; in the bedroom, plan storage and comfort upgrades. Develop a realistic timeline and milestones, and gather multiple contractor quotes. Stay organized with a phased approach, tracking progress and potential delays. If you keep going, you’ll gain practical steps to apply.
Kitchen: Assessing Layout, Storage, and Finishes
Evaluating your kitchen’s layout, storage, and finishes begins with a clear view of how you move through the space each day.
You’ll assess the current layout for workflow efficiency, spotting traffic bottlenecks and awkward movements that slow you down. Note daily challenges like limited counter space and how you place appliances, since space utilization matters from storage to function.
Consider that nearly half of homeowners reconstruct their layouts, using this as motivation to plan thoughtfully.
Nearly half update their layouts, turning ambition into thoughtful, practical kitchens.
For storage solutions, check existing setups for pots, pans, and utensils, and identify clutter hotspots and underutilized corners.
Prioritize pull-out pantry shelves and custom cabinetry, allocating substantial attention to sleek, soft-close cabinets that blend with durable finishes. This sets a solid foundation for a balanced, practical kitchen, making it essential to evaluate your kitchen’s layout and how it impacts overall functionality.
Bathroom: Plumbing, Fixtures, and Ventilation Needs
You’ll start by checking plumbing integrity, ensuring pipes and connections are age-appropriate and free of corrosion.
Next, you’ll consider fixture efficiency, selecting low-flow options and WaterSense-certified components to save water without sacrificing performance.
Finally, you’ll verify ventilation essentials, confirming proper venting and airflow to prevent sewer gas and maintain a healthy bathroom environment. Additionally, it's wise to inspect kitchen drain systems regularly to prevent future plumbing issues that could affect the bathroom.
Plumbing Integrity
Plumbing integrity in a bathroom project means guaranteeing every valve, drain, vent, and connection works together reliably.
You’ll verify accessibility for toilet, sink, and shower valves, test their functionality, and replace corroded parts when needed.
Install missing shut-off valves to enable quick curb-side shutoffs during future repairs, and confirm valves operate without leaks when turned.
For drain-line sizing, measure pipe diameter for sinks, showers, and tubs, and consider upsizing a shower drain if you’re adding multiple heads or a rain shower.
Ascertain drains stay clog-free after installation and keep gutters unobstructed during final checks.
Proper-venting remains essential; confirm vents on all fixtures, add vents for relocated or new fixtures, and address slow drains or odors.
Leak-detection testing seals the approach with confidence. Additionally, ensure all plumbing works comply with local plumbing codes to avoid future issues.
Fixture Efficiency
Fixture efficiency in a bathroom blends water savings with reliable performance, so you get comfort without waste.
You’ll prioritize water saving faucets that keep strong flow while cutting usage, and you’ll look for WaterSense labels to verify efficiency.
Choose functional options like single-handle or double-handle models in chrome or brushed nickel, with hands-free convenience from motion-activated designs.
Pair faucets with compatible sinks—undermount, vessel, or pedestal—for a cohesive look and easier cleaning.
For toilets, select efficient toilets with EPA WaterSense labeling to balance flush performance and water use, including comfortable heights and both one-piece and two-piece configurations.
Smart options exist, yet still focus on reliability; prioritize smooth installation and straightforward maintenance.
This approach supports responsible, stylish bathroom updates.
Ventilation Essentials
Ventilation plays a key role in bathroom comfort and health, especially after upgrading fixtures and selecting water-saving options. You’ll evaluate ventilation types to guarantee effective moisture control and odor management.
For small bathrooms, aim for 50 CFM, while larger spaces require 100 CFM or more or follow 1 CFM per square foot up to 100 square feet, then base on fixtures beyond that.
Place exhaust fans near the shower or tub, with a secondary vent near the toilet in larger rooms. Use smooth, insulated ducts and vent directly outside to maximize efficiency.
Compliance matters: mechanical ventilation is mandatory in windowless baths, and recirculation is prohibited. Combine fans with operable windows when possible, and verify local codes and HVI ratings for performance.
Living Room: Flooring, Lighting, and Structural Checks
Kicking off the Living Room remodel, start with a clear plan for flooring, lighting, and structural checks to form a solid foundation for everything that follows.
You’ll inspect the subfloor after clearing furniture, then remove old materials and check for damage, moisture, or unevenness. Choose durable options like laminate, engineered wood, or tile, ensuring proper installation aligns with design goals and room traffic, preserving living room flooring longevity.
For lighting, evaluate wiring, outlets, and fixtures for code compliance, then add task lighting and recessed fixtures while maximizing natural light with window upgrades.
Concerning structural checks, identify load-bearing walls, assess built-ins or fireplaces, and confirm mold or pest risks are addressed.
Concerning structural checks, identify load-bearing walls, assess built-ins or fireplaces, and confirm mold or pest risks are addressed.
Prioritize structural integrity to support future cosmetic updates and maintain design alignment throughout the project.
Bedroom: Storage Solutions and Comfort Upgrades

Built-in closet ideas offer smart space optimization, from adjustable shelves to modular organizers that grow with your needs.
Pair these with comfort-boost upgrades like seating nooks, soft lighting, and accessible storage to elevate daily use.
As you plan, consider how built-ins and thoughtful finishes can streamline your routines and reinforce a cohesive bedroom aesthetic.
Built-in Closet Ideas
A built-in closet can transform a bedroom by seamlessly integrating storage with style, providing a cohesive space that feels larger and more organized.
In this section, you’ll explore smart configurations that maximize every inch. Use custom shelving to tailor heights and widths for folded items, accessories, and seasonal gear. Modular systems let you expand or reconfigure without major renovations, ideal for changing needs.
Adjustable racks and hanging solutions keep garments accessible and visible, reducing clutter and making mornings smoother. Drawers with full-extension tracks improve reach, while shallow bins handle small items neatly.
Center shelves, deep drawers, and dedicated hanging sections combine for efficient organization. With thoughtful placement and durable materials, your built-in closet becomes a quiet, functional backbone of room design.
Comfort-Boost Upgrades
A comfortable bedroom starts with how you sleep, and that means prioritizing storage pieces that keep your space neat while also enhancing comfort.
You’ll explore mattress upgrades and cooling bedding to support better rest, while ergonomic accessories ease daily strain.
Multifunctional beds offer storage options and gently integrated tech, blending convenience with calm aesthetics.
Smart tech features, like sleep tracking and built-in USB ports, help you monitor and improve your environment.
- mattress upgrades and surrounding bedding for ideal temperature and support
- cooling bedding that stabilizes comfort through the night
- ergonomic accessories to reduce pressure and improve posture
- multifunctional beds with hidden storage and practical enhancements
- smart tech elements that track sleep and simplify charging
These choices create a balanced, efficient, and restful bedroom upgrade.
General Planning: Budget, Vision, and Permits

Planning your home remodel starts with a clear map: a realistic budget, a compelling vision, and a solid permit plan. You’ll allocate funds for construction costs, design fees, materials, labor, permits, and a contingency for surprises.
Research local costs and obtain multiple contractor quotes to compare. Include line items for demolition, utilities, structural work, systems, rooms, exterior, interior, site tasks, fixtures, and finishes.
Set a realistic budget reflecting priorities, noting that older couples and families with child safety needs may differ.
Develop a vision alignment by gathering inspiration and defining a finished result that covers permitted, designed, built, purchased, installed, and fitted items.
Hire a designer or architect to translate ideas into actionable plans, ensuring permit requirements and team selection support cohesive project planning.
Construction Phases Overview: Timeline and Milestones
Constructing a remodel follows a logical sequence of phases, each with clear goals, timelines, and milestones. You’ll follow a defined construction timeline, from site prep to final touches, with milestones that mark progress and quality checks.
Phase 1 clears space and establishes a safe workflow, then Phase 2 brings in framing, rough-ins, and inspections. Phase 3 moves drywall and insulation, preparing for finishes, while Phase 4 handles finishes, trim, and cabinetry to transform the space.
Phase 5 wraps up with a punch list, inspections, and final cleanups, confirming code compliance and usability. Expect a total duration of 8–10 weeks, potentially longer with change orders or material delays. Stay proactive, and track milestones to stay on schedule and within budget.
- Site preparation and demolition
- Rough work and mechanics
- Drywalling and insulation
- Finishes, trim, and cabinetry
- Final touches and completion
Room-by-Room Task Prioritization: Essential vs. Wish List
Room-by-room planning helps you separate must-do essentials from nice-to-have upgrades, ensuring your remodel stays focused and on budget.
In the kitchen, prioritize structural integrity, then plumbing and electrical upgrades, followed by countertops, backsplashes, and energy-efficient appliances. These essential features create a solid foundation for future aesthetic enhancements.
For the bathroom, address ventilation, plumbing, and casing for water integrity first, then plan vanity and storage updates, with lighting installed to support safe, daily use.
Living spaces demand a load-bearing assessment and proper HVAC and electrical updates before finishes.
Wrapping It Up
Plan and prioritize room by room, starting with clear goals, a solid budget, and required permits. Keep a practical timeline and check each phase against your vision. For kitchens and baths, lock in layouts, storage, and ventilation; for living spaces and bedrooms, focus on flooring, lighting, and comfort. Use the checklist to distinguish essentials from wish-list items, and stay flexible as you progress. With steady planning, your remodeling project stays orderly and on track.
San Diego Whole-Home Remodel Timeline: What Really Happens Month by Month
Are you considering a whole-home remodel in San Diego? You're not alone—many homeowners embark on this journey with dreams of transforming their living spaces. However, navigating the complexities of a remodel can be daunting. This article on the San Diego Whole-Home Remodel Timeline will guide you through each critical phase, from goal-setting and contractor selection in the initial month to design and permit acquisition over the next two months. You’ll learn about the demolition and site preparation stages, which pave the way for the extensive construction that follows. As you near completion, we’ll cover essential inspections and final touches that ensure your project is a success. By understanding what really happens month by month, you’ll be better equipped to manage expectations, avoid common pitfalls, and ultimately create the home of your dreams. Let's dive in and explore this exciting renovation journey together!
Defining Your Remodeling Goals and Vision

How can you ensure your whole-home remodel meets your expectations?
To ensure your entire home renovation aligns with your vision, start by precisely identifying your remodeling goals. Consider whether your aim is to increase property value or enhance functionality for everyday living.
Additionally, determine if this project is intended for long-term enjoyment or future resale; this decision will influence everything from material choices to budget allocations.
- Assess if you require a complete overhaul or focused updates.
- Clearly communicate your priorities to contractors for optimal craftsmanship.
- Answering these questions early will help streamline the project and minimize changes.
Furthermore, understanding the average recommendation to remodel kitchens every five years can guide your decisions regarding kitchen updates.
Planning, Design, and Contractor Selection
How can you effectively plan and design your home remodel?
To effectively plan and design your home remodel, begin with comprehensive consultations to define your project's scope and vision. Collaborate with a skilled contractor to develop detailed blueprints, typically within two weeks, while discussing essential elements such as design ideas, materials, and budget constraints.
Start your remodel with thorough consultations and collaborate with a contractor to create detailed blueprints tailored to your vision and budget.
- Ensure ongoing communication to align with your long-term goals.
- Research contractors with strong portfolios and positive client feedback.
- Verify their experience with the permitting process.
Establishing a solid foundation during this phase will lead to a smoother remodeling experience, minimizing surprises. Additionally, consider evaluating client referrals to gain insights into the reliability and skill of potential contractors.
For more insights on choosing the right contractor, see our guide on contractor selection.
Navigating the San Diego Permit Process

How can you navigate the San Diego permit process for home remodeling?
Understanding the San Diego permit process is crucial for a successful home renovation. To comply with local regulations, you’ll likely need permits for electrical, plumbing, or structural changes, particularly in kitchen and bathroom remodels.
The permitting timeline can range from 2 to 6 weeks, depending on the complexity of your project.
- Check if your home is in a historic district or coastal zone, as this may involve additional steps.
- Consider partnering with an experienced remodeling company to simplify document submissions and revisions. This can help ensure you meet the specific permit requirements for your type of project.
- Familiarize yourself with the specific permit requirements for your type of project.
To learn more about the specific permits you may need, see our guide on home renovation permits in San Diego.
Material Selection and Procurement
As you embark on your remodel journey, selecting the right finishes and fixtures is crucial to reflecting your unique style.
But how do you ensure a seamless procurement process amid potential supply chain challenges? Exploring local suppliers and backup options can be key to keeping your project on track.
What strategies can you implement to optimize your material selection?
Personalizing Material Choices
How can you personalize material choices during a home remodel?
Personalizing material choices in a home remodel is essential for achieving a unique aesthetic and ensuring long-lasting functionality. Start by selecting materials that resonate with your personal style while considering their durability and comfort.
Collaborate with local suppliers to minimize shipping costs and speed up delivery times, which can alleviate potential supply chain delays.
- Begin your selection process early to avoid last-minute decisions.
- Consult with experienced contractors to ensure your choices meet design and functional needs.
- Consider eco-friendly options to enhance sustainability in your remodel.
Navigating Supply Chain Challenges
How can you effectively navigate supply chain challenges during a remodel?
Navigating supply chain issues is essential for a smooth whole-home remodel. To mitigate delays caused by material shortages, consider collaborating with local suppliers. This often leads to quicker access to required materials and more reliable delivery schedules.
To ensure project continuity, you might want to:
- Research local suppliers early on.
- Prepare backup options for critical materials.
- Coordinate procurement timing with your construction schedule.
By taking these proactive steps, you can maintain momentum in your remodeling project.
For more insights on optimizing your material choices, see our guide on smart sourcing strategies.
Early Selection Strategies
How can early selection of materials streamline your remodeling project?
The early selection of materials is essential for a smooth home remodeling process, especially in San Diego. By finalizing your choices four to six weeks ahead of time, you can mitigate potential delays caused by supply chain issues.
Opting for local suppliers can further expedite access to needed items.
- Research and choose your materials early.
- Create backup plans for your preferred finishes.
- Communicate material timelines clearly with your contractor.
By taking these proactive steps, you’ll enhance your remodeling experience and keep your project on track.
For more tips on managing your remodeling timeline, see our guide on efficient project planning.
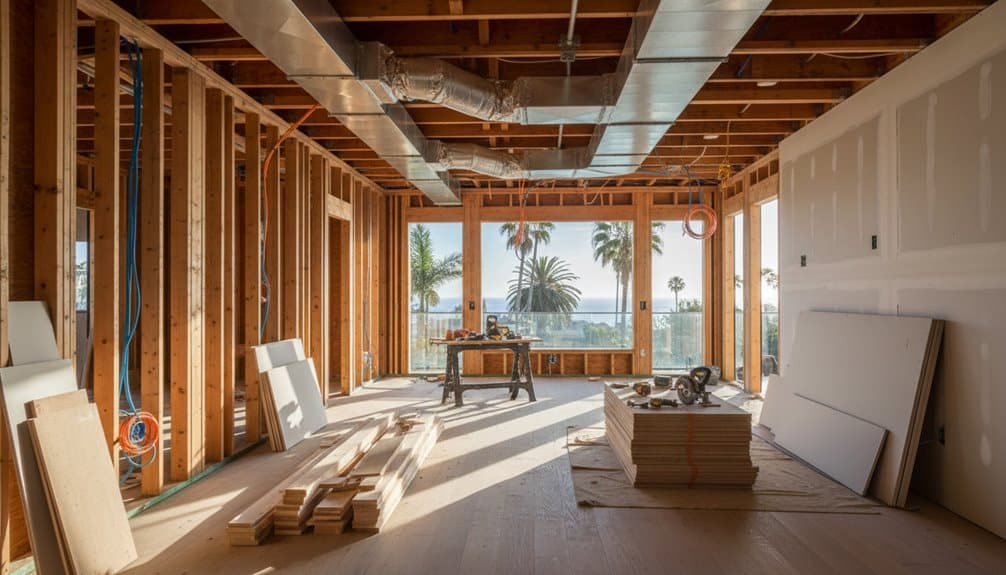
Demolition and Site Preparation
How does demolition kickstart a home remodel?
Demolition is the pivotal first step in your whole-home remodel, laying the groundwork for all subsequent enhancements. During this vital phase, expert teams efficiently remove outdated fixtures and finishes, preparing your living space for a remarkable transformation.
Demolition sets the stage for transformation, clearing out the old to make way for your home's stunning new beginnings.
Site preparation involves safeguarding unaffected areas and reinforcing foundational elements, all while complying with local regulations.
In addition to physical changes, this process can evoke a range of emotions, including:
- Excitement as you witness tangible progress.
- Anxiety regarding temporary disruptions to your daily routine.
- Relief knowing that seasoned professionals are managing every detail according to standards.
As you navigate these feelings, you can look forward to the next stages of your remodel. For more insights on what to expect, see our guide on managing emotions during renovations.
Construction and Core Remodeling Work
How does the construction and core remodeling process unfold?
Once your home is prepared, the construction and core remodeling can commence. This phase primarily involves tasks such as removing outdated fixtures, upgrading electrical and plumbing systems, and strengthening structural components like the foundation and framing.
Typically, this stage lasts between 2 to 6 months, depending on the project's complexity.
Key steps include:
- Removing old materials
- Installing insulation and drywall
- Selecting materials for finishes
Effective communication with your contractor is essential to mitigate delays caused by scheduling or weather.
After structural work wraps up, you can focus on the final touches. For more tips on selecting materials, check out our guide on home design essentials.
Final Touches, Inspections, and Project Handover
As your whole-home remodel nears completion with final touches and inspections, it's crucial to remain engaged in the process.
Are you prepared for the upcoming project handover and what it entails?
Understanding the importance of these final steps ensures everything aligns with your vision for your new space.
Completing Finishing Touches
How can you ensure your home remodel's finishing touches are perfect?
As your home remodel approaches the finishing touches phase, it's crucial to collaborate closely with your contractors. This stage typically spans 1-2 weeks and involves installing hardware, adding accessories, and executing final paint touch-ups to create a polished look.
Staying attentive to small details during this time can significantly enhance the overall aesthetic of your space.
- Conduct a final walkthrough to identify any incomplete tasks.
- Communicate clearly with your contractors about your vision.
- Make minor adjustments to ensure every aspect aligns with your expectations.
By prioritizing these steps, you can transform your house into a dream home.
To learn more about maximizing your renovation experience, check out our guide on essential home remodeling tips.
Passing Final Inspections
How can homeowners prepare for final inspections after a remodel?
To ensure a smooth final inspection process, homeowners should first familiarize themselves with local building codes and safety regulations. This knowledge allows you to anticipate what inspectors will look for, reducing the chances of unexpected adjustments.
Additionally, conduct a pre-inspection walkthrough with your contractor to identify and address any potential issues beforehand.
- Review all work completed to ensure compliance with specifications.
- Gather all necessary documentation, such as permits and warranties.
- Be ready to schedule any required follow-up visits promptly.
Once you’ve addressed these areas, you’ll be one step closer to enjoying your beautifully remodeled home.
For more tips on home improvements, see our guide on maximizing renovation efficiency.
Conclusion
As you embark on your San Diego whole-home remodel, understanding the month-by-month process is essential to realizing your dream space. By applying the strategies outlined in this article, you can manage expectations and effectively tackle challenges, ensuring a smoother renovation journey. Embracing these insights not only enhances your project management skills but also helps create a home that truly reflects your vision. For more helpful tips and guidance on navigating your remodel, consider exploring additional resources or related guides that can assist you in taking that exciting first step toward your dream home.