H**arness universal design features for aging in place—zero-step entry, safer bathrooms, and reachable kitchens—to stay independent, and there’s more to learn.

H**arness universal design features for aging in place—zero-step entry, safer bathrooms, and reachable kitchens—to stay independent, and there’s more to learn.

Pacing your budget is crucial—set a realistic range, prioritize fixes and ventilation, and refresh wisely first; keep reading for smart cost-saving steps.

F**or safety and resale appeal, upgrade bathroom accessibility with non-slip floors, grab bars, and reachable controls—discover which changes deliver the biggest payoff next.

Breeze through the City & County permit process in San Diego with this homeowner guide—learn which permits fit your project and how to avoid delays.

A Kitchen Remodel Can Feel Simple at First — Until You Learn…

Don’t Let an Unpermitted Backyard Unit Turn Into a Sale, Refinance, or…

Affecting property taxes in California, ADU rental income adds a small value to your bill—but there’s more to how it works, and you’ll want to read on.

META DESCRIPTION]: Ordinarily require structural engineer review when risks and codes demand independent checks, but the exact triggers may surprise—keep reading to learn where you stand.

I revealingly breaks down California Title 24 Energy Standards for home remodels and leaves you wondering what impacts your project most.

META DESCRIPTION]: However, permit requirements for ADUs and additions in San Diego County hinge on zoning and lot specifics, leaving you with more questions to uncover.

Garage Conversion Vs Detached ADU: Pros, Cons, Permits, Costs—get the key tradeoffs and a surprising detail that might change your plan.

This guide reveals hidden remodeling costs homeowners frequently overlook, but what surprises await your budget after the first quote?

META DESCRIPTION]: Just when you think you know, discover which remodels deliver the strongest ROI and why—keep reading to uncover the surprising value boosts ahead.

I’m exploring low-cost ADU design ideas under $100k that reveal practical, time-saving options—yet you’ll want to read on to see which approach fits your budget.

Producing a precise, room-by-room plan with local prices will reveal where cost surprises lurk—but you’ll need the full guide to uncover them.

Careful planning starts with a clear plan and budget; curious readers will learn room-by-room checks to stay organized and push through.

Transform your garage into an ADU in San Diego for rental income and increased property value. Discover how to navigate permits and costs for success.

Upgrade your San Diego home with aging-in-place bathroom design features for safety and accessibility. Discover how to enhance your space effectively.

Explore essential tips for second-story additions in San Diego, including design, permits, and structural guidelines. Learn more to ensure your project's success.

Embarking on a whole-home remodel in San Diego? Discover how the timeline unfolds month by month, from planning to final touches. Learn more today!

Discover how to finance your exterior renovation projects using options like home equity loans, personal loans, and government programs. Learn more today!

Discover essential tips for selecting exterior renovation materials that balance durability, aesthetics, and energy efficiency. Learn more for informed choices!

Transform your kitchen with modern remodeling ideas like open-concept layouts and two-toned cabinetry. Discover how to create a stylish and functional space.

Revitalize your home’s exterior with stunning renovations. Embrace light colors, unique trims, and vibrant landscaping. Discover how to enhance curb appeal today!

Discover how to choose between ADUs and traditional additions to enhance your property's functionality and value. Learn more about your options today!

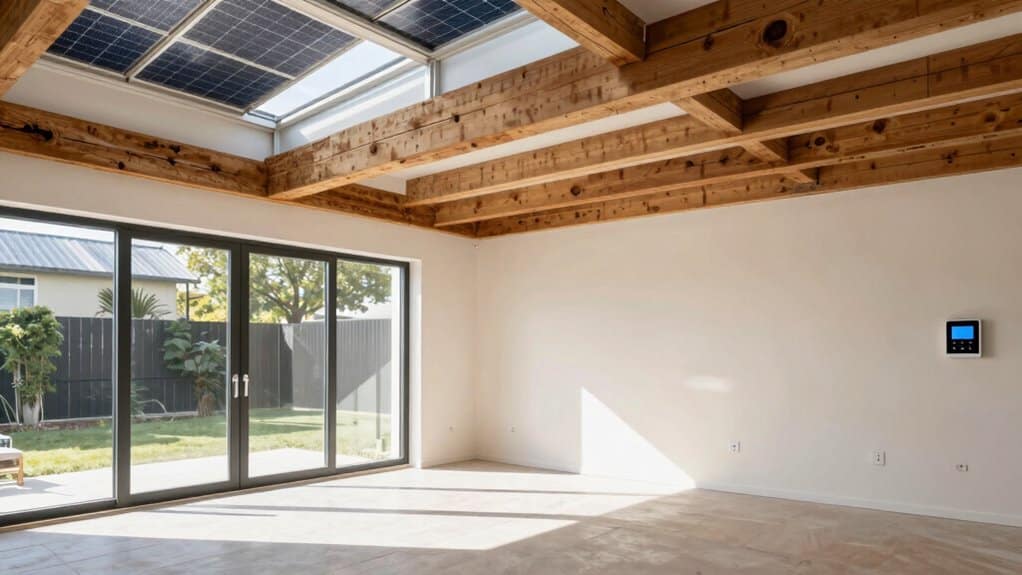
Discover how to build a sustainable ADU with solar panels, energy-efficient appliances, and eco-friendly materials. Learn more about making greener choices today!

Transform your home with innovative bathroom remodel layouts that enhance functionality and aesthetics. Discover how to create a serene space.

Transform your old house kitchen with expert contractors to blend historical charm and modern functionality. Learn more about the benefits of hiring pros for your remodel.

Discover trendy kitchen remodeling styles that blend functionality with style. Explore modern designs, rustic charm, and vibrant colors. Learn more today!

Transform your home with our 10 Best DIY Tips for Exterior Renovation Beginners. Discover how to plan, budget, and enhance your space. Learn more!

Enhance your home's value with strategic room additions like primary suites and kitchen expansions. Discover how these upgrades can elevate your property.

Designing a cozy small ADU involves smart space-saving solutions and natural light. Discover how to maximize comfort and style with our 7 tips for designing a cozy small ADU.

Discover top tips for hiring a bathroom renovation contractor to ensure a smooth experience. Learn more about effective communication and project management.

Transform your kitchen with simple DIY kitchen remodels perfect for beginners. Discover how to enhance your space affordably and stylishly. Learn more!

Optimize your bathroom renovation with expert DIY tips that save thousands while creating the luxurious space you've always wanted.

Jump into these game-changing exterior upgrades that can skyrocket your property value and transform your home's market appeal.

Avoid costly ADU construction mistakes by learning these essential planning tips that successful homeowners wish they'd known sooner.

Unlock stunning ADU bathroom transformations with three budget-friendly renovation tips that modernize your space without breaking the bank.

Modern open concept kitchens blend functionality and style through smart layouts, cohesive zones, and strategic design elements that transform cooking spaces.

Knowing the right deck and patio upgrades can transform your outdoor space from bland to breathtaking - discover smart solutions that maximize impact.

When planning a room addition, discover which roofing materials best match your home's style while maximizing durability and budget.

Knowing how to maximize your studio ADU's layout can transform a tiny space into a highly functional dream home.

Journey into luxury with freestanding bathtubs, where timeless elegance meets modern comfort in your personal spa retreat.

Space-saving kitchen solutions transform cluttered rooms into efficient cooking havens, but the smartest storage tricks might surprise you.

Find out which driveway materials best match your budget, climate, and style while transforming your home's curb appeal.
Today's room addition flooring choices range from classic hardwood to eco-friendly bamboo, but which option matches your lifestyle and budget?

Discover how guest house ADUs can transform your property into a versatile living space while boosting your home's value.

Get the inside scoop on walk-in shower installations, from essential safety features to budget-friendly design options that transform your bathroom.

You'll discover the perfect countertop material for your dream kitchen when you weigh these essential factors against your lifestyle needs.

Gorgeous landscaping transforms ordinary homes into showstoppers, but the secret lies in these proven design strategies...

Discover how smart room additions can slash your energy bills while creating the perfect sustainable living space for your family.

Transform your property's value with an ADU rental that can generate up to $5,000 monthly and boost home equity significantly.

You'll discover the perfect blend of style and function in modern bathroom vanity designs that revolutionize your daily routine.

Transform your kitchen cabinets with budget-friendly upgrades that elevate style and functionality without breaking the bank.

Perfect your home's exterior with these top renovation ideas that promise to enhance beauty and value—discover what transformative options await you!

Discover the powerful perks of family room additions that can transform your home; the benefits might surprise you!

Incredible benefits of ADUs for family living await discovery, offering solutions for connection, flexibility, and financial gain that could change your home life forever.

Simple bathroom remodeling tips for small spaces can transform your area into a stylish retreat; discover clever ideas to maximize functionality and charm.

Inspiring budget-friendly kitchen remodel ideas for small spaces await you—discover how simple changes can transform your kitchen into a charming oasis!

Explore 2024's finest Contemporary Bathroom Designs, featuring chic fixtures, minimalist remodels & luxury concepts for a stylish washroom update.

Elevate your culinary space with our expert custom kitchen designs, tailored to reflect your unique style and needs. Transform your home today!

Did you know adding on to your home could up its value…

About 85% of American homeowners plan to work on home improvements, including…

Adding a prefabricated ADU can boost your property's value by 10-35%. These…

Did you know adding an Accessory Dwelling Unit (ADU) can boost your…

Did you know that people spend 1.5 years in the bathroom over…

Did you know 85% of homeowners think kitchen lighting boosts energy efficiency?…

The heart of the home has always been the kitchen, but recent…
Transforming your bathroom into a sanctuary of tranquility and style is more…

Embark on your journey to a rejuvenated and enhanced living space with…

When considering a kitchen remodeling project in the vibrant city of San…

Transforming any outdoor space in San Diego into a masterpiece of design…

Discover the essence of finesse and elegance with the most professional kitchen…

If you're a San Diego homeowner in search of a kitchen remodel…

Welcome to our bathroom remodeling services in San Diego. We are your…

Are you feeling constrained by the limited square footage of your humble…
Are you tired of your old, outdated bathroom? Do you dream of…

What is a hardscape contractor? A hardscape contractor is a professional who…

San Diego homeowners looking to remodel their bathrooms can stay ahead of…
Kitchen is the heart of any home, where families gather to cook,…
Are you in the middle of a kitchen remodel? You are probably…
Starting a home remodel can be overwhelming at times You may that…
Do you have a vision of what you want your kitchen to…
It’s a great time to think about a San Diego kitchen remodel…
Creative Design & Build is an esteemed brand when it comes to…

Your kitchen cabinets are not meant to last forever. And you’ll know…

Kitchens are one of the most focal rooms that sway potential home…
Your bathroom is one place in your home that you should never…

Do you want your San Diego kitchen remodel to go smoothly as…

Are you still relying on a drab shower curtain in your San…

A good kitchen today cannot be complete without a pantry. If you…

At Creative Design and Build we relish giving our clients amazing bathrooms…

What adds the most value to a kitchen? How do I update…

If you just moved into a new house, it is common to…

If you’re looking to remodel or build your dream kitchen in San…

If you want to remodel your kitchen (be it because you just…

A kitchen remodel is a sure way to revitalize one of the…
Are you looking to remodel your San Diego kitchen? If the answer…
What should you not do in a kitchen remodel? In our line…

A kitchen remodel, just like any other remodel or design project, starts…
Granted, most homeowners worry about how to make smaller kitchens appear larger…

Small bathrooms are a constant headache for many homeowners and tenants across…

Often when we talk about kitchen remodeling San Diego County, it is…

A bathtub is a great addition to any bathroom. It adds style…

So, you’ve found the San Diego kitchen remodeling company of your dreams…

Countertops are easily the most noticeable features in any given kitchen. They…

If you have ever seen a dilapidated property or even viewed a…

Planning to renovate your kitchen? The kitchen is probably the most used…

Remodeling your bathroom or kitchen is usually a fun activity to look…

Why should I invest in a kitchen remodel in El Cajon? A…

With the coronavirus pandemic still raging on, people have had to come…
Even though the coronavirus pandemic is still raging on across the country,…

Are you thinking about undertaking a kitchen remodel for your property in…
The coronavirus pandemic has definitely added a twist to how we all…
Tired of your boring kitchen or worn bathroom? Despite how much of…
A lot of homeowners are thinking of doing kitchen remodeling in San…

The southern California region around San Diego is a highly-sought after real…

The real estate market in San Diego has been on the rise…

Storage is often a big factor when it comes to designing, constructing…

2020 is around the corner. And if you’re planning to take on…

Not every house is lucky enough to have a sprawling kitchen with…

Room additions have become quite common in the last decade. A typical…

Remodeling your kitchen is an exciting undertaking.You have all these wonderful ideas…

The kitchen is easily the most renovated space in any part of…
Bathrooms are some of the most ‘delicate’ spaces in any home. Unlike…
Since it came into style a few years ago, stamped concrete has…
A garage ADU (accessory dwelling unit) is a great way to add…
In this progressive age of advanced tech and amazing inventions, there are…
Remodeling Practices to Secure A Higher Home-Sale Price Most home owners plan…
Today, kitchen and bathroom remodels are a dime a dozen. Choosing to…
Every now and then there are certain architectural or décor aspects of…
A lot of focus is usually given to the kitchen, bathroom, and…

You one day walk into your kitchen and decide that it may…

The market today offers a huge variety of roofing materials. One gets…
The decision to have your home remodeled is a pretty straight one…
The coronavirus has affected so many aspects of our lives – from…

San Diego Escondido Del Mar National City Imperial Beach Ramona Alpine Rancho San Diego Pine Valley Potrero Lake San Marcos Harbison Canyon Crest Chula Vista El Cajon Poway La Mesa Spring Valley Solana Beach Jamul Camp Pendleton North Tecate Bonsall Fairbanks Ranch Shelter Valley Hidden Meadows Carlsbad Coronado San Marcos Santee Fallbrook Julian Bonita Borrego Springs Mount Laguna Casa de Oro-Mount Helix Granite Hills Boulevard Rainbow Oceanside Encinitas Lemon Grove Rancho Santa Fe Lakeside Valley Center Jacumba Hot Springs Descanso Campo Camp Pendleton South Bostionia