

Universal Design Features for Aging in Place
Use universal design features to keep you safe, independent, and comfortable at home. Prioritize zero-step entry, smooth ramps, and wide doors with enough turning space. Add bright, even lighting, motion lights, and slip-resistant flooring along walkways. In bathrooms, install grab bars, a shower bench, and non-slip surfaces, and use anti-scald valves. In kitchens, set reachable counters and lever-style controls. Finally, use pull-out storage and smart shutoff reminders to reduce falls, there’s more to learn next.
Start Here: Universal Design for Aging in Place Priorities
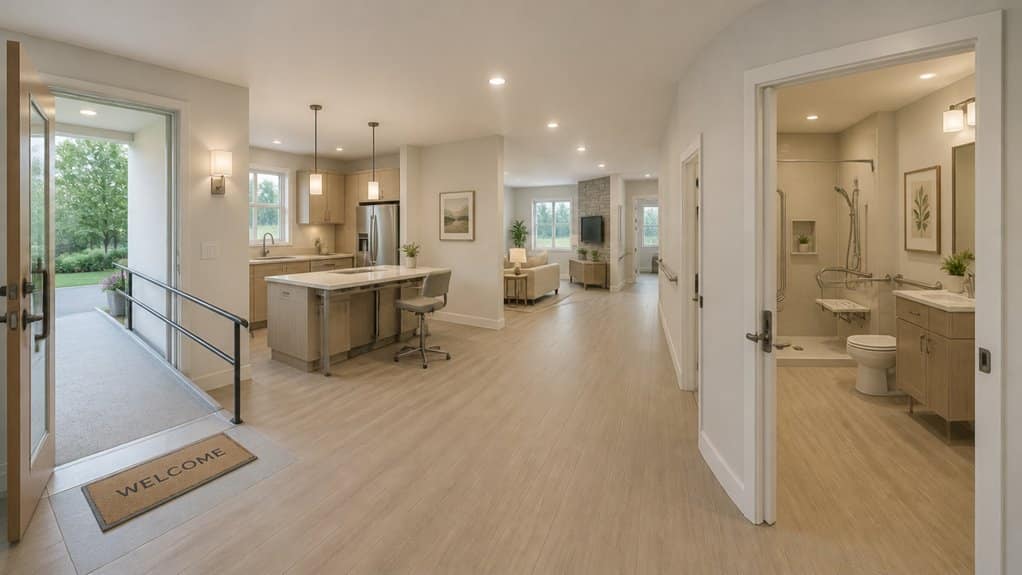
Before you make any changes, focus on priorities that help you stay safe, independent, and comfortable at home as you age. Start with clear pathways, good lighting, and reliable heating, because falls and cold rooms hurt first.
Next, choose universal design features that support social inclusion. For example, create seating areas where you can host friends, and add controls that are easy to reach and understand.
You should also plan for community support by designing an entry to invite neighbors in, even for short visits.
Keep tasks simple: organize storage within easy reach, label shared spaces, and reduce clutter.
When your home supports daily routines and connections, you feel more in control, and life feels easier.
Aging in Place Zero-Step Entry, Ramps, Door Widths
A zero-step entry helps you reach your home without traversing a risky threshold, and it often starts with smart site grading and a careful path from parking to the door. When you design for outdoor mobility, you reduce the strain on knees and ankles, and you lower fall risk. If you need a ramp, you plan for smooth slopes, stable surfaces, and landings where you can pause and turn. Keep ramp runs consistent, and use a handrail so you feel steady without rushing. For doorways, choose wider openings and easy-to-operate hardware, so wheelchairs, walkers, and strollers pass comfortably. Many homeowners use wheelchair accessibility improvements like ramp installation and expanded doorways after accidents to create a safer daily routine. Strong entryway design also includes enough turning space inside the doorway, which keeps daily routines simpler.
Safer Walkways: Lighting and Slip-Resistant Floors
When you design safer walkways, start by making every step easy to see and hard to slip on, especially at night or during bad weather. Use bright, even lighting along entrances, ramps, and turns, and place fixtures so shadows don’t hide changes in level. Add motion-activated or dusk-to-dawn lights for reliable outdoor surfaces safety.
Next, choose slip-resistant pathway materials that keep grip even when damp. Look for textured surfaces, proper traction ratings, and finishes that resist wear and algae. Keep connections smooth, but reduce abrupt edges between sidewalk sections, decking, and driveway crossings.
Clear debris, trim overhanging plants, and mark any step or ramp with high-contrast strips. When you combine lighting and traction, you reduce falls and boost confidence.
Bathroom Universal Design: Shower, Toilet, and Grab Bar Upgrades
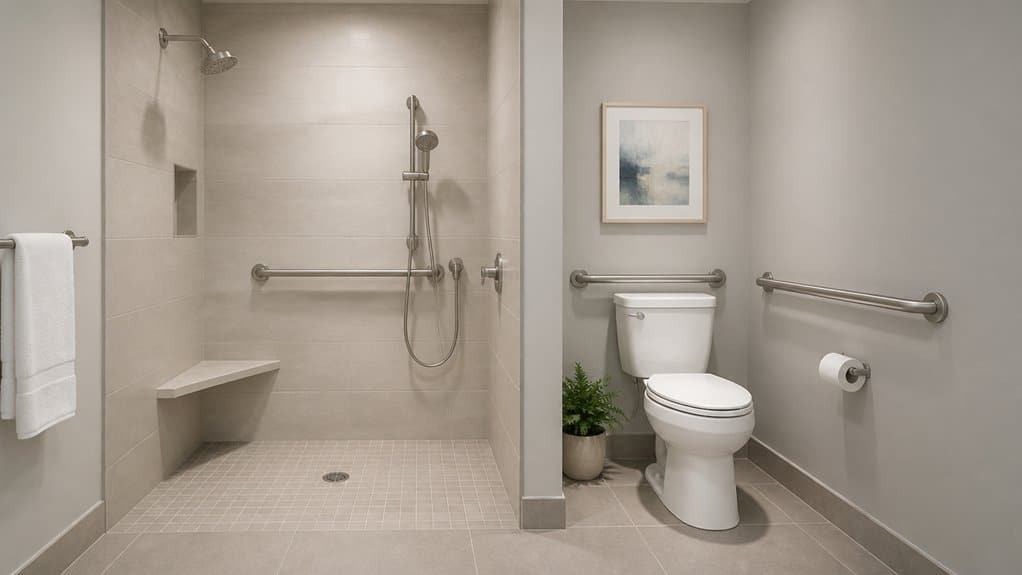
Upgrading the bathroom supports aging in place just as strongly as safer walkways do, because falls often happen inside during trips to the shower or toilet.
You can prevent hazards by tailoring daily surfaces and supports to your body’s needs. Start with these high-impact upgrades that improve confidence and reduce strain.
- Set comfortable toilet height and add clear grab bar placement near sitting, standing, and side transfers.
- Install shower benches and non slip mats; control water temperature with anti-scald valves for steadier, safer rinsing.
- Use accessible storage so shampoo, soap, and towels stay within easy reach, avoiding awkward bending or stretching.
You’ll notice fewer wobbly moments and smoother bathroom routines, which supports independence, and wheelchair accessibility modifications can further reduce barriers during daily use.
Aging in Place Kitchen Safety: Reach, Knobs, and Controls
When you plan your kitchen for aging in place, start with accessible countertop heights so you can work comfortably without overreaching. Choose easy-grip, lever-style controls for stoves, faucets, and appliances, and pair them with clear labels plus tactile cues so you can operate them confidently. These upgrades reduce strain and confusion, helping you stay safer and more independent day to day. For added safety, consider accessible kitchen layout elements that minimize reaching and potential trip hazards throughout the space.
Accessible Countertop Heights
Accessible countertop heights keep everyday tasks safer and easier, and they help you maintain independence as your mobility changes. You can choose heights that let you work without bending or stretching, so cooking stays comfortable.
Use an ergonomic design approach: align your knee space with the counter so you can pull in close, and keep frequently used items within easy reach. When you plan countertop materials, select durable, non-slip surfaces that stay stable under a damp cloth or spills.
- Set counter height for standing or seated tasks, using adjustable bases when possible.
- Create clear knee space under key sections, reducing pressure on hips and back.
- Place sink and prep areas at matching levels, so you don’t twist while washing or cutting.
Easy-Grip, Lever-Style Controls
Even with the right countertop height, kitchen tasks become safer only if you can operate faucets and appliances smoothly, without straining.
Choose easy-grip, lever-style controls that match an ergonomic design, so you can use less grip strength and fewer wrist twists. When you place levers within easy reach, you reduce the risk of spills caused by awkward turning.
Look for user-friendly interfaces on stoves, mixers, and dishwashers, where short lever travel quickly starts, stops, and adjusts settings. You can control water temperature with a gentle action, and you can pause cooking without fumbling.
Soft traction grips help your hand maintain contact, even when hands are damp. Test buttons and levers while standing or seated, so you know they work for you.
Clear Labels And Tactile Cues
- Label each control clearly and place labels at eye level.
- Use raised dots, ridges, or swipe patterns to guide by touch.
- Keep legends high-contrast and regularly check they stay legible.
Smart Storage and Safety Controls to Prevent Falls
You can reduce fall risk by using motion-sensing night lighting, so pathways stay visible without you fumbling for switches.
Add slip-resistant pull-out shelves to bring heavy items within easy reach and help you keep stable footing while moving around.
Finally, consider voice-controlled shutoff systems for stoves and other hazards, so you can turn things off quickly if you feel unsteady.
Motion-Sensing Night Lighting
Motion-sensing night lighting helps you move through your home safely at night, and it does so by turning on only when it detects motion. This approach supports ambient lighting where you need it, without blasting bright glare that can confuse your eyes.
With the right setup, you strengthen your safety awareness and reduce the risk of missteps on stairs, hallways, and routes to the bathroom.
- Position fixtures along likely travel paths, so light appears as you approach.
- Use warm, low-glare bulbs and adjust sensitivity to match your typical walking speed.
- Add timers or battery backup so the system stays reliable during outages.
You stay oriented, you react faster, and you can navigate independently.
Slip-Resistant Pull-Out Shelves
Slip-resistant pull-out shelves help you access items safely, especially when you need to bend, reach, or reposition yourself in the kitchen or pantry. When you install shelves with a grippy surface, you reduce slipping and dragging, even if your hands are slightly damp.
Pull-outs also let you keep heavy or frequently used items at comfortable heights, supporting an ergonomic design that minimizes strain. Look for smooth runners that extend fully and stop securely, so drawers don’t jerk back or slide away.
You should choose user-friendly features like raised rails that contain jars and prevent spills. With clear labeling and adjustable positions, you organize food and supplies logically, reducing clutter and trips.
Voice-Controlled Shutoff Systems
Smart storage and safety controls can make aging in place safer by reducing risky moments, and voice-controlled shutoff systems help you do exactly that.
When you leave the kitchen, laundry area, or bathroom, you can use voice activation to command lights, fans, or hot water to turn off. This matters because forgetting is common during busy days, especially when you feel rushed or distracted.
You also reduce fall risk by avoiding hurried returns to double-check switches.
- Use simple voice commands to shut off appliances safely.
- Receive automated alerts if a device stays on too long.
- Add backup switches for times when your voice, phone, or Wi‑Fi fails.
Wrapping It Up
When you plan universal design for aging in place, you choose safety that works every day, not just during emergencies. Zero-step entries ease arrivals, while better lighting and slip-resistant floors keep your path steady. In the bathroom, walk-in showers, reachable toilets, and secure grab bars reduce strain. In the kitchen, sensible reach and clearer controls prevent “too far” surprises. With smart storage and safety switches, you trade worry for confidence.
Budget-Conscious Bathroom Remodel: What to Prioritize
When you’re budgeting for a bathroom remodel, start by setting a realistic range and adding 10–20% for surprises. Then prioritize the essentials: fix any plumbing leaks ASAP and upgrade ventilation so humidity drops fast. Next, refresh the look cheaply with moisture-ready paint, re-grout, and recaulk before you buy decorative upgrades. Choose efficient, WaterSense fixtures and LED lighting for daily value. Plan permits early, budget time for inspections, and match DIY work to safe tasks so your results stay worth it—keep going to learn the details.
Set a Bathroom Remodel Budget (and Allocate It)
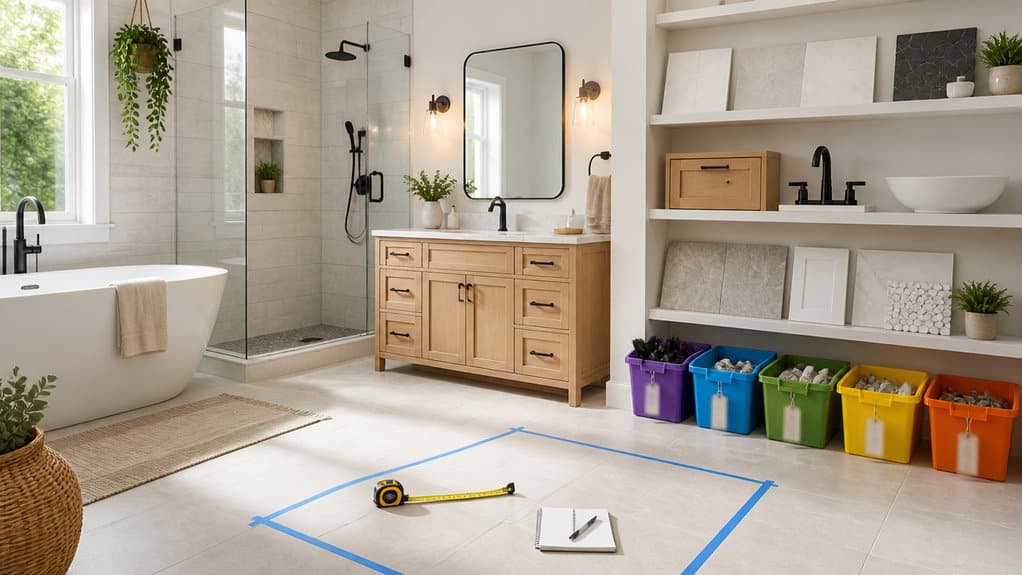
Start by setting a total range: midrange U.S. projects usually run $10,000–$25,000, while upscale jobs often exceed $30,000. Use budget estimates tied to your home value, and try to avoid spending more than 3–5% unless resale demand supports it.
Set a realistic budget: midrange bathroom remodels run $10,000–$25,000, while upscale jobs often exceed $30,000.
Add a contingency of 10–20% for surprises like rotten subfloors, hidden mold, or outdated wiring. Factor in local market multipliers, which can raise costs 10–40%, and confirm pricing with early contractor quotes.
Then create clear cost breakdowns: plan for 40–65% labor, 35–60% materials, plus design, permits, disposal, and a 15–25% allowance for any structural, electrical, or plumbing upgrades. Planning a remodel is essential to align expectations with the realities of contractor timelines and permitting requirements.
Fix Plumbing Leaks and Upgrade Ventilation First
You should detect hidden plumbing leaks early by doing a water-meter test, checking under sinks and around toilets, and using moisture meters or infrared to spot problem areas you can’t see.
Once you find leaks, you’ll prevent subfloor rot and mold by repairing the exact source—often from supply-line fittings, shower cartridges, or slow joint failures.
Then upgrade your bathroom exhaust fan so humidity drops quickly after showers, which keeps moisture below harmful levels and protects tile, grout, and paint.
Quality of service for homeowners seeking reliable remodeling and preventive maintenance can further support timely interventions and long-term durability in any bathroom project.
Detect Hidden Leaks Early
Why wait for a bathroom “mystery odor” or a soft spot on the floor when you can catch hidden plumbing leaks early?
Start with visual inspections for stains, peeling paint, warped flooring, or persistent damp smells.
Then run a water meter isolation test, shutting off all fixtures and watching for continued movement.
Use moisture meters and infrared thermal imaging to pinpoint unusual moisture behind finishes.
For toilets and tubs, do dye testing to confirm slow leaks.
If you suspect in-wall pinholes, choose acoustic testing and pressure testing for precise location.
This leak detection approach supports early intervention, so you can do repair prioritization before mold prevention becomes expensive.
Remember: undetected leaks waste water, trigger mold in 24–48 hours, and can cause 2–10× structural damage without plumbing maintenance.
Early detection aligns with our comprehensive bathroom remodeling approach, ensuring professional craftsmanship and high-quality materials are applied when addressing leaks and upgrades.
Upgrade Exhaust Fan Ventilation
Once you find and fix hidden leaks, you can upgrade bathroom exhaust fan ventilation with far better results. The fan’s job is to remove humidity and airborne byproducts—not to compensate for constant wetting behind walls. During showers, bathroom humidity can hit 70–100%, feeding mold within 24–48 hours, so prioritize airflow and control. Use proper sizing to meet code: many bathrooms need about 50 CFM intermittent or 20 CFM continuous. Then boost exhaust fan efficiency with quieter, ENERGY STAR models and smart ventilation features like humidity sensors and timers. Also plan ducting correctly, with smooth short runs and exterior termination plus a backdraft damper. Size CFM by bathroom volume. Target ≤1.0 sone noise. Choose ENERGY STAR + sensors. Use exterior metal ducting. Mold Prevention is a critical consideration when upgrading ventilation and addressing hidden leaks to ensure a healthier bathroom environment.
Refresh the Look Cheaply: Paint, Re-grout, Caulk
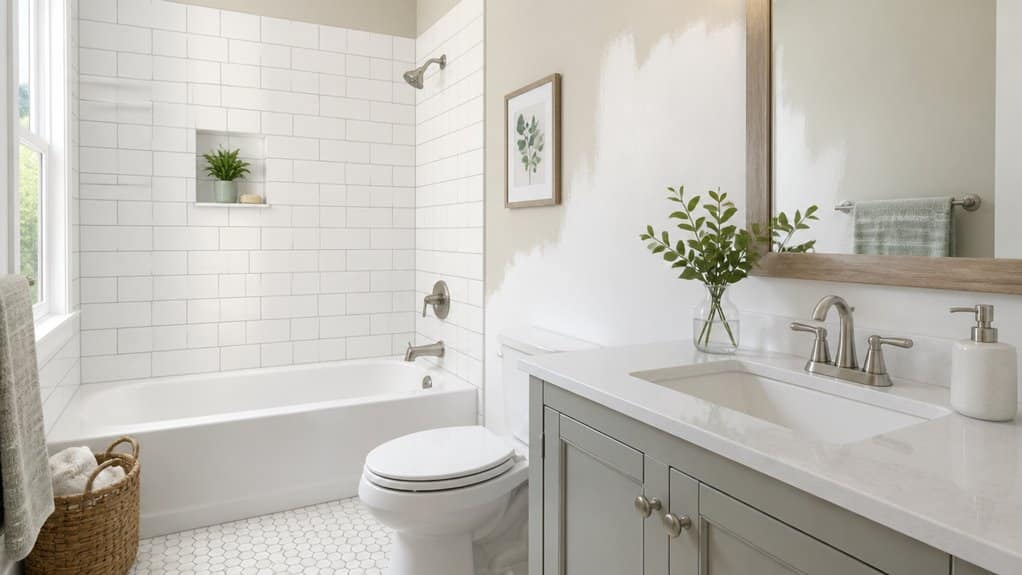
To refresh your bathroom cheaply, start with mold-resistant bathroom paint by using a moisture-ready primer and choosing satin or semi-gloss so the finish wipes clean and resists mildew.
Next, re-grout and re-caulk any cracked or missing lines, since water intrusion through bad grout can lead to mold and substrate damage.
If you prep properly—clean, dry, and match the grout and caulk to joint width and wet areas—you’ll get a look that holds up without a major remodel.
Additionally, consider selecting water-efficient fixtures to reduce long-term operating costs while maintaining style and function. eco-friendly materials and fixtures can enhance sustainability without a full renovation.
Mold-Resistant Bathroom Paint Options
When you refresh a bathroom on a budget, the right mold-resistant paint choice can make a noticeable difference.
Start with smart surface preparation: remove growth, scrub clean, and let everything dry fully. Then pick your topcoat type. For most walls, choose acrylic latex with mildewcide additives for breathable moisture release and strong scrub resistance.
If humidity is extreme, epoxy modified paints add extra moisture and chemical resistance. For hairline cracks or shifting substrates, use 100% acrylic elastomeric coatings. Use anti microbial formulations as inhibitors, and rely on primer systems for a stronger barrier, especially on porous areas.
- Clean and dry completely.
- Match sheen: semi-gloss/high-gloss in wet zones.
- Follow application best practices for film thickness.
- Plan two coats over a mold-killing primer.
Re-grout And Re-caulk Tile
Re-grout and re-caulk tile to refresh the look cheaply while restoring moisture protection at the same time. You’ll get major aesthetic impact when you address cracked or discolored joints, often the biggest bathroom refresh complaint.
Start with surface preparation: remove failing grout/caulk completely, then clean and dry for 24–72 hours, so new material bonds well. Match your grout color for visual continuity, and choose sanded or unsanded grout based on joint width; epoxy grout resists stains but costs more and takes more effort.
For caulk types, use 100% silicone in wet seams, acrylic-latex if paint coverage matters, or a hybrid for balance. Apply with solid application techniques, correct joint geometry, and tool smoothly for strong moisture protection and longer tile longevity.
This cost comparison often keeps materials under $200 instead of $1,000+ replacement.
Pick Materials That Fit Your Bathroom Remodel Budget
- Porcelain tile vs LVP
- Quartz vs laminate
- Waterproof wall panels vs acrylic
- Sealing for concrete/wood
Choose Efficient Fixtures and Lighting for Daily Value
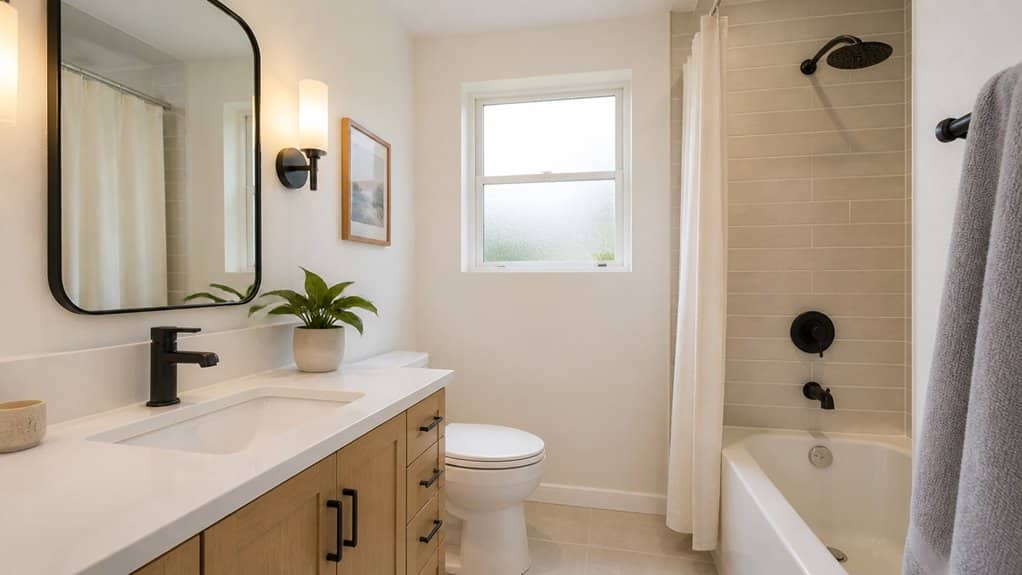
To get daily value from your bathroom remodel, focus on fixtures and lighting that save water and energy without sacrificing comfort.
Start with water saving fixtures: install EPA WaterSense-labeled showerheads and faucets, so you use about 1.5 gpm or less instead of older 2.5–5.5 gpm models. You’ll cut waste fast, and many low-flow showerheads pay back in 1–3 years.
Add thermostatic or pressure-balancing valves to keep the temperature steady while reducing wasted warm-up water. Choose durable ceramic disc faucets to prevent leaks, since leaks can waste 10–30% of indoor water.
For lights, use energy efficient lighting like LEDs, which use 75–80% less power and last far longer. Add dimmers and wet-rated fixtures near showers.
Plan Permits, ROI, and DIY vs Pro Work Wisely
Planning your permits, estimating ROI, and choosing the right amount of DIY versus professional help can make or break a bathroom remodel.
Start by checking permit processes early: moving plumbing, adding electrical circuits, or changing walls often triggers permits, and approvals can take days to months. Budget about $100–$2,000 plus 1–6 extra weeks for fees, plan prep, and inspections.
Next, use ROI strategies: minor updates often recoup ~70%–80%, while midrange remodels can return ~60%–70%. Avoid over-customization beyond neighborhood norms.
Finally, match DIY to safe tasks, like painting and re-caulking, but hire pros for major plumbing, electrical beyond swaps, waterproofing, and structural work.
- Permits: confirm thresholds
- Costs: plan extra time
- ROI: target market comps
- DIY: reduce risk, not quality
Wrapping It Up
As you plan your budget-conscious bathroom remodel, keep your priorities in order, and you’ll get the most return for your effort. Start by setting a real spending limit, then handle the “not-so-fun” fixes like leaks and ventilation, before you chase a nicer look. Use affordable upgrades—fresh paint, re-grout, and new caulk—then invest selectively in fixtures and lighting. Finally, weigh permits, ROI, and DIY versus pro help, so the project stays steady and worthwhile.
Bathroom Accessibility Upgrades: What Adds Safety and Value
You can add real safety and value with a few smart bathroom upgrades. Start with non-slip, textured flooring and well-maintained suction shower mats, then install properly mounted grab bars near the toilet and shower. Choose comfort-height toilets, lever-style faucets, and controls you can reach from seated position. Plan smoother shower flow with curbless or zero-threshold layouts and reachable controls. Finally, add motion-sensing night lights and anti-scald thermostats. Keep going, and you’ll uncover more practical details.
Prevent Slips and Falls With Safer Bathroom Upgrades
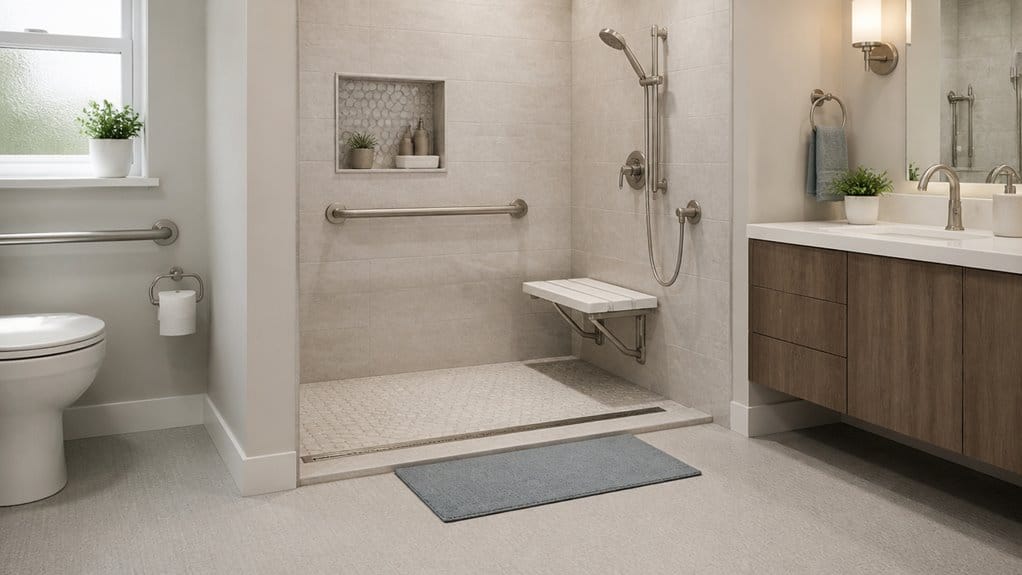
When you upgrade your bathroom, you can considerably reduce the risk of slips and falls, and it all starts with better traction and safer surfaces. Choose non slip flooring with a textured finish so water doesn’t turn walking into an accident. You should also focus on key wet areas. Install shower mats with suction backing, and replace them when they lose grip. In addition, consider grab bars near the toilet and shower, but only if your layout supports proper mounting. Keep thresholds low so your feet land predictably, and use contrasting edges to highlight steps. Finally, you should maintain surfaces, because soap scum and worn finishes make even good materials unsafe. These upgrades boost everyday safety and long-term value. Improved ventilation can also help limit bathroom moisture that contributes to unsafe, slippery conditions.
Universal Design Upgrades for Comfort and Independence
Universal design upgrades make your bathroom easier to use, not just for one person, but for many stages of life, including when mobility changes. You can start by choosing a comfortable height for the toilet and adding grab bars that double as supportive handholds. Select lever-style faucets so you can operate them with less grip strength, even when your hands are busy or you’re wearing gloves. In your fixture selection, look for controls that are reachable from a seated position and that clearly mark hot and cold settings. Wider doorways, smooth shifts at thresholds, and slip-resistant, low-pile flooring also help you move confidently. These choices support daily routines and boost curb appeal because thoughtful design looks good and works better. As a result, homeowners often see increased home value alongside everyday safety improvements from practical bathroom accessibility upgrades.
Pick Bathroom Accessibility Shower and Bath Layout Options
How you arrange your shower and bath shapes how safe and independent you’ll feel every day, so it’s worth planning the layout before you buy fixtures. Start by mapping your path from the door to the shower, then choose spaces that let you turn, reach, and transfer without squeezing. When you plan for curbless showers, you reduce trip edges and create smooth entry. Pair that with adjustable showerheads so you can set the height and angle for rinsing while seated or standing. wheelchair-accessible upgrades are especially valuable when the layout supports comfortable transfers, consistent reach, and safer daily movement. Keep controls within arm’s reach and avoid awkward corners that trap your wheelchair or walker.
- Clear at least one wide transfer route
- Place shower controls at reachable heights
- Use non-slip flooring with steady drainage
- Choose seats or benches near the spray zone
- Plan door swings or pocket doors early
Safer Toilets and Vanities: Spacing and Grab Bars
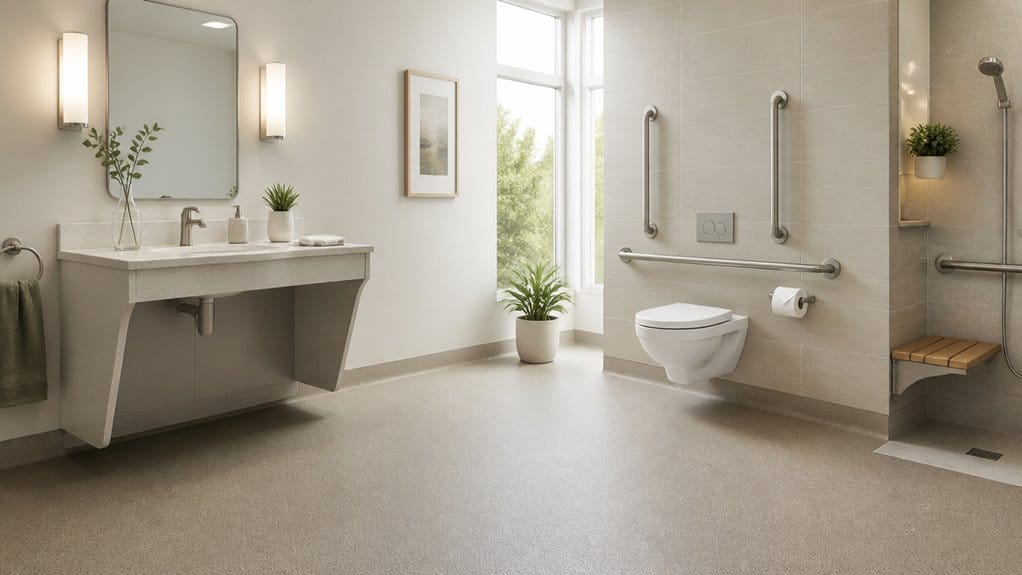
Planning the spacing around your toilet and vanity matters just as much as choosing the right shower layout, because a few inches can decide whether you transfer safely and comfortably.
Start with toilet height: choose a comfort range that matches your needs so you can stand and sit with less strain. Keep clear floor space at the sides for easy transfers, and avoid tight corners that block your reach.
Next, focus on vanity placement. Install the sink so you have knee clearance and can approach straight-on, especially if you use a walker or wheelchair.
Add grab bars near the toilet and at the vanity edge, firmly anchored into studs or blocking. Position bars where your hands naturally land, then you gain stable support.
Accessibility Upgrades That Boost Resale and Aging-In-Place
Smart accessibility upgrades can raise your bathroom’s value while helping you stay independent for years. When you plan for aging-in-place, buyers also notice thoughtful comfort and safer layouts.
Focus on features that blend today’s design trends with smart technology, so the space works now and later.
- Add lever-style handles and anti-scald thermostats for easier control
- Install a zero-threshold shower with a seat to prevent slips
- Choose motion-sensing night lights to guide footsteps safely
- Upgrade to a handheld or slide-bar showerhead for flexible reach
- Use smart voice or app reminders for medication and water settings
These improvements reduce strain and make daily routines smoother.
You’ll gain resale appeal and long-term peace of mind, without sacrificing style.
Wrapping It Up
When you plan bathroom accessibility upgrades with safety first, you protect everyday routines, and you add long-term value. Safer flooring, smart layouts, supportive grab bars, and well-spaced fixtures reduce falls, while universal design helps you stay independent longer. Choose updates that match your needs now, and your future will thank you—like a solid handrail, they’ll quietly hold you up when it matters most. With aging-in-place in mind, you invest wisely, not just beautifully.
City & County Permit Process Guide for Homeowners in San Diego
To navigate the City & County permit process in San Diego, you first match your project scope—like additions, structural changes, demolition, or certain repairs—to the right permit type and agency. You’ll need complete, stamped drawings, Title 24 documentation, and any required structural, geotechnical, or fire reports before you submit. Verify jurisdiction via SanGIS/APN, then use the right portal for plan check. Expect multiple fee categories, with plan check a major share, and schedule inspections in order to stay stop-work free—there’s more you’ll want to know next.
Match Your Project to the Right San Diego Permit
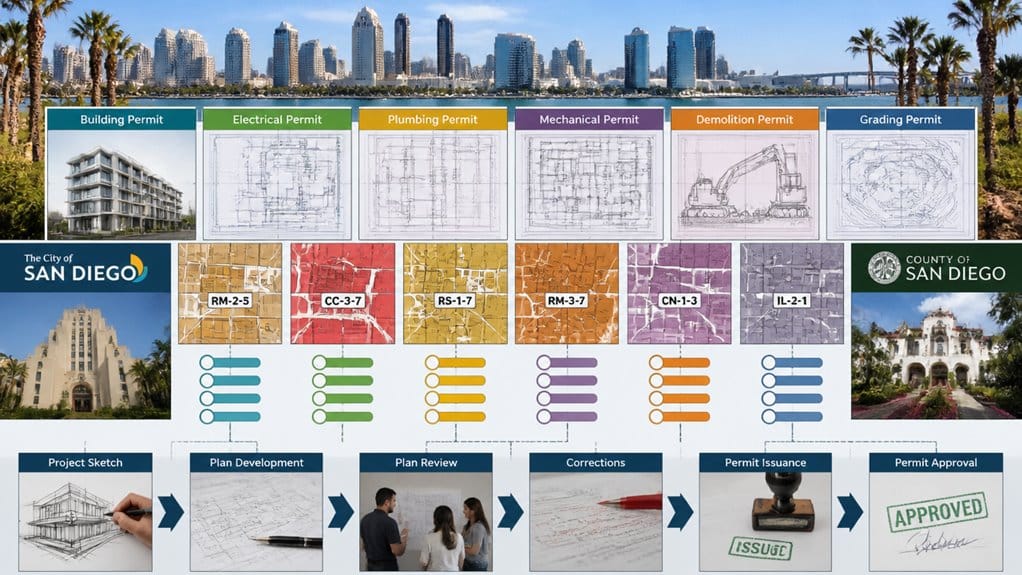
Before you apply for any permits in San Diego, match your project to the right permit path by figuring out what you’re actually doing and what code category it falls under.
Start with project classification: residential versus commercial, because that choice affects permit types, fees, and inspections.
Next, identify triggering activities like new construction, additions, demolition, structural alterations, or changes of use, since these usually require a building permit under SDMC and CBC.
Identify triggering activities—new construction, additions, demolition, structural alterations, or change of use—since they typically require a building permit under SDMC and CBC.
For repairs, be careful: roofing over existing sheathing, electrical changes beyond minor work, HVAC upgrades, or repiping often still need permits.
If you build an accessory structure, check size and setback thresholds, especially for ADUs tied to state ADU laws.
Finally, protect life-safety work—egress, fire separation, sprinklers, and smoke detectors demand permits.
Prep Drawings, Title 24, and Required Reports First
Before you submit anything, prep complete drawings with licensed stamps so plan checkers can verify scope, code references, and structural intent.
At the same time, start Title 24 early by choosing the compliance path and preparing CF1R, plus the supporting CF2R/CF3R or CBECC-Res documentation so you’re not rushing later.
If your project triggers structural or geotechnical reports, get those required documents in line first, because incomplete submissions usually cause delays and rework.
Drawings With Licensed Stamps
Once you start prepping permit drawings in San Diego, you should plan on getting licensed stamps on the documents that affect structural, electrical, mechanical, or plumbing work.
The City and County require sealed or stamped drawings prepared by California-licensed professionals, and they verify drawing accuracy at intake. If you submit un-stamped plans, they may be rejected, which slows everything down.
Make sure your contractor or designer holds the right license for the scope, such as A, C-3, C-10, C-36, P.E., or R.A. If the license doesn’t match the work, plan check fails or notices of noncompliance follow.
Stamped prep drawings also shift professional liability onto the licensee and can reduce plan-check cycles. Always confirm license status and insurance.
Title 24 Forms Early
Starting your permit drawings with Title 24 compliance documents right away can save you serious time in San Diego. When you plan early documentation, you align with California’s Title 24, Part 6 requirements, including the latest regulatory updates, so energy efficiency reviews don’t stall.
At intake, many city and county counters expect the compliance forms upfront, so missing CF1R data can trigger rejection or conditional approvals. Build your permit integration by including CF1R (and CF1R Residential) with your envelope specs, HVAC details, hot water, and lighting schedules.
This supports cost analysis through early modeling trade-offs, like insulation levels, HVAC sizing, and window performance, and it improves project timelines. Later, you complete CF2R at inspections, matching installed equipment to your CF1R, and add HERS or load calculations when required.
Submit Through the Right Agency (City vs County)
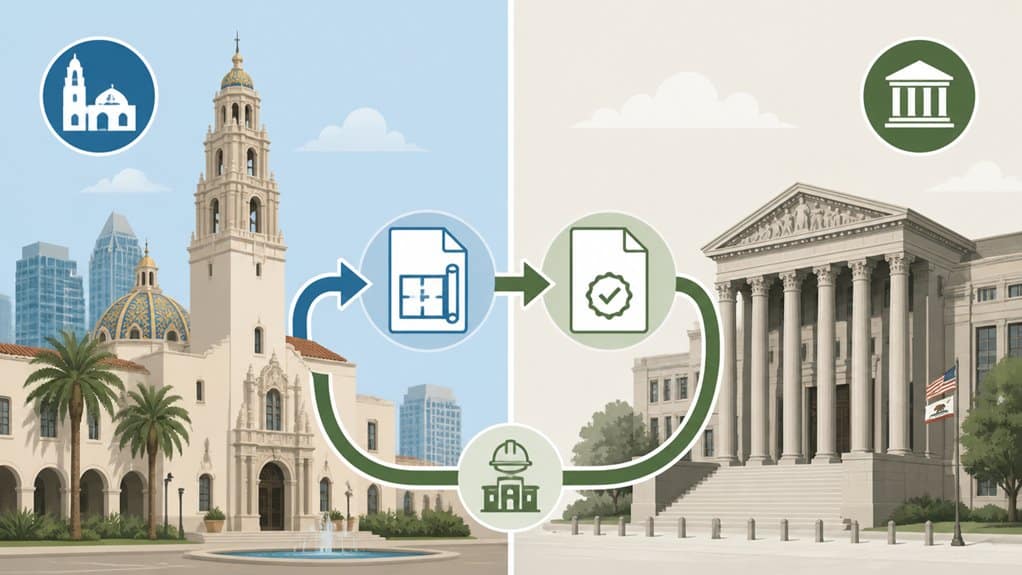
Choosing the right permitting agency in San Diego can make your project smoother, because the “city vs. county” line determines where your plans go and which rules apply.
Start with jurisdiction verification by checking city boundaries using SanGIS, plus your assessor parcel number (APN). Remember, annexation areas and sphere-of-influence changes can shift oversight, so confirm the latest boundary records.
If you’re inside the City of San Diego, submit through Development Services Online or CityView/ProjectDox, and follow city requirements for building, grading, and coastal development permits.
If your property is in unincorporated land, use the County ePermit portal or submit in person, and expect county reviews for land use and septic/OWTS.
Also, don’t forget special districts and fire review may add steps.
Get Through DSD Plan Check Comment Cycles Fast
To get through DSD plan check comment cycles fast, start by preparing complete scoping notes that clearly define your project scope, code basis, and required details.
Submit fully code-compliant drawings upfront, then respond to corrections quickly by using a comment-reply matrix that matches each issue to a specific revision, note, or calculation update.
When you mark changes clearly and consolidate related fixes, you reduce back-and-forth, which keeps your review timeline moving.
Prepare Complete Scoping Notes
When you prepare complete scoping notes up front, you help the Development Services Department (DSD) reviewers move faster because they can verify your intent, compliance path, and site constraints in the first review.
Start with a clear project scope summary: work type, square footage changes, existing versus proposed use, bedroom and bathroom counts, structural alterations, and any plumbing or HVAC impacts.
Then list the specific codes and standards you’re using, including the California Building Code edition, local amendments, energy code, and accessibility requirements, to show code compliance.
Add site constraints like FEMA flood zone status, steep slopes, geologic hazards, and any easements or right-of-way encroachments.
Reference related prior permits.
Request decisions upfront for variances or alternative materials.
Include key studies and reports, so common comment cycles drop.
Submit Code Compliant Drawings
Submitting code-compliant drawings sets the pace for a smooth Development Services Department (DSD) plan check, and it’s the quickest way to reduce repeat comment cycles.
You should align your submittal to current drawing standards and show clear code compliance from the first sheet. Start by filling the title sheet with permit info, scope, code editions, occupancy classification, and valuation.
Then include complete site, floor, roof/structural, elevations, and sections. Add structural loads, framing, connection notes, and a foundation plan referencing the soil report and engineer stamps when required.
Make accessibility and egress easy to verify with door clearances, landing sizes, and handrail details.
Finish with Title 24, Green, and energy/MEP diagrams plus calculation summaries, using properly formatted e-submittals.
Respond To Corrections Quickly
Once you get DSD plan check comments, treat them like a set of instructions, not a suggestion—because speed and clarity directly affect how many comment cycles you’ll face.
Read the entire comment set within 24 hours, then triage. Use your review strategy to group items into minor clerical, drawing revisions, calculation updates, and code interpretation disputes, so nothing blocks other disciplines.
Flag structural, MEP, or geotechnical needs immediately, and log expected turnaround times.
Build a master response log that ties each comment number to an action, owner, and date, and decide early whether you can fix it with a clarification letter, clouded/delta sheets, or a full resubmittal.
When you prepare your comment response package, cross-reference sheets, update title blocks, and keep PDFs searchable.
Estimate San Diego Permit Fees and Review Timelines
Estimating San Diego permit fees and review timelines starts with understanding what the City or County charges, because the total cost usually comes from several fee categories added together.
Estimating San Diego permit fees starts with understanding City/County charges, since totals are built from multiple fee categories.
For fee calculations, you treat plan check as a large piece, often 65%–80% of the permit fee, plus building, trade, and impact charges that vary by valuation and scope.
Timeline expectations depend on workload and number of disciplines. You’ll typically see intake in 1–3 business days if you apply online, while the first review often takes 2–6 weeks for many residential projects.
- Plan check + valuation multipliers
- Separate trade permits per item or unit
- Impact fees, issuance, and any express surcharges
Schedule Inspections in the Correct Order
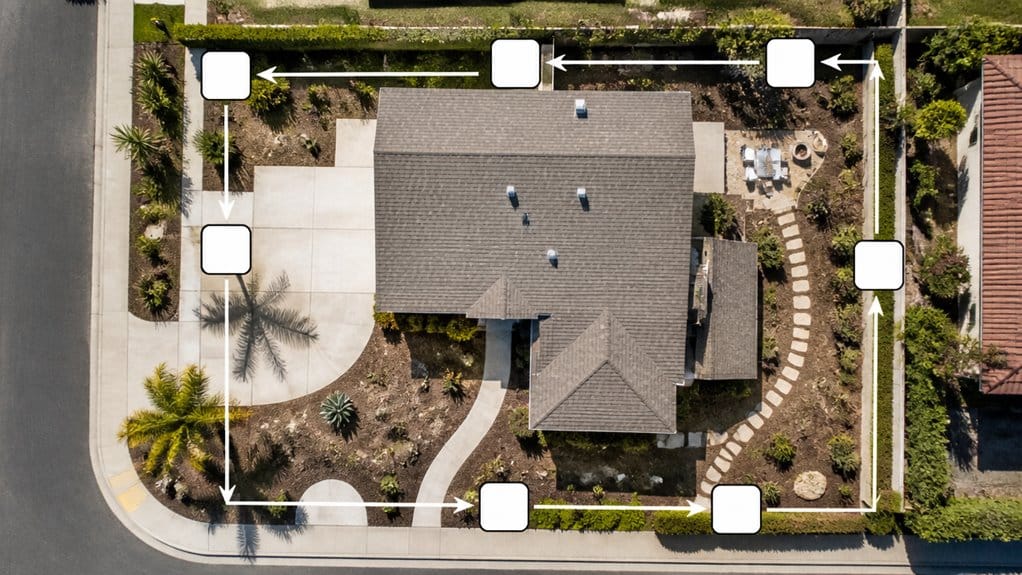
Why risk failed inspections when you can plan the order from the start? First, you follow San Diego’s required sequence: footing, foundation, framing, rough trades like plumbing/electrical/MEP, insulation, drywall, then final.
You schedule only after each preceding inspection is approved, because the city enforces this order through municipal code and permit conditions, and many inspectors won’t approve out-of-sequence work.
Use inspection readiness as your checklist, confirming required pressure tests, documentation, and completed systems before you request the next step.
When you do inspection scheduling, submit the correct permit number, inspection code, and address in eTRAKiT or by phone.
Choose timing wisely, since routine requests may fit same-day, while complex inspections often need several days.
Clear Zoning, Fire, and Coastal Approvals Early
After you lock in the inspection order, you should clear the permitting “checkpoints” that can stall your schedule if you wait—zoning, fire, and coastal rules. Start with zoning verification using San Diego GIS Portal and the Municipal Code, confirming setbacks, height, lot coverage, and whether discretionary permits like Coastal Development Permits are triggered. Next, run fire safety checks early by determining if San Diego Fire-Rescue plan review is needed for fire access, hydrants, sprinklers, and apparatus road clearance, especially for larger additions or multi-family projects. Then, confirm coastal approvals by checking Local Coastal Program jurisdiction and whether Coastal Development Permits apply, including public notice and potential California Coastal Commission escalation. Verify zoning + overlays (ADU standards, nonconforming conditions) include timeline considerations and ensure coordination with SDFD plan check aligned with building timing. Map coastal constraints and likely studies or exhibits.
Avoid Stop-Work: Stay Inspection-Ready From Day One
To avoid stop-work orders, you need to stay inspection-ready from day one, not scramble once inspectors show up.
Build your inspection readiness using a compliance checklist: submit a complete application packet, with correct code editions, licensed signatures, and accurate scope and valuation. Confirm parcel-specific requirements so you don’t face resubmittals.
Keep approved plans on-site, and make sure safe access to the work area stays clear. Before each inspection, stage required materials and test equipment, and follow the proper inspection sequence.
Post permits and required erosion or stormwater BMPs before grading. Document prior corrections and approvals with inspection tags.
Verify the inspector identity, keep written notes, and track correction lists so re-inspections go fast. Coordinate third-party test reports, too.
Wrapping It Up
When you match your project to the right San Diego permit, prep drawings, and submit to the correct agency, you’re basically stacking the odds in your favor. Stay inspection-ready from day one, schedule inspections in order, and clear zoning, fire, and coastal approvals early. Yes, permit timelines can feel slow, but with clean documentation and responsive revisions, you’ll cut delays fast. Finish smarter, not harder, and avoid the dreaded stop-work notice like it’s a red flag.
Kitchen Remodel Permits in San Diego: When a No-Plan Permit Works and When You Need Full Review
A Kitchen Remodel Can Feel Simple at First — Until You Learn the City May Treat the Same Project Very Differently Depending on What You Change, What You Move, and What the Inspector Finds Once the Work Is Opened Up
Melissa thought she was planning a straightforward kitchen remodel.
The cabinets were dated. The counters were worn. The lighting was poor. She wanted a cleaner layout, better storage, a stronger hood, and a more modern look that finally matched the rest of her San Diego home. Like many homeowners, she assumed the permit question had a simple answer. If she was not adding square footage, not moving the kitchen to another room, and not tearing the house apart, she figured the city would treat the job as minor.
That assumption is where many projects start going sideways.
Because in San Diego, some kitchen remodels really can move through a lighter permit path. Others need full review from the start. And a project that looks simple on paper can quickly become a full-plan job the moment structural issues, wall changes, plumbing additions, historic review, or questionable existing conditions enter the picture.
That is why the smarter question is not just, “Do I need a permit for my kitchen remodel?”
The better question is, “Can this project qualify for a no-plan permit, or am I heading into full review whether I realize it yet or not?”
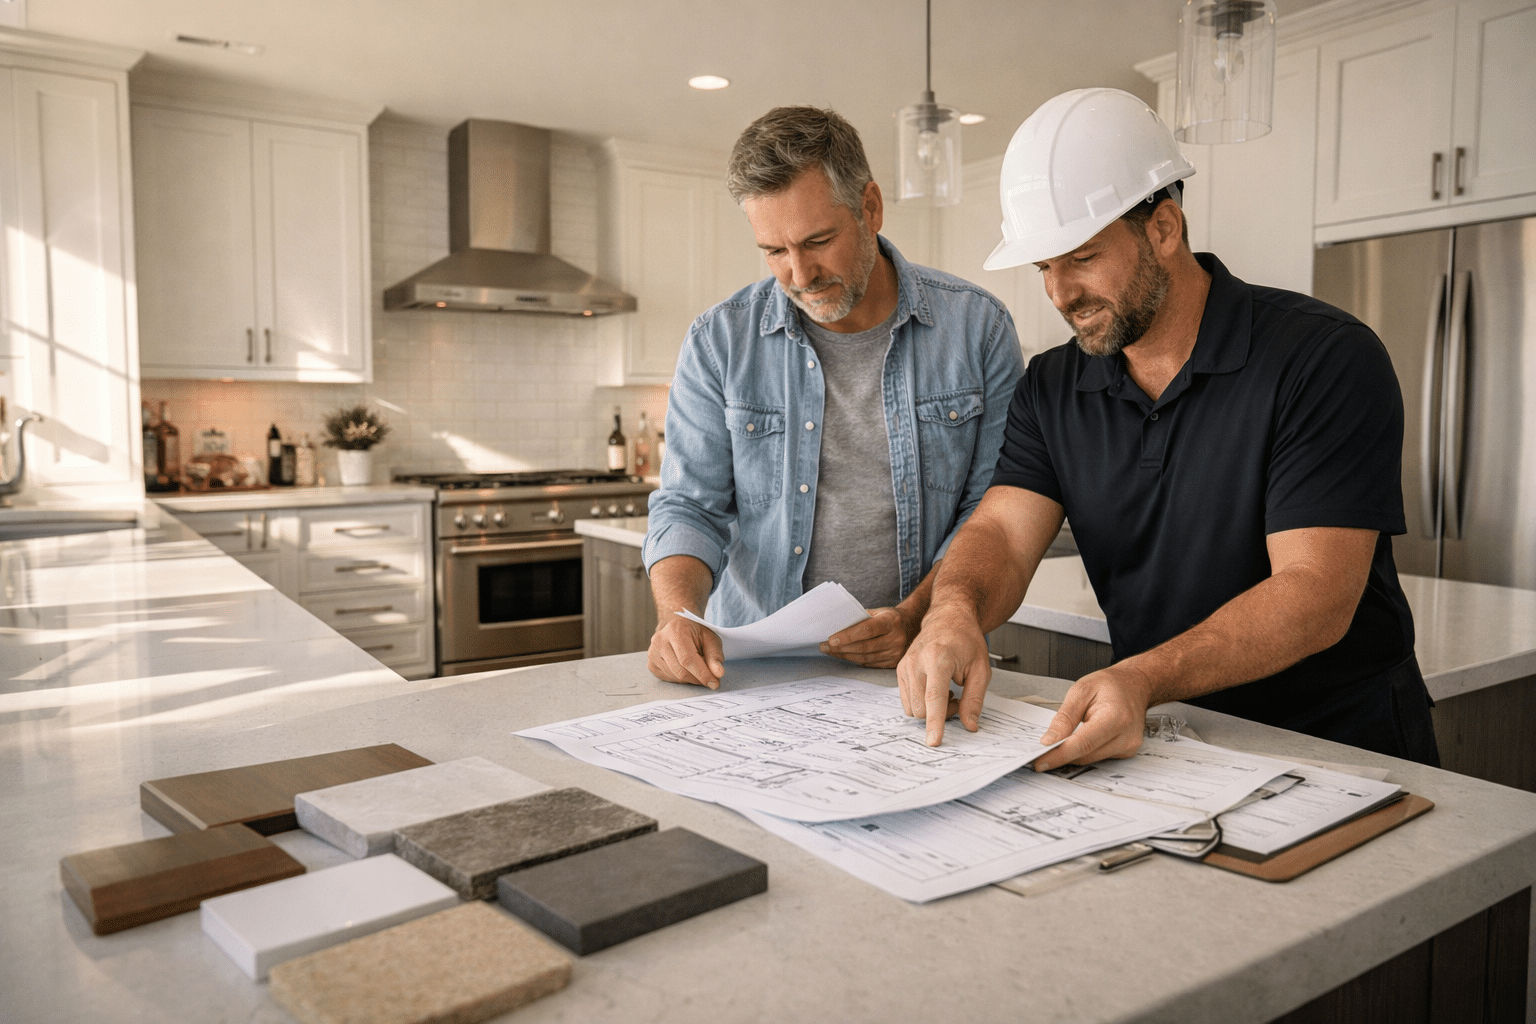
The Main Distinction Homeowners Need to Understand
For many San Diego homeowners, the confusion comes from hearing phrases like “simple permit,” “no-plan permit,” and “full review” used almost interchangeably.
They are not the same.
A no-plan building permit can apply to certain residential kitchen remodels when the work stays within a limited scope. That usually means remodeling an existing kitchen in an existing residential building without changing structural elements, wall framing, or exterior walls, and without adding plumbing fixtures.
A simple permit is a different concept. It is usually used for certain minor mechanical, electrical, or plumbing work that does not require plan review.
And then there is full review, which is where the city expects plans and a more complete review because the project is broader, more invasive, or harder to verify safely without drawings.
That distinction matters because homeowners often budget for one process and accidentally design another.
When a No-Plan Permit Can Work for a Kitchen Remodel
A no-plan permit can make sense when the kitchen remodel stays inside the existing envelope and avoids the types of changes that trigger deeper review.
In practical terms, this usually works best when the project looks like this:
- the kitchen remains in the same location
- no walls are being moved or reframed
- no exterior walls are being altered
- no structural elements are being removed, modified, or added
- no new plumbing fixtures are being added
- the work is limited to the interior remodel of the existing kitchen
- the home is an existing legally permitted residential structure
This is often the category for homeowners replacing cabinets, countertops, finishes, and some interior components while keeping the overall kitchen framework intact.
But this is where people get tripped up: qualifying for a no-plan permit does not mean the project is casual or unregulated. The work still has to comply with code. Inspections still matter. And if the inspector determines the work is more extensive than expected or the existing conditions cannot be verified properly, the city can require plans and shift the job into a different track.
In other words, a no-plan permit is not a free pass. It is a narrower permitting lane.
When You May Not Need a Building Permit at All
Some kitchen work is light enough that homeowners assume it should not trigger a permit, and in limited cases, that is true.
For example, purely cosmetic work may fall outside the permit requirement, especially when you are replacing finishes with similar materials and not affecting electrical, plumbing, or mechanical systems. In San Diego, the relocation of cabinets and countertops in certain residential kitchens can also fall under an exemption.
But homeowners should be careful here.
The moment a “cosmetic” remodel starts involving hidden systems, new wiring, moved receptacles, ventilation work, gas work, plumbing changes, drywall opened beyond a small repair context, or any question about what is behind the walls, the project can stop being cosmetic very quickly.
This is one of the biggest mistakes people make. They start with “just cabinets and counters,” then add recessed lights, move a sink, upgrade appliances, relocate outlets, install a new hood duct, or rework plumbing lines. By then, the permit answer is no longer the one they started with.
When Full Review Is Usually the Safer Assumption
A kitchen remodel usually moves into full review territory when the project affects more than finishes and straightforward interior replacement work.
That often includes situations like:
- removing or altering walls
- touching load-bearing construction
- changing wall framing
- modifying exterior walls or openings
- adding plumbing fixtures
- reconfiguring plumbing locations in a substantial way
- making changes that require plan review for electrical, plumbing, or mechanical systems
- remodeling in a historic district or on a historically designated property
- remodeling a building old enough to trigger historic review issues
- working in a property where the legality or condition of the existing construction is hard to verify
This is why experienced planning at the start matters. A homeowner may think the question is whether the city “will let us do the remodel.” But the real question is usually how the city wants the remodel documented and reviewed.
If your project changes the bones of the kitchen, not just the surfaces, full review is often the more realistic path.
Why “Simple Permit” Does Not Mean “Kitchen Permit”
Another point of confusion is the city’s simple permit system.
Homeowners sometimes assume that if a kitchen remodel includes electrical, plumbing, or exhaust work, the whole kitchen can move through a simple permit. That is not how it usually works.
A simple permit is intended for certain minor no-plan MEP work, such as some wiring work, some exhaust fan work, and certain plumbing repairs or replacements. It is not a substitute for full kitchen-remodel review when the project as a whole exceeds those limits.
So while part of your kitchen project may involve work that can fit a simpler permit path on its own, that does not automatically mean the overall remodel avoids plan review.
A kitchen is a combination project. Once the scope expands, the city is looking at the remodel as a whole, not just at one isolated permit-friendly item.
The Three Most Common Ways Homeowners Accidentally Turn a Light Remodel Into a Full-Review Project
1. They move something “just a little”
A sink moves a few feet. A gas line gets adjusted. An island gains a prep sink. A hood vent route changes. A wall outlet layout gets reworked more extensively than expected.
What sounds minor in conversation can be major in permitting.
2. They open walls and discover older work
Once demolition begins, surprises show up. Improper wiring. Past patchwork plumbing. Framing changes from an older remodel. Missing permits from earlier work.
At that point, the project can stop being easy to verify and start requiring a more formal review path.
3. They assume the house’s age will not matter
If the property is historic, within a historic district, or old enough to raise historic review questions, even a scope that looks no-plan eligible at first can become more complicated.
That does not mean the remodel cannot happen. It means the permit path may not be the short one the homeowner expected.
A Good Rule of Thumb Before You Finalize Design
If your kitchen remodel is mostly about replacing what is already there, inside the same room, without changing structure, without changing exterior walls, and without adding plumbing fixtures, you may be in no-plan territory.
If you are changing layout in a meaningful way, modifying walls, opening up the home, adding plumbing, upgrading multiple systems at once, or working in a property with historic or verification issues, you should assume full review is at least possible from day one.
That mindset helps protect your budget, your timeline, and your design decisions.
Because the worst time to learn your kitchen needs plans is after you have already priced it like it does not.
Why It Helps to Plan the Permit Strategy Before the Remodel Strategy
Many homeowners focus first on finishes, colors, cabinets, countertops, and appliance packages.
Those choices matter. But permit strategy comes earlier.
You want to know:
- which scope keeps the project lighter
- which choices trigger plan review
- whether the existing home conditions are likely to complicate permitting
- whether your dream layout is worth the extra review time and cost
- how to avoid redesigning the kitchen after permit realities catch up
That is where having the right design-build team makes a major difference. The goal is not just to design a beautiful kitchen. It is to design one that makes sense for your home, your budget, and the approval path in front of you.
Start With the Right Permit Strategy Before You Build
A kitchen remodel should feel exciting, not uncertain. But in San Diego, permit questions can reshape the entire project if they are handled too late.
If you are planning a kitchen remodel and want to know whether your project may qualify for a no-plan permit or whether full review is the smarter path, Creative Design & Build can help you evaluate the scope before costly mistakes are made. Our team helps homeowners across San Diego County plan, design, and execute remodels with the right strategy from the beginning.
Call Creative Design & Build today at (855) 445-9455 or email [email protected] to schedule your free in-home estimate. You can also visit us at 9275 Trade Place Suite H, San Diego, CA 92126. We proudly serve homeowners throughout San Diego County under License #1045112.
How to Legalize an Unpermitted ADU in San Diego (AB 2533 Guide)
Don’t Let an Unpermitted Backyard Unit Turn Into a Sale, Refinance, or Code Enforcement Problem — Understanding AB 2533 and San Diego’s Retroactive Permit Process Could Protect Your Property
Jason converted the detached garage behind his San Diego home in 2019. At first, it was meant to solve a family problem, not create one. His mother needed a place to stay nearby, and the garage already had enough room for a small bathroom, a kitchenette, and a sleeping area. The work got done quickly. Everyone moved on.
Then life changed.
A few years later, Jason wanted to refinance. The lender asked a question he wasn’t ready for: “Do you have permits for the secondary dwelling unit?”
He didn’t.
What had once felt like a practical home improvement suddenly became a property issue with real consequences. A sale could get delayed. A refinance could stall. Insurance questions could follow. A tenant situation could become risky. And if a complaint ever reached the city, the problem could become urgent overnight.
Like many homeowners, Jason assumed that because the work was already done, he had only two options: keep hiding it or tear it all out.
That is not always true.
For qualifying properties in the City of San Diego, AB 2533 created a more realistic path to legalize certain unpermitted ADUs and JADUs. That does not mean every unpermitted unit automatically becomes legal. It does mean some homeowners now have a clearer path forward than they did before.
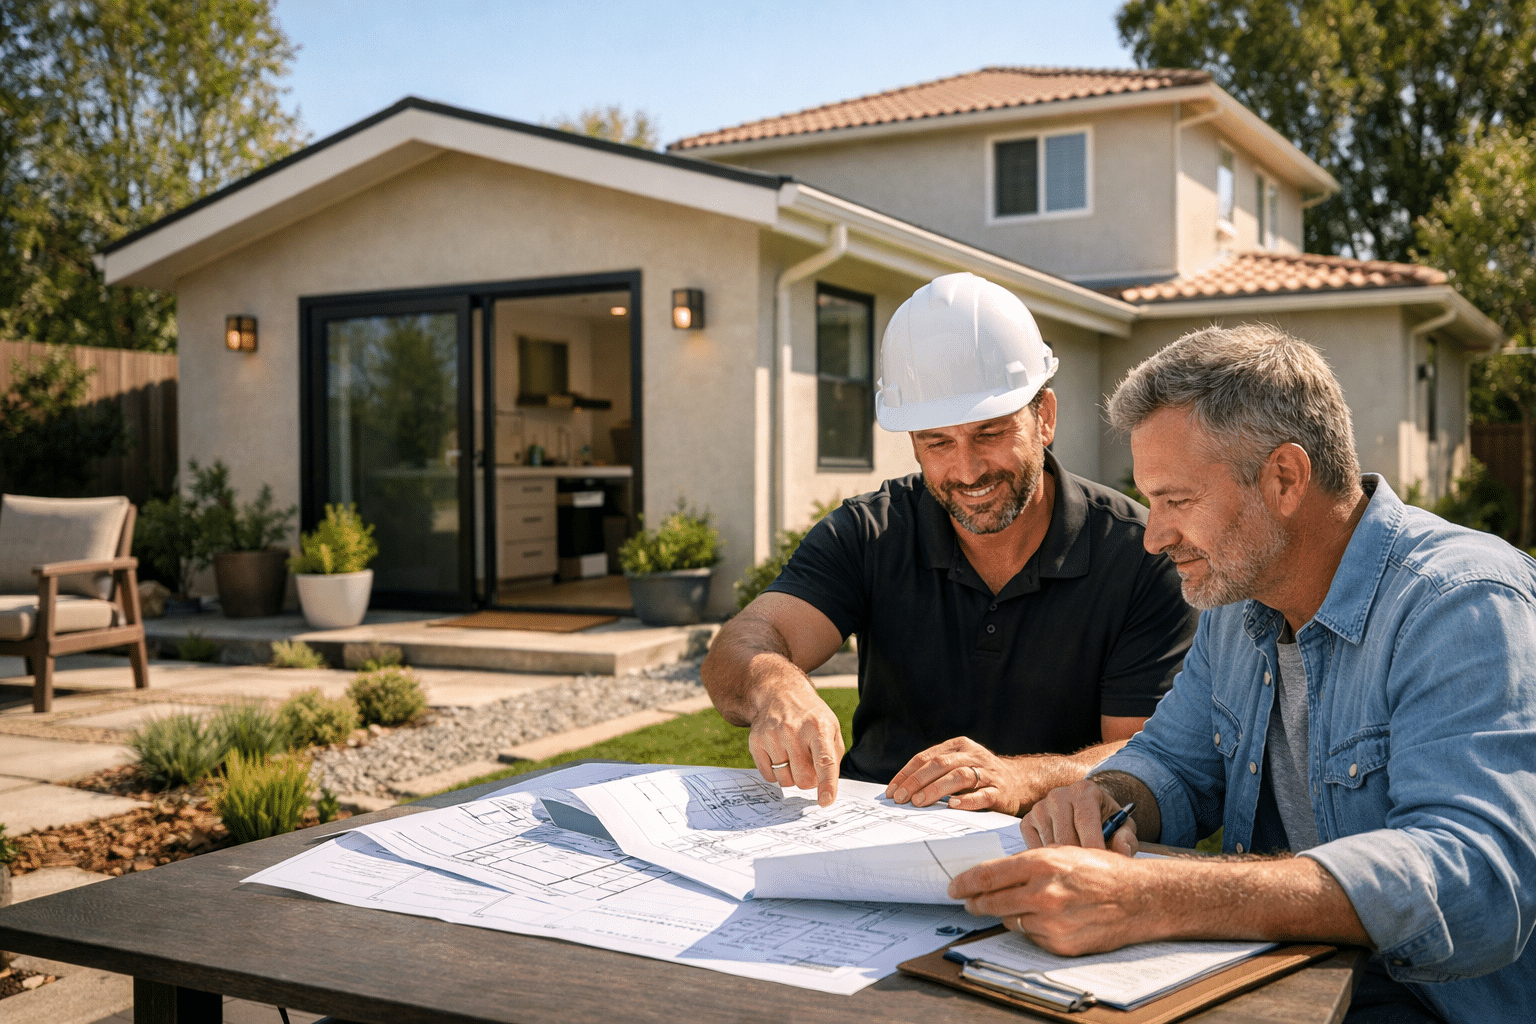
What Is AB 2533?
AB 2533 is the California law that changed the conversation around unpermitted ADUs. For many homeowners, the biggest takeaway is simple: if an ADU was constructed before January 1, 2020, the city generally cannot deny a permit application just because the unit violated building standards or ADU rules when it was created.
That is the part most people hear.
The part they miss is just as important: the law still centers on health and safety. If the unit is substandard, dangerous, or cannot satisfy the conditions required to avoid being treated as a substandard building, the path becomes much harder.
For homeowners in the City of San Diego, the issue is no longer only, “Was this built without permits?” The real question is, “Can this unit be documented, corrected where necessary, and brought to an approvable condition?”
That is a very different question — and for many properties, it is the difference between panic and a plan.
The Truth Many Homeowners Miss: AB 2533 Is Not Automatic Amnesty
A lot of homeowners hear the term “ADU amnesty” and assume the state now gives every garage conversion or backyard unit a free pass.
That is not what is happening.
What the law can do
For a qualifying older unit, AB 2533 can give you a real legalization path instead of shutting the door immediately because the space was created without permits.
In practical terms, that means:
- A qualifying ADU built before January 1, 2020 may still be eligible for retroactive permitting.
- The city’s focus shifts toward habitability, safety, and what must be corrected.
- A homeowner can get a confidential third-party inspection before filing, which can help avoid submitting blind.
- If corrections are needed to address health and safety issues, the process is supposed to move toward fixing the problem rather than punishing the owner just for coming forward.
What the law cannot do
AB 2533 does not magically erase every issue tied to an unpermitted unit.
It does not:
- Automatically legalize a unit the moment you discover the law.
- Protect unsafe or truly substandard construction.
- Guarantee that additions, alterations, or remodeling done later can ignore current code.
- Remove the need for plans, permit review, inspections, and correction work.
- Solve every issue for properties subject to Coastal Act requirements.
That last point matters more than many owners realize. A homeowner may have a qualifying unit and still face a more complicated process because of the property’s location or existing site constraints.
What Makes an ADU “Substandard”?
This is where many legalization efforts succeed or fail.
A homeowner may say, “The space looks fine,” but appearance is not the test. The city looks at whether the unit meets minimum habitability and life-safety expectations and whether the structure falls into substandard conditions that must be corrected.
Common red flags include problems like:
- missing or improper bathroom or kitchen fixtures
- no hot and cold running water
- inadequate heating
- poor ventilation or insufficient natural light
- unsafe or nonfunctional electrical, plumbing, or mechanical systems
- deteriorated foundations, floors, walls, or roof framing
- weatherproofing failures, leaks, broken exterior protection, or major moisture issues
- inadequate exits or missing fire-safety features
- spaces being used for living, cooking, or sleeping when they were never properly suited for that occupancy
This is why a lot of unpermitted garage conversions become complicated. A room can feel comfortable enough for short-term family use and still fall short of what is required for a legal dwelling unit.
The good news is that many units do not need to be demolished. They need to be evaluated honestly, documented accurately, and upgraded strategically.
How the San Diego Legalization Process Usually Works
For homes in the City of San Diego, the legalization path is not just one form and one inspection. It is a sequence.
Step 1: Confirm that the unit actually qualifies
The first question is whether the ADU fits the AB 2533 pathway at all.
That means figuring out:
- when the unit was built
- whether it is really functioning as an ADU or JADU
- whether the property is in the City of San Diego
- whether Coastal Act issues or other location-based restrictions could change the process
- whether the unit appears capable of avoiding substandard status after corrections
This first step matters because homeowners often spend money on plans before they answer the eligibility question correctly.
Step 2: Get a confidential inspection and feasibility review
One of the smartest moves is to evaluate the unit before you submit anything.
A confidential third-party inspection can help you understand:
- what is already acceptable
- what will likely need correction
- what could become expensive
- whether the space is a strong candidate for legalization or a more serious reconstruction effort
This is where experience matters. A homeowner who applies too early may trigger a process without understanding the true scope. A homeowner who waits too long may lose leverage, time, and money.
Step 3: Prepare accurate as-built plans and a site plan
You cannot legalize what you cannot clearly document.
For a serious application, you usually need a clear picture of what exists now, not what someone remembers building years ago. That often means preparing as-built drawings and a site plan that show the property boundaries, setbacks, lot coverage, location of the unit, nearby access, and other critical site information.
This stage also reveals some of the hidden issues that catch people off guard, including fire access concerns, setback realities, utility complications, and design conflicts between what exists and what the city can reasonably approve.
Step 4: Define the correction scope before filing
Not every issue has the same weight.
Some corrections are relatively straightforward: smoke alarms, carbon monoxide alarms, ventilation openings, or egress improvements.
Others can be far more serious: structural repairs, electrical system corrections, plumbing replacement, heating upgrades, or reworking parts of the building envelope.
A strong legalization strategy separates the scope into three buckets:
- what can stay
- what must be corrected
- what should not be touched until the permit path is clear
That distinction can save a homeowner from wasting money on the wrong work at the wrong time.
Step 5: Submit the building permit application
In the City of San Diego, the retroactive permitting process runs through a building permit application submitted online.
If the property already has a code enforcement issue or citation, that needs to be handled carefully and reflected appropriately in the application scope.
This step is where poor planning usually shows. If the plans are vague, the site information is incomplete, or the correction strategy is unrealistic, delays start stacking up.
Step 6: Complete corrections and pass inspections
Even when the city allows the legalization path, the work is not done until the required corrections are completed and inspections are passed.
That can include life-safety improvements, documentation updates, utility-related corrections, access issues, and other code items that must be addressed before the unit is recognized through the permit process.
This is why legalization is not just paperwork. It is a design, permitting, and construction problem that has to be solved in the right order.
Common Upgrades Homeowners Should Expect
Every property is different, but some items show up again and again in unpermitted ADU cases.
Homeowners should be prepared for upgrades such as:
- smoke alarms and carbon monoxide alarms
- emergency escape or rescue openings
- light and ventilation corrections
- heating installation or replacement
- plumbing and electrical repairs
- sanitation fixture corrections
- weatherproofing repairs
- framing or structural reinforcement
- fire access or site-related modifications
The key point is this: a unit does not have to be perfect on day one to have a path forward, but it usually does need to be correctable.
Real-World Scenarios That Catch Owners Off Guard
Scenario 1: The family garage conversion that becomes a rental
What begins as a room for a parent, adult child, or guest often turns into a long-term housing solution. Years later, the owner decides to rent it out for income.
That is usually the moment the risk changes.
Once a space becomes part of your financial plan, the cost of leaving it unpermitted gets much higher. Rent, liability, insurance, and future resale value all become part of the equation.
Scenario 2: The refinance or sale that uncovers everything
Many owners assume no one will ever ask.
Then the appraiser notices the separate entrance. The buyer asks for permit history. The lender wants documentation. The title process raises questions. Suddenly, an issue that sat quietly for years is now sitting in the middle of a transaction timeline.
At that point, “we’ll deal with it later” is no longer a strategy.
Scenario 3: The coastal property surprise
Some homeowners have a strong AB 2533 case on paper and still run into a second layer of complexity because of where the home is located.
If the property is in an area subject to Coastal Act regulations, the normal city bulletin path is not the whole story. Extra approvals can enter the picture, and the process may not be as simple as homeowners expect.
That is why location matters just as much as construction date.
Understanding the Cost Reality
One of the biggest mistakes homeowners make is asking, “How much does it cost to legalize an unpermitted ADU?” as if there is one number.
There isn’t.
The real question is: how close is the unit already to a safe, documentable, approvable condition?
Your total cost may involve:
- feasibility review and inspection
- as-built drawings and site documentation
- permit fees and review costs
- correction work for code and life-safety items
- electrical, plumbing, HVAC, or structural upgrades
- possible utility-related work
- final inspections and project close-out
A clean, well-built garage conversion with minor life-safety issues is a very different job from a badly altered structure with major electrical problems, no heat, poor drainage, and no proper exit strategy.
AB 2533 may create opportunity, but it does not make the process free. The homeowners who protect themselves best are usually the ones who start with a realistic assessment instead of guessing.
Red Flags That Signal You Should Start Now
If any of these sound familiar, it is probably time to stop postponing the issue:
- you plan to sell or refinance in the next year
- you want to rent the unit legally
- the space was converted from a garage, workshop, or storage area
- electrical, plumbing, or mechanical work was added without permits
- you have received a complaint, warning, or code notice
- your insurance, lender, appraiser, or buyer has started asking questions
- you are considering “just remodeling it a little more” before figuring out the permit path
That last one is especially risky. New work added onto old unpermitted work can make the situation harder, not easier.
Don’t Wait Until a Buyer, Lender, or Inspector Forces the Issue
Most homeowners do not deal with an unpermitted ADU because they are careless. They deal with it because life moved quickly, the space solved a real problem, and the urgency of the moment outweighed the paperwork.
But once the unit exists, the question becomes whether you control the process — or whether the process eventually controls you.
Critical timing issues include:
- sale and refinance problems surfacing with no warning
- code complaints turning a quiet issue into an active one
- incorrect repair work making the final legalization process more expensive
- documentation gaps causing permit delays when time matters most
Why professional help matters:
- the first step is knowing whether the unit has a viable path
- the second is documenting existing conditions correctly
- the third is designing the right correction scope
- the fourth is coordinating permit work and construction so the project actually moves forward
This is not just a code issue. It is a property strategy issue.
Protect Your Property the Right Way
If you have an unpermitted ADU, garage conversion, guest unit, or backyard living space in San Diego, do not wait until a sale, refinance, tenant issue, or city complaint forces the problem on someone else’s timeline.
Creative Design & Build helps homeowners turn complex property problems into real project plans. We can evaluate the existing space, prepare the plans, coordinate the permit process, and complete the upgrades needed to move the unit toward compliance.
Call Creative Design & Build today at (855) 445-9455 or email [email protected] to schedule your free in-home estimate. We are located at 9275 Trade Place Suite H, San Diego, CA 92126, serve homeowners throughout San Diego County, and operate under License #1045112.
How ADU Rental Income Affects Property Taxes in California
Adding an ADU changes your California property taxes mainly through a small, separate value tied to the new unit, while your home’s Prop 13 value stays protected. SB 1164 keeps the overall bill predictable during the shift. You’ll see a modest increase from the ADU’s value, typically isolated from the main home’s assessment. Rental income from the ADU is taxable, but you can deduct expenses and depreciation. Interested in how to optimize your scenario? Stay with this guide.
Assessing the ADU and Its Impact on Your Property Tax
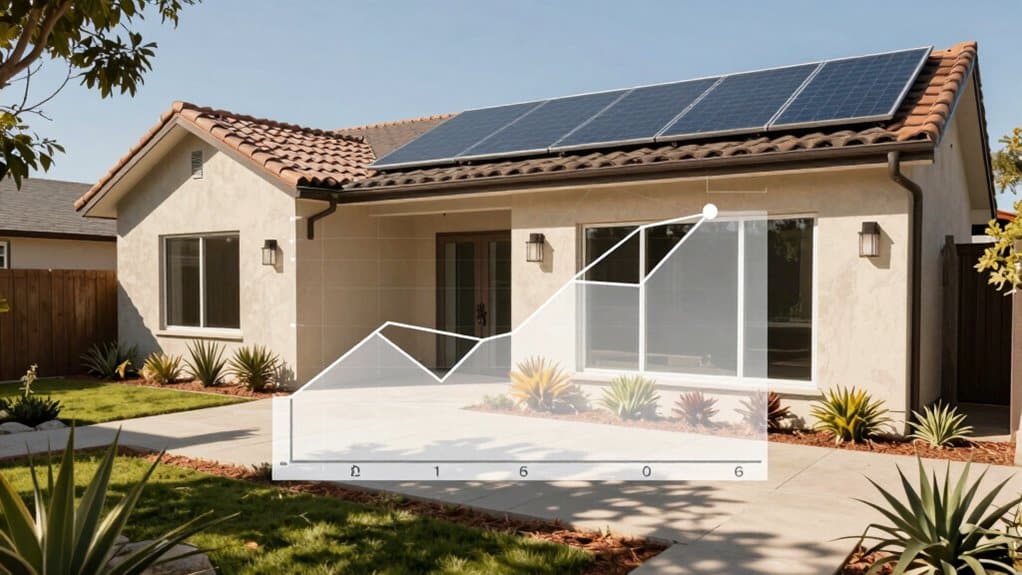
Evaluating the ADU and its impact on your property tax starts with understanding how the blended assessment works.
You’ll keep your primary residence’s Prop 13 protected value, while the ADU adds value separately to the existing property assessment. Think of it as a home addition that isn’t a full reassessment, so the blended assessment reflects only the marginal ADU value.
SB 1164 helps by preserving the current assessment unchanged, easing you into the process.
When considering ADU valuation, authorities look at construction cost or market value at completion, using standardized rates and factors like size, quality, and location.
The result feeds into your property assessment, guiding the eventual tax implications without overhauling your base.
How Reassessment Works When an ADU Is Added
When you add an ADU, the county reassesses only the new or marginal value the ADU brings to your property. The existing home's assessed value stays the same, while the ADU’s value is calculated using ADU valuation methods and market comparables.
The new total is then added to your property's base value, triggering a separate assessment for the marginal addition.
- Focus on construction costs, size, and location to determine value
- Use market data from local comparable ADUs to refine estimates
- Consider any applicable property tax exemptions that may apply to your situation
This approach keeps assessments fair and predictable.
You’ll receive a notice of the new assessment and retain the right to appeal if you believe the value isn’t properly supported by the data.
Additionally, enhanced family connectivity and independent living opportunities offered by ADUs can significantly boost their market appeal and overall property value.
How Blended Tax Rates and SB 1164 Affect Your Bill
SB 1164 changes how your ADU affects your bill by using a blended assessment instead of a full property reappraisal.
With blended rates, the ADU’s value adds to your existing home’s assessed value, but the primary residence isn’t fully revalued. You’ll still see the base 1% Prop 13 rate, plus local levies and bonds, which typically yield effective rates around 1.1% to 1.3%.
The ADU portion is taxed at its determined market value, usually near 1%, and annual increases stay capped at 2%. This approach isolates the ADU’s tax impact, reducing dramatic jumps.
In practical terms, your tax implications hinge on ADU size and local rate adds, rather than a complete reassessment of your entire property. Blended assessment offers predictability and fairness.
Rental Income From an ADU: Taxable Income and Deductions
Rental income from an ADU is taxable, so you’ll report what you earn on federal and state returns as part of your overall income.
In California, rental profits create tax liabilities, and income includes monthly rent plus any lease cancellation fees. The income is treated as a passive activity, so you report it on Schedule E for federal returns and on the appropriate California forms.
You’ll also deduct ordinary, necessary expenses to reduce taxable income, which can lower your overall bill.
- deductible expenses include maintenance, repairs, and fixture replacements
- property management fees, and owner-paid utilities are deductible
- depreciation of the ADU lowers taxable income over time
Practical Scenarios: Typical Tax Changes and Net Profit With an ADU
A practical look at how ADU investments affect taxes and net profit helps you plan smartly after adding an accessory dwelling unit.
In these scenarios, you’ll see how modest to substantial ADU costs shift yearly tax bills and cash flow. For a 500 sq ft ADU in San Diego, your tax rises 650–825 dollars, while rents of 1,500–3,000 dollars monthly generate strong after-tax profits.
With higher-cost builds, monthly rent generally outpaces the tax increase by 14–20 times, creating meaningful net gains after the first year.
Consider ADU financing options to manage upfront costs and timing of reassessment, and note property appreciation effects may amplify long‑term value.
These patterns show how tax planning and rent income align to support smart investments.
ADUs not only provide potential rental income but can also increase property value by 20% to 30%, making them a strategic choice for homeowners looking to enhance their property's worth and functionality.
Wrapping It Up
You’ll see that adding an ADU can raise assessed value and property taxes, but rules like SB 1164 and blended rates shape the bill. Rental income adds taxable income, with deductions available for qualified expenses. By understanding reassessment timing and possible exemptions, you can plan effectively. Stay attentive to local assessments and documentation, and model scenarios to gauge net profit. With careful budgeting and accurate records, you’ll make informed decisions about your ADU investment.
When Structural Engineer Review Is Required
Structural engineer review is required whenever your project presents significant risk, complex design, or regulatory thresholds that trigger independent checks. You’ll need peer reviews in certain jurisdictions, and independent design reviews for seismic or performance-based work. Foundations, lateral load paths, and superstructure connections must be verified for safety and code compliance. Licensing and professional responsibility matter, with proper documentation and qualified supervision. If you keep exploring, you’ll gain clearer steps for ensuring a compliant, durable structure.
Peer Review Mandates Across Jurisdictions
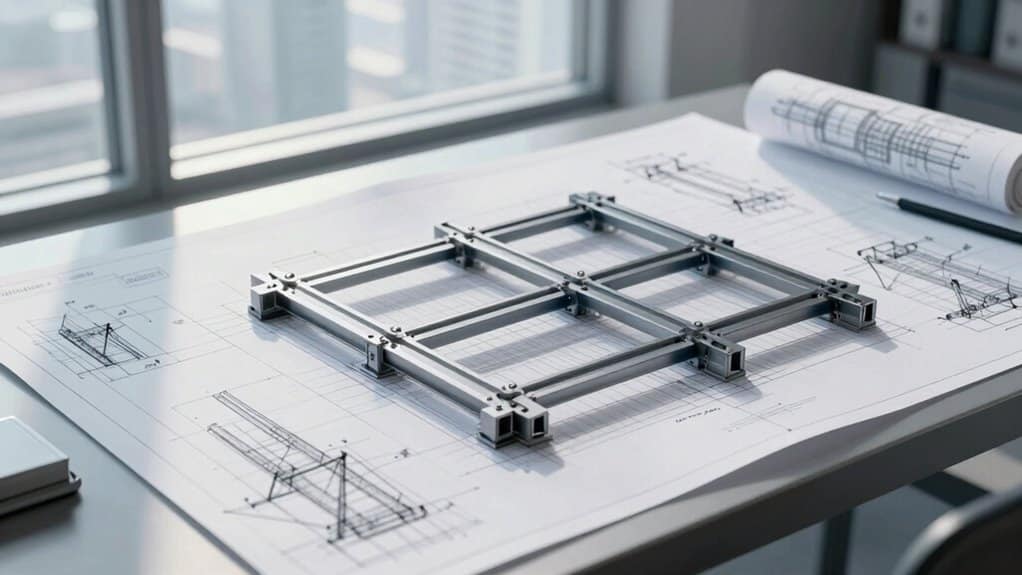
Peer review requirements vary widely by jurisdiction, and understanding these differences helps you plan safer, compliant projects.
Across Massachusetts, Connecticut, California, and Chicago, rules hinge on height, area, occupancy, and code compliance, creating distinct pathways for review. You’ll notice jurisdictional differences: some mandates arise from state codes, others from city or county policy, and a few invite voluntary participation to speed permits.
Design complexities grow where thresholds push structures into mandatory evaluation, or where owner-selected reviewers bring specialized expertise. In California, a licensed structural engineer must review construction documents, while Chicago offers optional peer review to accelerate approvals.
This mosaic means you must anticipate who reviews your plan, what they assess, and how findings affect timelines and safety. The core goal remains robust, code-aligned designs.
Projects Requiring Independent Design Review
Independent design review is triggered by specific seismic and performance criteria throughout a project, so you’ll want to identify early which rules apply to your scope.
If your plan includes base isolation, viscous damping, or nonlinear response history analyses, independent review is likely required to verify safety and reliability.
You’ll also need to reflect on performance-based approaches and site-specific geotechnical conditions, as these factors can mandate peer evaluation to guarantee robust design outcomes.
Independent Review Triggers
Independent Design Review is triggered when a project meets specific complexity and risk criteria that warrant an objective design check.
You’ll see independent assessments come into play when building complexity crosses defined thresholds, aligning with the Australian Building Codes Board’s view of how complex a project is.
Location matters, too: being in a natural disaster-prone area counts as one criterion, so Darwin projects gain an added trigger, and a single complexity element can push a review.
Public risk, design complexity, and innovative design types all inform the trigger, ensuring the review addresses potential critiques or deficiencies before issuance.
You’ll work with reviewers who maintain independence, objectivity, and clear communication throughout the process.
Seismic Design Necessities
Seismic design is a key focus when a project requires an independent design review, because the stakes are high and the details matter. You assess local seismicity, fault proximity, and expected ground motion to establish project-specific design criteria.
Soil conditions, liquefaction potential, and site amplification effects require evaluation during the design review process. Site parameters and free-field ground motion characteristics are integral to seismic analysis review, while geotechnical assessment forms provide a foundational step in the preliminary phase.
Ground motion basis selection influences retrofit design criteria and seismic performance ratings. You examine lateral load-resisting systems, verify code-compliant reinforcement and connections, and guarantee regularity reduces torsional effects.
Seismic assessments and robust design methodologies guide nonlinear analysis, performance-based design, and retrofit strategies with professional rigor.
Foundation, Superstructure, and Lateral Load Assessments
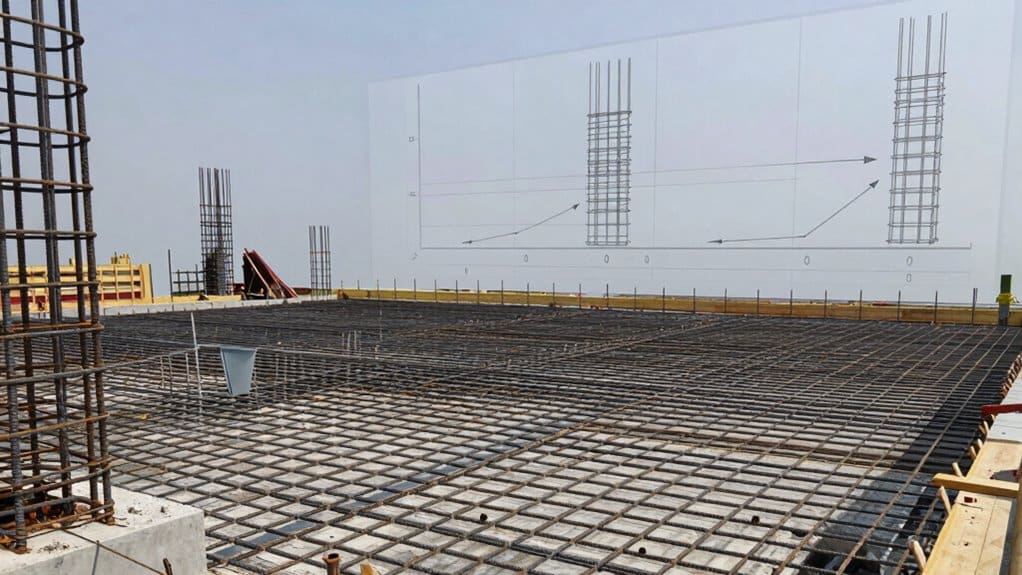
Foundation, Superstructure, and Lateral Load Assessments are about ensuring you can confirm Foundation Compliance Checks, verify Lateral Load Path Review, and validate Superstructure Design Verification.
You’ll look at how foundations carry loads, how lateral forces move through the building, and how the overall frame resists stresses, using clear criteria and codes.
This discussion sets the stage for precise, evidence-based recommendations your team can trust.
Foundation Compliance Checks
Foundation compliance checks combine careful on-site evaluation with precise documentation to verify that a structure meets both safety and loan-eligibility standards.
You’ll review soil bearing capacity, settlement, and moisture-related heaving, while inspecting cracks, footing stability, and drainage around the foundation. The process guarantees permanent installation, code compliance, and loan eligibility, especially for manufactured homes under HUD’s PFGMH guidelines.
You assess foundation durability by documenting footing sizes, piling or pier conditions, and slabs for alignment and deterioration with photos. Certification comes from engineer review of field data, notes, and photos, aligning with engineering standards.
You also confirm moisture intrusion controls and proper grading to prevent future movement, supporting lenders’ confidence in the overall structural integrity.
Lateral Load Path Review
Lateral Load Path reviews examine how forces move from the load-bearing parts of a structure to its foundation, through the superstructure, and into the ground.
You assess how a continuous path transfers lateral shear, uplift, and overturning forces, guaranteeing no gaps disrupt the flow. A solid path continuity means each element connects securely to the next, from shear walls to footings, with embedment depth and bolt spacing verified per code.
1) Foundation connections guarantee anchorage systems transfer forces without discontinuity.
2) Superstructure links, like nails, screws, and hold-downs, maintain force transfer to resistance elements.
3) Diaphragms and collectors distribute forces evenly and support path continuity across elevations.
4) Deficiency criteria flag non-continuous paths, misaligned framing, or inadequate blocking that impair transfer.
Superstructure Design Verification
When you verify a structure’s design, you’re confirming that the foundation, superstructure, and lateral load systems work together as a coherent whole.
You’ll conduct a thorough Superstructure Design Verification, tying together foundation details, framing plans, and load paths. Start with design optimization to guarantee material use is efficient without compromising safety.
During structural analysis, verify that framing plans align across drawings, floors meet loading conditions, and the system remains strong and serviceable under expected forces. Independent calculations on representative members validate adequacy, while a constructability review helps avoid construction issues and supports long-term durability.
This process confirms compliance with codes, performance criteria, and project design criteria, then documents results with visuals and measurements. Your role, as the engineer of record, remains central throughout.
Code and Specification Verification Standards
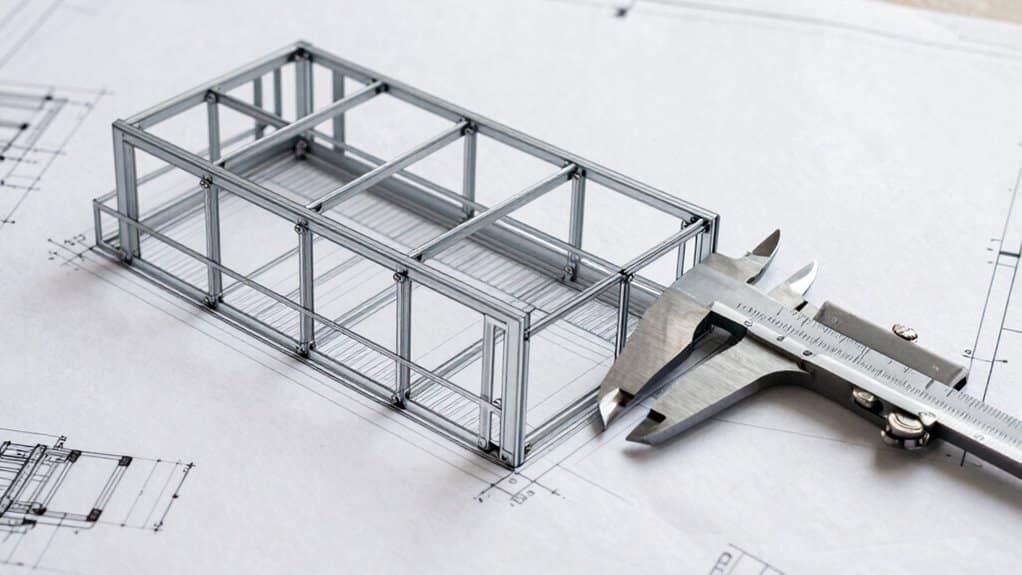
Code and specification verification standards guarantee that structural designs meet accepted requirements before construction begins. You verify code compliance by cross-checking with IBC, ASCE/SEI 7-22, and model codes that reference material standards without restating them in full.
Design verification then confirms that each component matches current acceptances for concrete, steel, and other materials.
- Confirm alignment with IBC 2024 and IEBC 2024 for new and existing buildings.
- Cross-check ACI 318/350 for concrete, and AISC 360 for steel sections and connections.
- Use verification tools to automate clause-referenced reports and load checks.
- Ascertain ongoing updates through ASCE five-year cycles and regional code adaptations.
This process emphasizes code compliance and design verification, delivering trustworthy, well-documented results for construction-ready designs.
Licensing, Professional Responsibility, and Legal Implications
Licensing, professional responsibility, and legal implications shape how structural engineers practice every day. You pursue licensing to prove you’re competent beyond a basic PE, especially for designated structures like buildings and bridges.
Licensing implications include passing FE early, then gaining four years of supervised, progressive experience, and finally meeting SE I and II exams for advanced competency.
Licensing requires FE success, four years of supervised experience, then SE I and II exams for advanced competency.
Professional accountability rests on accurate records, amplified work histories, and proper supervision by licensed engineers. You’ll need references—three licensed PEs and others with equivalent expertise—and may face firm licensure requirements with a professional-in-responsible-charge.
Legal consequences await non-compliance, from penalties to loss of good standing if you skip renewals or continuing education. States differ in recognition, but responsibility and public safety demand thorough, ethical practice.
Special Considerations for High-Razard and Performance-Based Designs
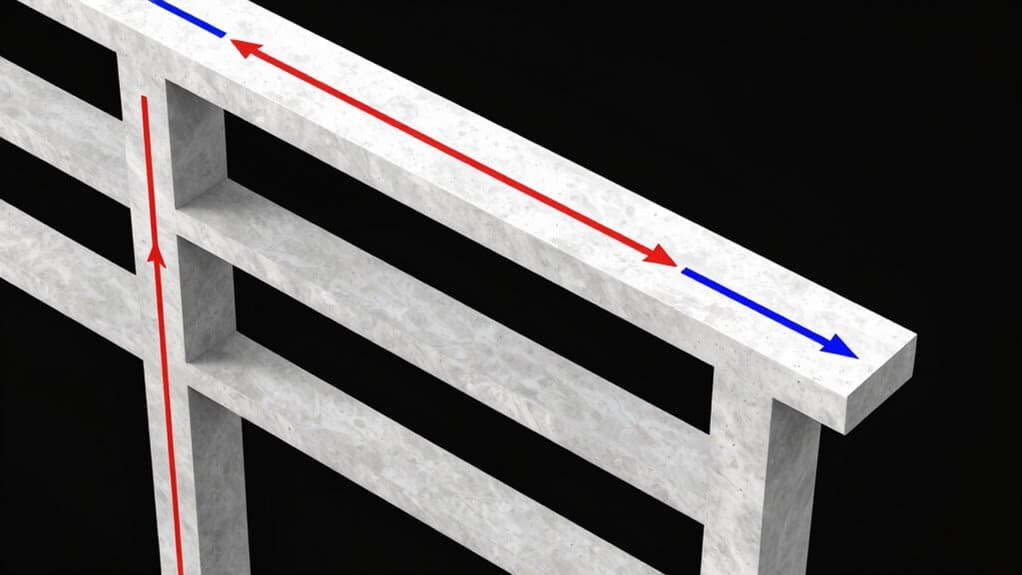
High-risk designs demand a careful, evidence-based approach that prioritizes safety without compromising practicality.
In these cases, you’ll confront complex criteria and rely on robust analysis to guide decisions. You should expect thorough evaluation of how environments influence performance, with emphasis on accurate modeling and clear risk judgments.
This topic highlights how high risk assessments and performance modeling shape design choices, ensuring resilience without unnecessary conservatism.
- Assess high-risk scenarios using site conditions, loads, and fault sources.
- Apply nonlinear response-history analysis to verify seismic performance.
- Verify wind, flood, and material behavior against code and project criteria.
- Integrate retrofitting status, drift limits, and site-specific hazard analyses into decisions.
Wrapping It Up
Conclusion: You’ll see that recognizing when a structural engineer review is needed protects people, property, and progress. By checking jurisdiction mandates, project scope, and critical elements like foundations and lateral systems, you confirm the appropriate independence and accuracy. Verification standards, licensing duties, and risk considerations shape responsible practice. Adopting a clear decision process helps you balance safety with efficiency, ensuring high-importance designs meet code, performance goals, and professional obligations without unnecessary delay.
California Title 24 Energy Standards Explained for Home Remodels
California Title 24 sets the energy rules you must meet when remodeling a home. You’ll trigger requirements for windows, insulation, ducts, lighting, HVAC, and electrical systems based on the scope of work, not every repair. The 2025 code tightens standards with more duct sealing, stronger ventilation, and new electrification options, plus solar and battery mandates for many projects. You’ll use HERS testing and California-certified energy models to demonstrate compliance before permits. If you keep reading, more specifics await.
What California Title 24 Covers for Home Remodels
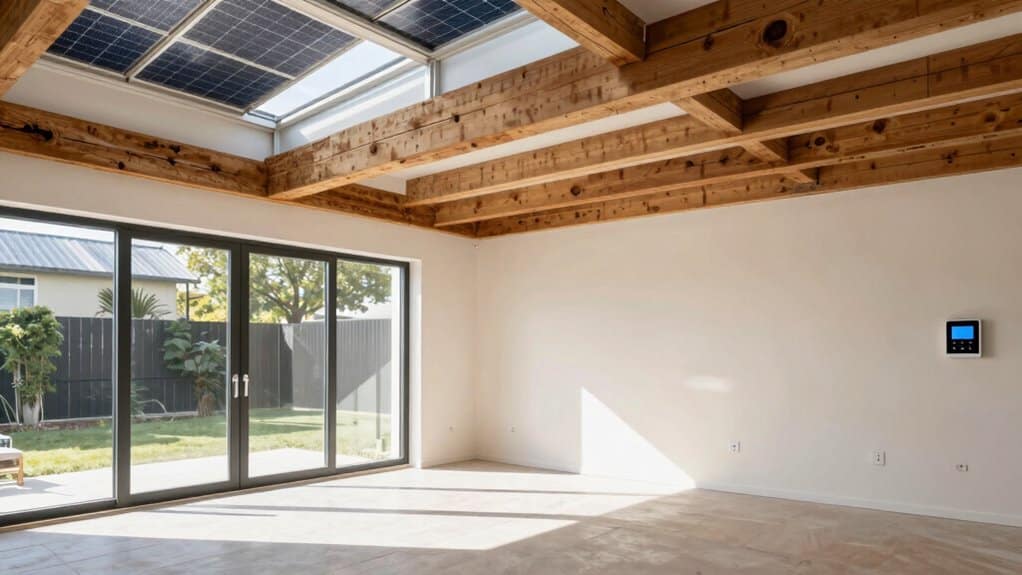
California Title 24 sets the rules for what counts as a remodel from an energy-efficiency standpoint, so you’ll want to know when changes trigger its requirements.
In short, certain renovations activate compliance, while some repairs do not. If you replace or enlarge windows and doors, upgrade HVAC systems, modify ducts, or alter insulation, you’re facing Title 24 compliance.
Lighting changes in kitchens, bathrooms, and garages, plus water heater upgrades, also count toward energy upgrades.
Distinctions matter: alterations, which modify energy usage, require full compliance certification, whereas simple repairs don’t.
Distinctions matter: alterations require full energy-compliance certification, while simple repairs do not.
Building envelope work—roofs, exterior walls, and insulated floors—can trigger standards, especially when you add space or change usage.
Permits and pre-construction documentation often formalize these compliance challenges before any work begins.
Key Changes for 2025 Energy Code Adoption
The 2025 Energy Code adoption brings notable shifts that affect nearly every project, from new builds to alterations.
You’ll face more stringent requirements across buildings, reflecting a roughly 30% increase in stringency versus 2022 standards. The scope now covers new construction, additions, and alterations for residential and nonresidential buildings, with single-zone heat pump baselines expanded.
HVAC and envelope rules tighten, including mandatory duct sealing, an R-22 (or 0.043 U-factor) ceiling/roof insulation, and reduced whole-house fan and attic vent area.
Electrification expands options for space heating, water heating, cooking, and pool heating, accelerating the shift from natural gas.
PV and battery mandates grow, promoting energy resilience. Expect enhanced lighting controls and sensors, all aligning under energy efficiency goals within the building codes framework.
How Ventilation and Heat Pumps Impact Remodels
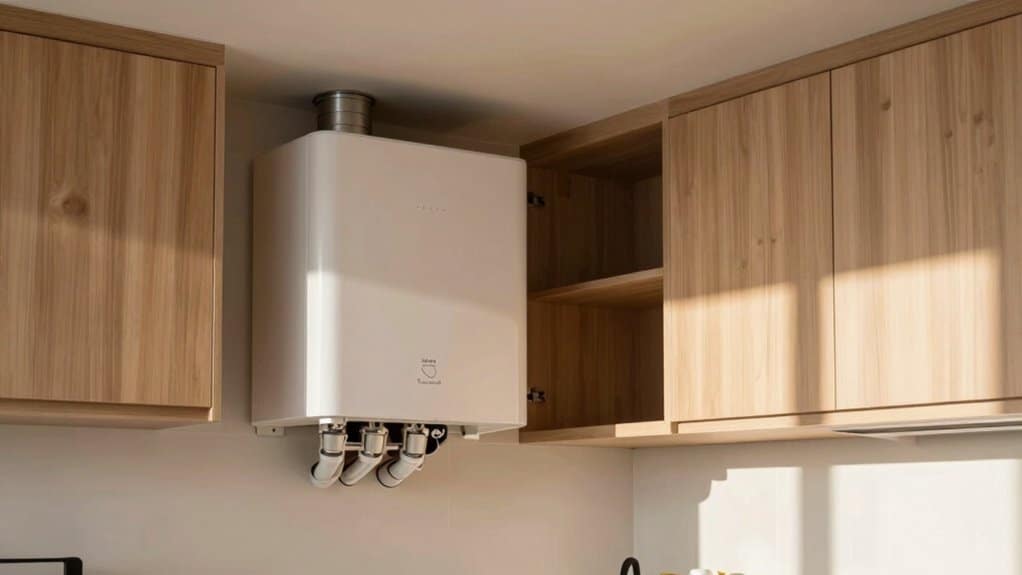
As the 2025 Energy Code expands, ventilation and heat pump requirements increasingly shape remodel projects.
You’ll see the minimum ventilation volume rise to 1 cfm per 100 sq. ft. plus 7.5 cfm per occupant, with occupants based on bedrooms. A 3-bedroom, 1,800 sq. ft. townhouse needs about 48 cfm continuous ventilation, and the new formula uses the larger of occupant-based or area-based rates.
Whole-house ventilation becomes mandatory, via a continuous bathroom fan or central HVAC supply/return. In multifamily buildings, balanced ventilation is required, and HERV paths may apply to improve cost-effectiveness.
Whole-house ventilation becomes mandatory via continuous bathroom fan or central HVAC supply/return; balanced ventilation required in multifamily buildings.
Heat pump efficiency matters, with updated VRF options and prescriptive verification by HERS raters. Expect stronger duct sealing, testing, and upgraded airflow controls as you remodel.
Ventilation strategies and heat pump efficiency matter.
Solar, Batteries, and Electric-Ready Requirements
Solar, Batteries, and Electric-Ready Requirements are shaping how you plan new residential, commercial, and multifamily projects.
Title 24 mandates solar PV systems for new builds, sized by floor area and occupancy factors, with calculations like kWPVdc = (CFA × A) / 1000.
New 2025 updates raise PV capacity in certain occupancies and apply to nonresidential and high-rise multifamily projects.
Battery storage is now required alongside PV for many commercial properties, sized by Section 140.10 equations, with a 25% PV size reduction when paired with qualifying storage.
You’ll use tools such as the Solar PV Calculator and California Solar Shade Analysis to verify access and sizing.
Compliance may apply from January 1, 2026, for permits issued afterward.
solar panel integration, battery storage requirements.
Compliance Tools and Resources for Remodel Projects
Compliance tools and resources for remodel projects keep you aligned with Title 24 requirements at every stage.
You’ll use HERS verification for mechanical changes, additions, and major remodels to confirm post-installation efficiency, performed by certified HERS raters.
Title 24 calculations happen before permits, with energy models submitted by your energy consultant and generated through California Certified Energy Reading programs.
Title 24 calculations precede permits, using energy models crafted via California Certified Energy Reading programs.
CEC-approved tools, like EnergyPro and CBECC, simulate envelope, lighting, HVAC, and water heating performance, ensuring official permit documents are valid.
Compliance forms help identify the right Part 6 forms, while MAEDbS lists approved luminaires your designer must specify.
Local AHJs verify JA-marked products and forms, guiding your permitting, planning, and post-construction commissioning alongside energy consultants for continued compliance.
Wrapping It Up
You’ll find California Title 24 remodeling rules clearer than you’d expect, with practical steps you can take now. As codes evolve, focus on energy efficiency, ventilation, and the growing role of heat pumps, solar, and storage. Keep plans aligned with 2025 changes, verify requirements for electric-ready spaces, and use available compliance tools to stay on track. By staying proactive and organized, you’ll simplify approvals, save energy, and deliver a safer, more comfortable home renovation.
Permit Requirements for ADUs and Additions in San Diego County
In unincorporated San Diego County, ADU and addition permits depend on your zoning, unit type, and lot. You’ll need detailed site plans, architectural drawings, and setback and height information, plus potential environmental or septic documents. Detached ADUs can be up to 1,200 sq ft; JADUs up to 500 sq ft; attached units have their own size rules. Expect a 60‑day target for approvals after a complete application. If you keep exploring, you'll uncover key steps and timelines in detail.
ADU Eligibility and Zoning in Unincorporated San Diego County
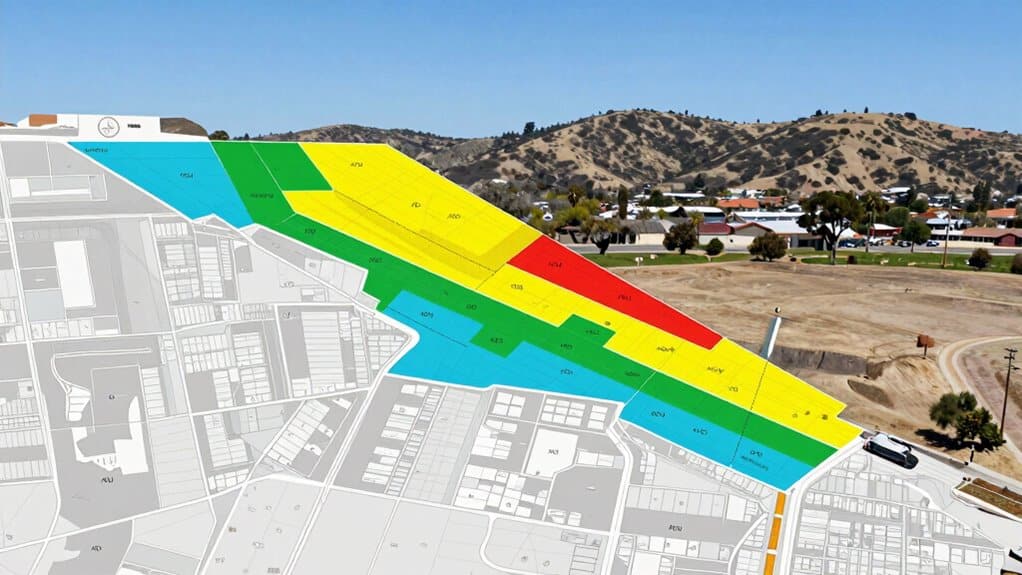
In unincorporated San Diego County, ADU eligibility and zoning hinge on whether your lot is residential and how you plan to use the space.
If your property is zoned for residential use with an existing or proposed single-family dwelling, you’re eligible for one detached ADU, and you can convert permitted spaces within an accessory structure or the dwelling itself. A junior ADU is also permitted alongside a detached ADU on single-family lots.
For multifamily sites, residential zoning allows two detached ADUs or space-conversions, with height and conversion limits.
You’ll face overlay and fire-zone considerations that affect feasibility. Understand ADU financing options early, and anticipate zoning compliance challenges to avoid delays or redesigns.
Size Limits and Unit Types for ADUs
Size limits for ADUs are defined clearly, with different caps depending on whether the unit is detached, attached, or a JADU.
You’ll find that detached ADUs can reach up to 1,200 square feet, with a minimum of 150 square feet, and no dependency on the primary residence’s size.
Attached ADUs are limited to 50% of the primary residence, capped at 1,200 square feet, though studios or one-bedroom units may go up to 850 square feet and two-bedroom units up to 1,000 square feet, with a 150-square-foot minimum.
JADUs cap at 500 square feet, starting from 150 square feet, created within the existing home.
Setbacks, Height, and Placement Requirements

Setbacks, height, and placement rules determine how you can position an ADU on your property while meeting safety and zoning standards.
You’ll see that side setbacks vary: newly constructed detached ADUs require a minimum 4-foot side setback, with zero side setbacks allowed for some small detached units, while exterior side yards on corner lots need 4 feet from easements or streets.
Rear setbacks also differ, with zero rear setbacks for certain small detached ADUs outside high fire zones and a mandatory 4-foot rear setback in Very High Fire Hazard zones.
Height rules matter too: under 16 feet you may enjoy reduced setbacks, but taller structures face stricter limits.
Placement requires a 6-foot separation from other structures, and front encroachment can be allowed under recent state and local rules for eligible sizes.
Setback regulations and height limitations guide every decision.
Required Permit Documents and Review Timeline
Maneuvering the required permit documents and the review timeline starts with knowing what you must submit and when. You’ll need detailed site plans and architectural drawings to prove zoning and building code compliance, plus documentation showing residential zoning and an existing primary dwelling.
Site plans must display setbacks, building separations, and lot coverage, while architectural plans specify square footage, height, and entrance locations for your ADU or JADU. Environmental notes may be required, such as septic plans or fire department approvals in wildfire-prone areas.
The permit review process aims to finalize approvals within 60 days of a complete application, with San Diego County usually taking 4–10 weeks. Incomplete submissions trigger corrections that pause the clock, and streamlined pathways may apply if standards are met.
When planning for an ADU, it's crucial to understand the benefits of incorporating sustainable features and working closely with professionals to enhance property value.
Additions, Ownership, and Special Programs for 2026 ADUs
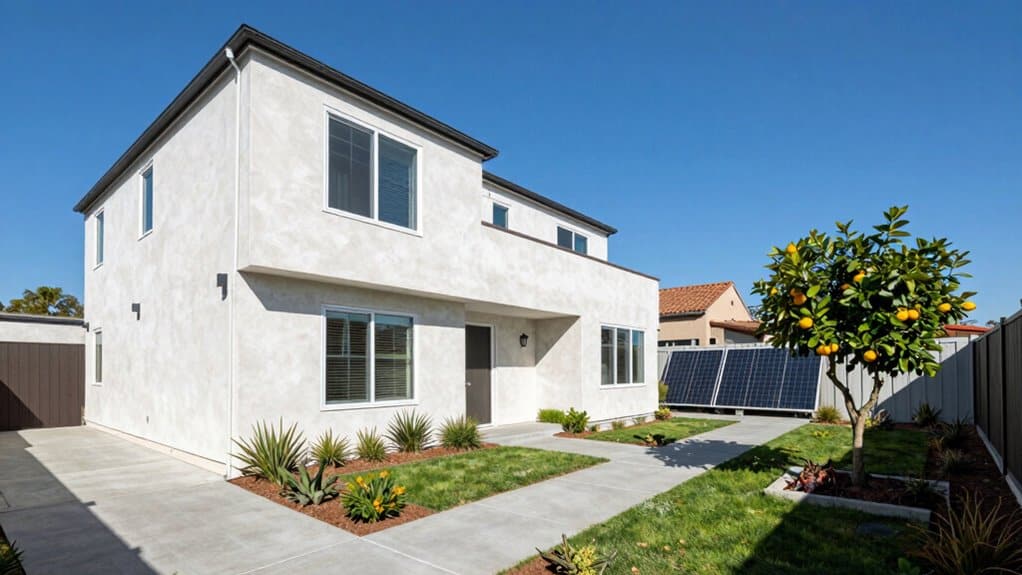
ADUs in 2026 bring notable changes to ownership, occupancy, and special programs, making it easier for property owners to maximize usable space while meeting state and local requirements.
You’ll find that ADU ownership can’t be sold separately from the primary residence under standard rules, except in approved affordable housing programs or SB 9 lot splits, which must meet strict zoning and affordability criteria.
Owner-occupancy is no longer required for most ADUs, allowing you to rent both the main house and ADU if you choose.
JADUs retain occupancy rules, but new AB 1154 removes them for JADUs with separate bathrooms.
Multifamily sites gain flexibility with expanded detached ADU limits.
Special programs, including bonus and standard plan options, help streamline approvals and reduce costs.
Wrapping It Up
You’ll find that ADUs and additions in unincorporated San Diego County follow clear rules focused on safety and livability. By understanding eligibility, size limits, setbacks, and permit documents, you’ll streamline the process and avoid delays. The process emphasizes proper planning, timing, and coordination with county review steps. With careful preparation and attention to requirements, you can confidently pursue thoughtful upgrades that enhance value and housing options while staying compliant and informed throughout 2026.
Garage Conversion Vs Detached ADU: Pros, Cons, Permits, Costs
Garage conversions convert your existing garage into usable space at a lower cost and with quicker timelines, while detached ADUs add privacy and independent living space but at higher upfront investment. Pros include better yard use for conversions, and rental income for ADUs; cons cover limited layout in conversions and greater permitting for ADUs. Costs vary widely—$10k–$150k for conversions vs $100k–$300k for detached units—plus permitting needs. If you want more details, you’ll gain clearer guidance as you explore options.
Garage Conversion: Overview and Key Benefits
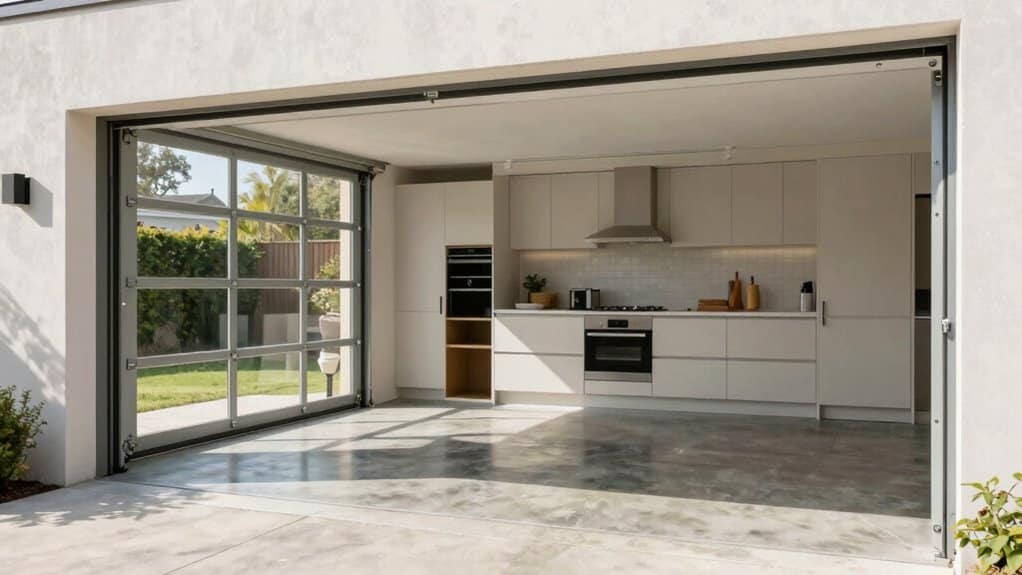
A garage conversion transforms an underused space into valuable living square footage without the upheaval of a full home addition. You repurpose the existing structure to create an extra bedroom, home office, guest suite, or playroom, adding usable space without sacrificing outdoor yard area. The conversion process integrates proper insulation and heating, enabling seamless connection with the rest of your home. It’s considerably more affordable than traditional extensions, since the basic structure is already in place, reducing labor and materials. This approach delivers strong return on investment and can increase resale value by 10-20% when done well. Design options let you tailor layouts, windows, and finishes to fit your needs while maximizing comfort and storage potential. For those considering such projects, hiring a professional contractor ensures a successful remodel tailored to your specific needs.
Detached ADU: Overview and Key Benefits
Detached ADUs offer notable space and privacy you’ll appreciate, with a separate entrance and living areas that keep you autonomous from the main home. They also deliver a strong ROI by boosting rental income and property value, while providing flexible options for multigenerational living or caregiver housing. In short, you gain a private, efficient micro-housing solution that can enhance your property's financial and functional appeal. Additionally, ADUs boost market appeal by appraising 20-30% higher than homes without them, making them a smart investment choice in competitive markets.
Key Benefits Overview
Detached ADUs offer distinctive advantages that make them a compelling option for homeowners. You get design flexibility from ground up, tailoring layouts to fit modern studios or cozy cottages. Separate structures let you choose unique styles and materials without the constraints of existing buildings, supporting a standalone design that appeals to independent living. You’ll find greater architectural variety compared to attached or converted spaces, with flexibility in size typically 600-1,000 square feet for smaller households. These units also boost property value by adding usable living space and offering rental income, which helps cover mortgage or expenses. They support multigenerational living, aging in place, and a steady income stream, aligning with design trends and homeowner preferences. Additionally, Creative Design and Build Inc. ensures that the ADUs are crafted with high-quality materials and modern construction techniques for durability and energy efficiency.
Space and Privacy Value
Space and privacy come into sharper focus with a detached ADU, as its standalone nature preserves your main home's flow while offering a separate living space.
This setup supports space optimization by using a compact footprint and efficient layouts, letting you maximize backyard potential without overwhelming the property. Built-in storage and a smaller kitchen and bathroom minimize footprint while preserving usability.
The standalone structure provides complete separation from the main house, delivering strong privacy enhancement for renters, guests, or a dedicated home office or studio. A dedicated entrance and facilities help maintain autonomy and reduce family distractions, improving focus.
Seamless integration with gardens and patios preserves outdoor flow, while flexible zoning accommodates irregular lots and setbacks for harmonious living. Tailored ADU Solutions ensure that the designs align with the homeowner's vision and maximize property potential.
Financially Strong ROI
Financially strong ROI for a detached ADU hinges on a blend of upfront cost efficiency, solid rental demand, and favorable tax incentives.
You can expect robust returns across options, from budget modular ADUs at 13.4% annual ROI to mid-range setups near 10.1%.
Rental income varies by market, with Seattle, San Diego, and Florida examples showing compelling cash flow, even after costs.
Property value appreciation supplements income, as ADUs can boost resale values and overall home worth.
Construction costs range widely, but modular builds offer faster timelines and reduced on-site work, improving financial forecasting.
Consider investment strategies that combine rent, tax benefits, and potential appreciation.
Use careful budgeting, track performance, and align ADU goals with long‑term financial objectives.
A detached ADU can enhance the overall charm of Santee community by integrating seamlessly with existing homes and boosting property value.
Cost Comparison: Garage Conversion Vs Detached ADU
When evaluating costs, a garage conversion typically costs far less upfront than building a detached ADU, but the exact figure depends on the existing structure and required upgrades.
You’ll see lower initial costs because you’re using the current space, yet older garages may need wiring, plumbing, or roof work. A garage conversion can range roughly from $10,000 to $150,000, depending on scope, with a two-car option hitting around $120,000.
A detached ADU starts higher, often $100,000 to $300,000, due to new foundations and full utilities. Consider cost factors like site work, materials, and labor, which drive totals.
With respect to rental income, expect about $1,000–$1,800 monthly for conversions and roughly $1,600–$2,500 for detached units, influencing overall ROI and timelines.
Permits and Approvals: Garage Vs Detached ADU
Permits and approvals for garage conversions and detached ADUs require careful navigation through local and state rules, and getting this right sets the project up for smoother construction.
You’ll face permit requirements that cover building, electrical, plumbing, and mechanical work, plus zoning approvals to confirm eligibility.
Application processes demand complete design plans, site surveys, and compliance documentation before submission.
Detached ADUs often require extra reviews, like site plans and fire-safety or historical permits, which can extend timelines.
Both paths rely on state licenses and local approvals to move forward confidently.
In some areas, fast-track options exist for garage conversions, while other jurisdictions maintain stricter limitations.
- permit requirements and application processes for both options
- evidence of zoning compliance and site plan requirements
- review timelines and resubmission steps
- differences in California, New York, and city-level rules
Layout, Space, and Privacy Considerations
Garage conversions and detached ADUs differ not just in structure, but in how layout, space, and privacy flow into daily living.
You’ll feel layout flexibility limited in a garage due to fixed walls, roof, and foundational elements that cap usable space.
With a detached ADU, you gain design freedom, including one or two bedrooms and customizable ceilings, windows, and lighting, boosting space optimization.
With a detached ADU, you gain design freedom and optimized space.
Privacy concerns are more pronounced in a conversion because of shared walls with the main home, whereas a detached unit offers independent entry and complete separation.
Consider utility access: garage conversions leverage existing connections, while detached ADUs require new hookups.
Outdoor integration matters too, as garage conversions preserve yard space, while detached structures reshape landscaping and setbacks.
ADUs provide flexible living solutions for family members or tenants and often yield a higher ROI compared to traditional additions.
ROI and Long-Term Value
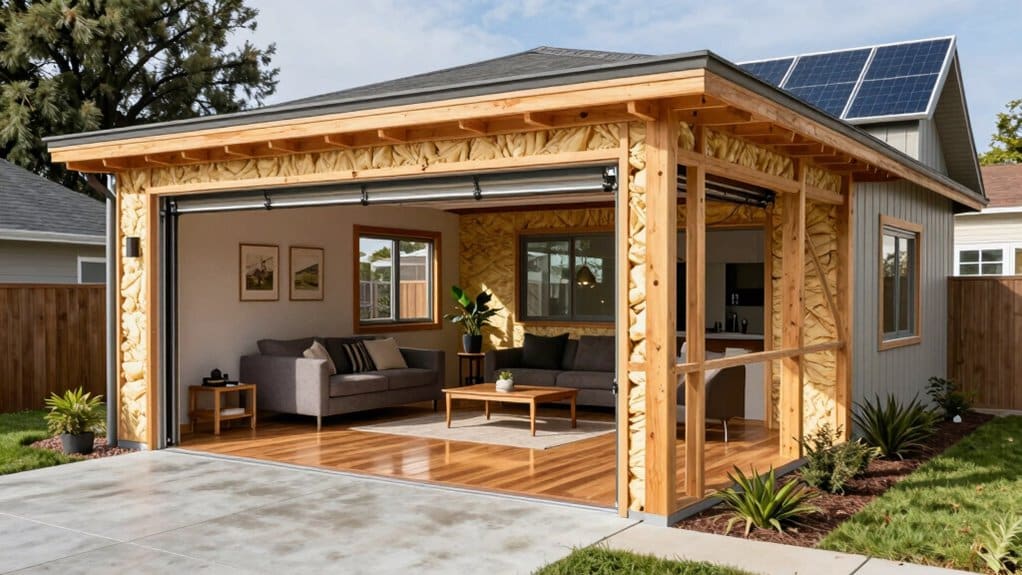
ROI and long-term value aren’t just about upfront costs—they hinge on steady rent, appreciation, and ongoing maintenance. You’ll see garage conversions typically offer strong ROI with lower initial capital, while detached ADUs can yield higher returns but require more investment; the key is balancing cash flow with potential property value growth. As you compare, consider long-term trends in value appreciation and how annual operating costs affect your net gains. Additionally, ADUs can increase property value by 20-30%, providing significant financial benefits in the right markets.
Long-Term ROI Trends
Long-term ROI from garage conversions and detached ADUs shows strong potential, with both paths delivering meaningful value over time. You’ll see steady equity growth as functional spaces add resale appeal, especially when finishes and utilities are well executed.
Market Trends influence ROI, while smart Investment Strategies help you maximize returns through durable design and efficient costs. Over time, conversions tend to maintain higher percentage recoveries than broader home additions, yet ADUs offer sizable absolute value gains via rental income and increased property value in active markets.
- Market Trends shape long-term value, with location and demand driving appreciation and rent potential
- Investment Strategies emphasize quality finishes, efficient workflows, and cost control
- Rental income from ADUs supports ongoing returns alongside resale gains
- Equity accumulation benefits from usable square footage and strategic upgrades
Value Growth Impact
Value growth from home improvements hinges on how you manage both cost and market demand.
When you compare garage conversions to detached ADUs, you’ll notice different value growth paths. Garage conversions typically deliver value appreciation in the 20-30% range, with a $80,000-$180,000 addition common for many homes.
In high-demand markets, both options show 20-30% value rises, but detached ADUs can push toward the upper end, sometimes 25% or more, and even higher appraisals in sizable lots.
ROI remains strong: conversions often yield 70-80% with solid cash-on-cash returns, while detached ADUs commonly reach 70-80% cost recouped in value per NAHB data.
Ultimately, garage conversions usually pay back faster, 3-6 years, whereas detached ADUs trend toward 4-7 years, guided by market demand and cost.
Practical Decision Guide: Which Option Fits Your Property
Considering whether to convert a garage or build a detached ADU hinges on your property’s size, budget, and long-term goals, and the choice can greatly shape how you use your yard and home.
Your decision hinges on property size and zoning regulations, as they determine footprint, setbacks, and allowable square footage. If you have a small lot, a garage conversion keeps yard space intact and speeds permitting. A larger lot offers more flexibility for a detached ADU, preserving green space yet requiring careful planning.
Budget timing also matters: garage projects cost less and finish faster, while detached ADUs demand more time and capital but can yield higher rental returns. Consider long-term value, privacy, and how neighbors view each option.
- Assess property size and zoning regulations to identify feasible footprints
- Compare costs, permitting timelines, and potential revenue
- Weigh impact on yard, privacy, and future resale value
- Align choice with long-term lifestyle and goals
Wrapping It Up
If you’re choosing between a garage conversion and a detached ADU, weigh cost, permits, and space first. A conversion is cheaper and quicker but uses your existing footprint and may limit exterior access. A detached ADU offers privacy and flexibility, with higher upfront costs and longer approvals. Consider your property’s lot, zoning, and long-term plans. Use this guide to balance budget, lifestyle needs, and value—making a well-informed decision that enhances livability and resale potential.
Hidden Remodeling Costs Homeowners Frequently Overlook
Hidden remodeling costs sneak in from several angles you might overlook. Expect structural assessments and temporary supports to protect against collapse, plus permit fees that can surprise your budget. Plumbing and electrical work can spike costs, especially if major overhauls or panel upgrades are needed. Don’t forget temporary housing, storage, and change orders—plus a prudent contingency for unforeseen issues. And ongoing maintenance after the project ends can quietly drain funds. If you keep exploring, you’ll uncover practical ways to plan ahead.
Unexpected Structural Issues That Inflate Renovation Budgets

Unexpected structural issues can quietly derail a renovation budget, turning a straightforward remodel into a major project when you least expect it.
When you remove a load-bearing wall, you risk collapse if you skip proper support. You’ll need temporary beams or columns to redistribute weight, and if you ignore this, ceilings sag and walls crack.
When removing a load-bearing wall, don’t skip temporary support or you risk ceiling sag and wall cracks.
Structural assessments help catch problems before they snowball, and renovation inspections verify that engineers’ plans are correctly implemented.
Foundation cracks or settling pose another surprise: vertical cracks signal settling, horizontal ones indicate pressure issues. Repairs, like underpinning or pier installation, can cost thousands more.
Inadequate framing for new loads, especially in additions, demands reinforced joists or steel, raising costs. Regular assessments protect budgets and safety.
Retiling is essential for maintaining hygiene and functionality, and neglecting this update can also contribute to unexpected increases in renovation costs.
Hidden Code Compliance and Permitting Pitfalls
Hidden code compliance and permitting pitfalls can quietly derail a project if you don’t plan for them upfront. You’ll face permit pitfalls that can surprise you with fees, reviews, and hearings beyond the basic construction cost. Building, historic district, electrical, plumbing, and zoning permits each carry distinct fees that add up quickly, from hundreds to thousands of dollars. Compliance costs often extend beyond initial estimates as inspectors require upgrades or documentation to meet current standards. You may discover outdated systems or materials during inspections, triggering unplanned work and delays. Early coordination with local authorities helps you anticipate requirements, avoid stop-work orders, and reduce last-minute surprises. It is crucial to ensure that your contractor has the necessary licensing and legal compliance to avoid legal risks and potential project setbacks.
Plumbing and Electrical Surprises That Drive Costs up
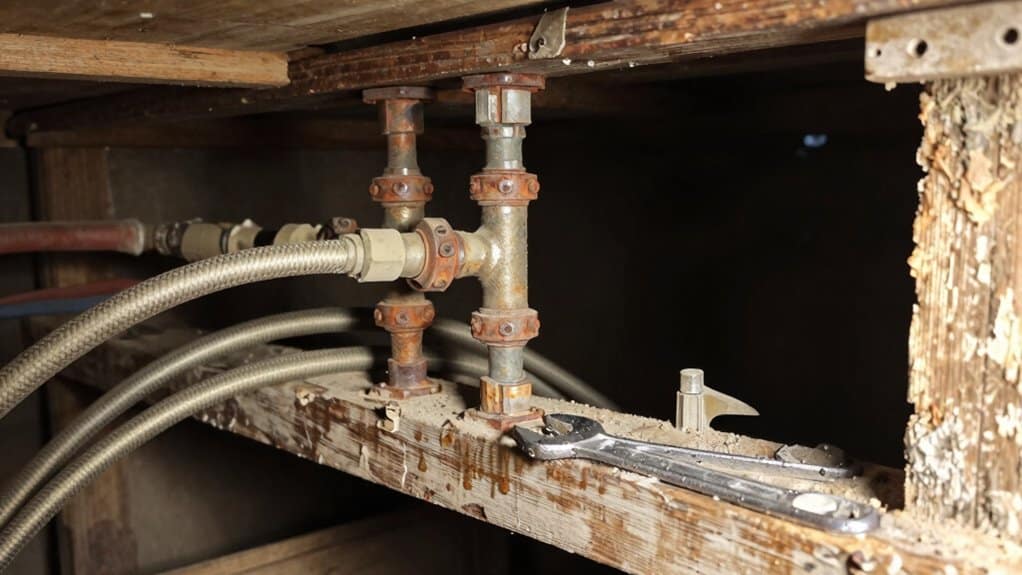
Many remodeling projects hit a snag when plumbing and electrical work reveals itself as more costly than expected.
Many remodels surprise you when plumbing and electrical costs climb higher than expected.
You’ll often face plumbing surprises that push budgets higher, from minor fixes at 150–350 dollars to major overhauls like full re-plumbing or main sewer work that can reach 2,000–15,000.
Electrical upgrades follow a similar arc: basic repairs stay under 400 dollars, but panel upgrades or new circuits run 500–2,000, with older homes needing more substantial safety updates.
In bathrooms, intensive plumbing work can lift typical remodel costs, while standard full bath projects commonly land in the 12,000–25,000 range.
Labor cost increases, 3.4% year over year, amplify these figures, so plan for steady, informed decisions and budget cushions for plumbing surprises and electrical upgrades.
Before starting a remodel, it is crucial to obtain detailed estimates from contractors to help mitigate unexpected expenses and align budget expectations with the project's scope.
The True Price of Temporary Housing and Living Disruptions
Temporary housing and living disruptions during a major remodel can quietly become one of the project’s biggest temptations to underestimate. When a renovation stretches 2–3 months, you’ll likely face temporary housing costs that quietly add up.
In Denver, expect monthly rents around $1,700 for a one-bedroom, with total housing bills for the period ranging from about $3,400 to $5,100. If you opt for extended-stay hotels, costs can run from $4,000 to $6,000 per month.
Add storage and moving, and expenses climb by thousands more. You’ll also encounter higher daily living costs and meal-service options that replace home cooking.
Plan for furnishing temporary spaces, meanwhile, as initial investments can be substantial. A proactive budget reduces stress and unexpected financial strain.
Change Orders and Contingencies: Why Budgets Spiral
Change orders and contingencies aren’t rare annoyances; they’re real drivers of budget growth you’ll see from the first bid to the final bill.
As you track changes, you’ll notice discretionary vs. non-discretionary shifts each add about 4% to 8% of costs, and overall averages often swing 10% to 25% higher than the original plan.
Change Order Realities
Change orders and contingencies are a real driver of budget spirals in construction projects. You’ll see change orders average about 10% of the total contract value, with some projects hitting 25%.
Major builds commonly run 10 to 15% in change order terms, while contract modifications of 5 to 10% are expected in many endeavors.
On residential work, projects priced 250K–500K average 6.3 change orders, more than double those under 250K, and higher-priced homes over 500K use more orders too, though the growth slows.
Change order impacts include delayed processing, pricing gaps, and cascading costs to later phases.
To avoid financial strain, it's crucial to allocate budget for unexpected expenses during the initial planning phase, ensuring that you can accommodate these potential changes without compromising your project.
Contingency Necessities
Contingency planning is essential because budgets rarely stay perfectly on track once a remodeling project begins. You’ll use a contingency percentage to cover surprises, from site conditions to price shifts.
The standard range is 5% to 15% of the total budget, with higher-risk projects needing 10% to 20% and larger loans sometimes requiring 20% to 30%. This isn’t extra money for frivolous changes—it’s protection against real risks identified in a risk assessment.
Budget forecasting should allocate contingencies across components, such as kitchens, bathrooms, and structural work, while considering project complexity. A dedicated team with over 35 years of experience can ensure stress-free remodeling and help you manage these contingencies effectively.
Remember that 1 in 3 renovations overrun their costs, so maintain disciplined tracking and update figures as design details firm up. This approach supports steady progress and informed decision-making.
Inspection Gaps: The Hidden Costs of Mold and Water Damage
Hidden remodeling costs often hide in plain sight, because mold and water damage can linger behind walls long after a home inspection seems complete.
When you plan renovations, you’ll want to evaluate mold inspection and water damage risks that aren’t always obvious.
Costs vary: a typical mold inspection runs about $300-$400 for smaller homes, with national averages higher, and on-site testing adding $250-$500 plus lab analysis.
Invasive techniques raise prices, and more samples boost the bill.
Remember that hidden water intrusion can mask mold spread, so accurate testing matters.
A thorough inspection reduces future surprises, yet remember that some cases require follow-up remediation, which can range from a few hundred to several thousand dollars.
Prioritize professional oversight to avoid conflicts.
Long-Term Maintenance Hidden Costs After a Remodel

As you plan a remodel, you’ll want to contemplate the long-term maintenance costs that quietly mount after the project wraps up. Ongoing upkeep, hidden long-term repairs, and regular upkeep expenses can strain budgets just as much as the initial construction costs, so identifying them early helps you stay prepared. It's crucial to consider contingency funds for unexpected issues like mold repair that might arise during or after the remodeling process.
Ongoing Maintenance Costs
Ongoing maintenance costs after a remodel quietly accumulate as homes age and systems wear in. You’ll notice these expenses grow with time because labor and material prices stay high, and aging components demand frequent attention. Ongoing maintenance, not just big upgrades, drains budgets when unexpected wear shows up. Hidden expenses include steady replacements for aging roofs, windows, and mechanicals, along with routine servicing that prevents major failures. With labor shortages pushing costs higher, even small fixes can feel like sizable surprises. Regular maintenance of kitchen cabinets and drawers can prevent the need for costly replacements down the line. By planning for regular upkeep, you can spread costs and avoid debt from sudden repairs. Track seasonal needs, prioritize safety-critical items, and set aside a maintenance fund to keep your home reliable, efficient, and comfortable over the long term.
Hidden Long-Term Repairs
Long-term repairs after a remodel can quietly reshape your budget, even when the big projects seem finished. You’ll uncover hidden needs as structures settle, and these costs can linger long after construction ends.
Prioritize long term inspections and structural assessments to catch issues early, before they escalate into major expenses. You may face foundational challenges, water damage, or pests that weren’t obvious at first glance, especially in older homes.
Planning for contingencies helps you avoid surprises when the bill arrives. By staying proactive, you preserve safety and value, rather than reacting to costly breakdowns. With careful monitoring, you reduce the chance of sudden shutdowns or inconvenient repairs disrupting daily life.
- Structural assessments reveal hidden risks before they grow
- Long term inspections identify moisture and mold threats
- Foundation checks catch settlement早
- Pest assessments prevent unseen damage
- Proactive findings guide budget-aware decisions
Regular Upkeep Expenses
Regular upkeep expenses after a remodel can quietly accumulate, especially as your home ages and labor costs rise. You’ll notice regular service needs emerge—often tied to aging systems and frequent wear.
Routine inspections help you spot small issues before they become costly failures, and they align with rising repair costs driven by labor inflation. As projects age, labor remains a dominant share of expenses, so budgeting for ongoing maintenance is smart.
Your 42-year-old home and many pre-1980 structures mean more frequent checks on windows, roofing, HVAC, and doors. Expect steady maintenance spending, with continued demand for routine updates.
Wrapping It Up
You’ll finish with a clearer picture of renovation costs and what really drives them. By spotting hidden issues early, you can avoid surprises and keep projects on track. Stay proactive with inspections, permits, and contingencies, and communicate openly with your team. Remember that maintenance matters long after the remodel, so plan for ongoing care. With careful budgeting and realistic expectations, you’ll restore and refresh spaces confidently while minimizing disruptions and stress. Your informed approach makes the difference.