Hidden Remodeling Costs Homeowners Frequently Overlook
Hidden remodeling costs sneak in from several angles you might overlook. Expect structural assessments and temporary supports to protect against collapse, plus permit fees that can surprise your budget. Plumbing and electrical work can spike costs, especially if major overhauls or panel upgrades are needed. Don’t forget temporary housing, storage, and change orders—plus a prudent contingency for unforeseen issues. And ongoing maintenance after the project ends can quietly drain funds. If you keep exploring, you’ll uncover practical ways to plan ahead.
Unexpected Structural Issues That Inflate Renovation Budgets

Unexpected structural issues can quietly derail a renovation budget, turning a straightforward remodel into a major project when you least expect it.
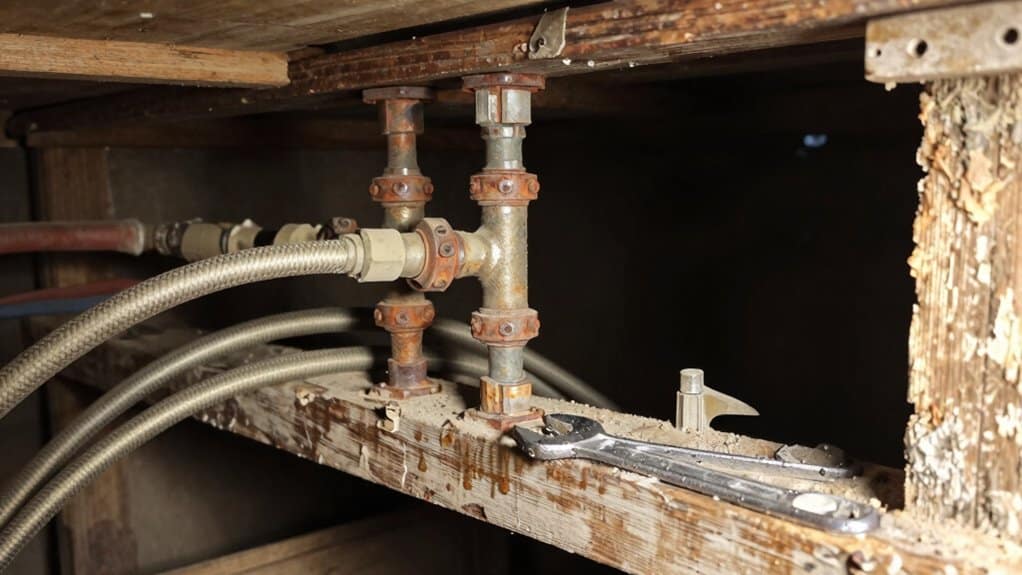
When you remove a load-bearing wall, you risk collapse if you skip proper support. You’ll need temporary beams or columns to redistribute weight, and if you ignore this, ceilings sag and walls crack.
When removing a load-bearing wall, don’t skip temporary support or you risk ceiling sag and wall cracks.
Structural assessments help catch problems before they snowball, and renovation inspections verify that engineers’ plans are correctly implemented.
Foundation cracks or settling pose another surprise: vertical cracks signal settling, horizontal ones indicate pressure issues. Repairs, like underpinning or pier installation, can cost thousands more.
Inadequate framing for new loads, especially in additions, demands reinforced joists or steel, raising costs. Regular assessments protect budgets and safety.
Retiling is essential for maintaining hygiene and functionality, and neglecting this update can also contribute to unexpected increases in renovation costs.
Hidden Code Compliance and Permitting Pitfalls
Hidden code compliance and permitting pitfalls can quietly derail a project if you don’t plan for them upfront. You’ll face permit pitfalls that can surprise you with fees, reviews, and hearings beyond the basic construction cost. Building, historic district, electrical, plumbing, and zoning permits each carry distinct fees that add up quickly, from hundreds to thousands of dollars. Compliance costs often extend beyond initial estimates as inspectors require upgrades or documentation to meet current standards. You may discover outdated systems or materials during inspections, triggering unplanned work and delays. Early coordination with local authorities helps you anticipate requirements, avoid stop-work orders, and reduce last-minute surprises. It is crucial to ensure that your contractor has the necessary licensing and legal compliance to avoid legal risks and potential project setbacks.
Plumbing and Electrical Surprises That Drive Costs up
Many remodeling projects hit a snag when plumbing and electrical work reveals itself as more costly than expected.
Many remodels surprise you when plumbing and electrical costs climb higher than expected.
You’ll often face plumbing surprises that push budgets higher, from minor fixes at 150–350 dollars to major overhauls like full re-plumbing or main sewer work that can reach 2,000–15,000.
Electrical upgrades follow a similar arc: basic repairs stay under 400 dollars, but panel upgrades or new circuits run 500–2,000, with older homes needing more substantial safety updates.
In bathrooms, intensive plumbing work can lift typical remodel costs, while standard full bath projects commonly land in the 12,000–25,000 range.
Labor cost increases, 3.4% year over year, amplify these figures, so plan for steady, informed decisions and budget cushions for plumbing surprises and electrical upgrades.
Before starting a remodel, it is crucial to obtain detailed estimates from contractors to help mitigate unexpected expenses and align budget expectations with the project's scope.
The True Price of Temporary Housing and Living Disruptions
Temporary housing and living disruptions during a major remodel can quietly become one of the project’s biggest temptations to underestimate. When a renovation stretches 2–3 months, you’ll likely face temporary housing costs that quietly add up.
In Denver, expect monthly rents around $1,700 for a one-bedroom, with total housing bills for the period ranging from about $3,400 to $5,100. If you opt for extended-stay hotels, costs can run from $4,000 to $6,000 per month.
Add storage and moving, and expenses climb by thousands more. You’ll also encounter higher daily living costs and meal-service options that replace home cooking.
Plan for furnishing temporary spaces, meanwhile, as initial investments can be substantial. A proactive budget reduces stress and unexpected financial strain.
Change Orders and Contingencies: Why Budgets Spiral
Change orders and contingencies aren’t rare annoyances; they’re real drivers of budget growth you’ll see from the first bid to the final bill.
As you track changes, you’ll notice discretionary vs. non-discretionary shifts each add about 4% to 8% of costs, and overall averages often swing 10% to 25% higher than the original plan.
Change Order Realities
Change orders and contingencies are a real driver of budget spirals in construction projects. You’ll see change orders average about 10% of the total contract value, with some projects hitting 25%.
Major builds commonly run 10 to 15% in change order terms, while contract modifications of 5 to 10% are expected in many endeavors.
On residential work, projects priced 250K–500K average 6.3 change orders, more than double those under 250K, and higher-priced homes over 500K use more orders too, though the growth slows.
Change order impacts include delayed processing, pricing gaps, and cascading costs to later phases.
To avoid financial strain, it's crucial to allocate budget for unexpected expenses during the initial planning phase, ensuring that you can accommodate these potential changes without compromising your project.
Contingency Necessities
Contingency planning is essential because budgets rarely stay perfectly on track once a remodeling project begins. You’ll use a contingency percentage to cover surprises, from site conditions to price shifts.
The standard range is 5% to 15% of the total budget, with higher-risk projects needing 10% to 20% and larger loans sometimes requiring 20% to 30%. This isn’t extra money for frivolous changes—it’s protection against real risks identified in a risk assessment.
Budget forecasting should allocate contingencies across components, such as kitchens, bathrooms, and structural work, while considering project complexity. A dedicated team with over 35 years of experience can ensure stress-free remodeling and help you manage these contingencies effectively.
Remember that 1 in 3 renovations overrun their costs, so maintain disciplined tracking and update figures as design details firm up. This approach supports steady progress and informed decision-making.
Inspection Gaps: The Hidden Costs of Mold and Water Damage
Hidden remodeling costs often hide in plain sight, because mold and water damage can linger behind walls long after a home inspection seems complete.
When you plan renovations, you’ll want to evaluate mold inspection and water damage risks that aren’t always obvious.
Costs vary: a typical mold inspection runs about $300-$400 for smaller homes, with national averages higher, and on-site testing adding $250-$500 plus lab analysis.
Invasive techniques raise prices, and more samples boost the bill.
Remember that hidden water intrusion can mask mold spread, so accurate testing matters.
A thorough inspection reduces future surprises, yet remember that some cases require follow-up remediation, which can range from a few hundred to several thousand dollars.
Prioritize professional oversight to avoid conflicts.
Long-Term Maintenance Hidden Costs After a Remodel

As you plan a remodel, you’ll want to contemplate the long-term maintenance costs that quietly mount after the project wraps up. Ongoing upkeep, hidden long-term repairs, and regular upkeep expenses can strain budgets just as much as the initial construction costs, so identifying them early helps you stay prepared. It's crucial to consider contingency funds for unexpected issues like mold repair that might arise during or after the remodeling process.
Ongoing Maintenance Costs
Ongoing maintenance costs after a remodel quietly accumulate as homes age and systems wear in. You’ll notice these expenses grow with time because labor and material prices stay high, and aging components demand frequent attention. Ongoing maintenance, not just big upgrades, drains budgets when unexpected wear shows up. Hidden expenses include steady replacements for aging roofs, windows, and mechanicals, along with routine servicing that prevents major failures. With labor shortages pushing costs higher, even small fixes can feel like sizable surprises. Regular maintenance of kitchen cabinets and drawers can prevent the need for costly replacements down the line. By planning for regular upkeep, you can spread costs and avoid debt from sudden repairs. Track seasonal needs, prioritize safety-critical items, and set aside a maintenance fund to keep your home reliable, efficient, and comfortable over the long term.
Hidden Long-Term Repairs
Long-term repairs after a remodel can quietly reshape your budget, even when the big projects seem finished. You’ll uncover hidden needs as structures settle, and these costs can linger long after construction ends.
Prioritize long term inspections and structural assessments to catch issues early, before they escalate into major expenses. You may face foundational challenges, water damage, or pests that weren’t obvious at first glance, especially in older homes.
Planning for contingencies helps you avoid surprises when the bill arrives. By staying proactive, you preserve safety and value, rather than reacting to costly breakdowns. With careful monitoring, you reduce the chance of sudden shutdowns or inconvenient repairs disrupting daily life.
- Structural assessments reveal hidden risks before they grow
- Long term inspections identify moisture and mold threats
- Foundation checks catch settlement早
- Pest assessments prevent unseen damage
- Proactive findings guide budget-aware decisions
Regular Upkeep Expenses
Regular upkeep expenses after a remodel can quietly accumulate, especially as your home ages and labor costs rise. You’ll notice regular service needs emerge—often tied to aging systems and frequent wear.
Routine inspections help you spot small issues before they become costly failures, and they align with rising repair costs driven by labor inflation. As projects age, labor remains a dominant share of expenses, so budgeting for ongoing maintenance is smart.
Your 42-year-old home and many pre-1980 structures mean more frequent checks on windows, roofing, HVAC, and doors. Expect steady maintenance spending, with continued demand for routine updates.
Wrapping It Up
You’ll finish with a clearer picture of renovation costs and what really drives them. By spotting hidden issues early, you can avoid surprises and keep projects on track. Stay proactive with inspections, permits, and contingencies, and communicate openly with your team. Remember that maintenance matters long after the remodel, so plan for ongoing care. With careful budgeting and realistic expectations, you’ll restore and refresh spaces confidently while minimizing disruptions and stress. Your informed approach makes the difference.
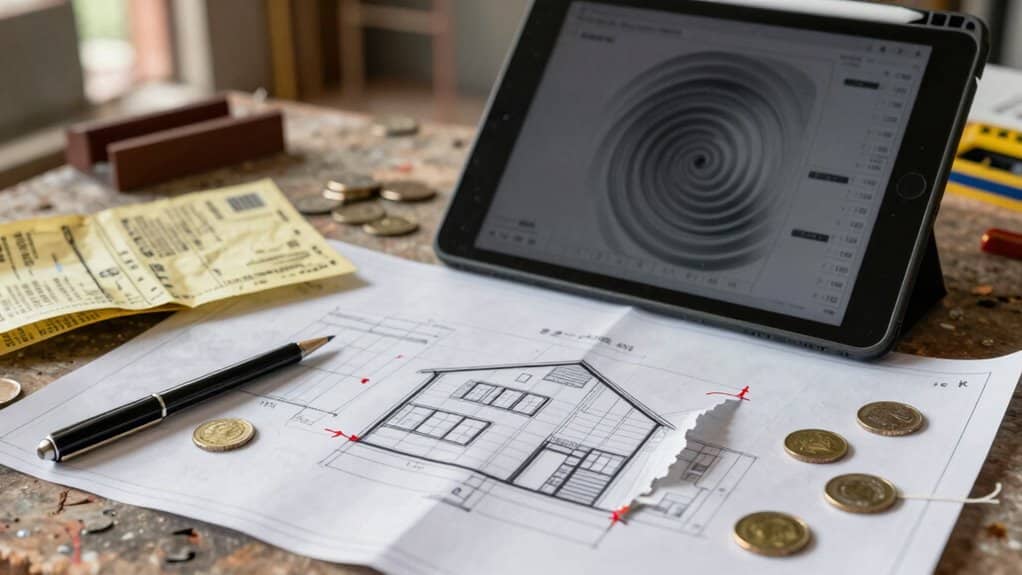
How to Estimate Your Remodel Budget (And Avoid Cost Surprises)
To estimate your remodel budget, start by clearly defining scope and priorities for each room, then ground every cost in local prices. create per-room budgets with distinct line items for materials, labor, permits, and contingency. Expect 20–40% of costs for labor and keep a 10–20% contingency for surprises. Compare multiple licensed quotes and watch materials’ share, typically 40–50%, plus a 15% price-buffer. If you keep this approach, you’ll stay on track and uncover more practical tips to follow.
Understanding Your Scope and Priorities
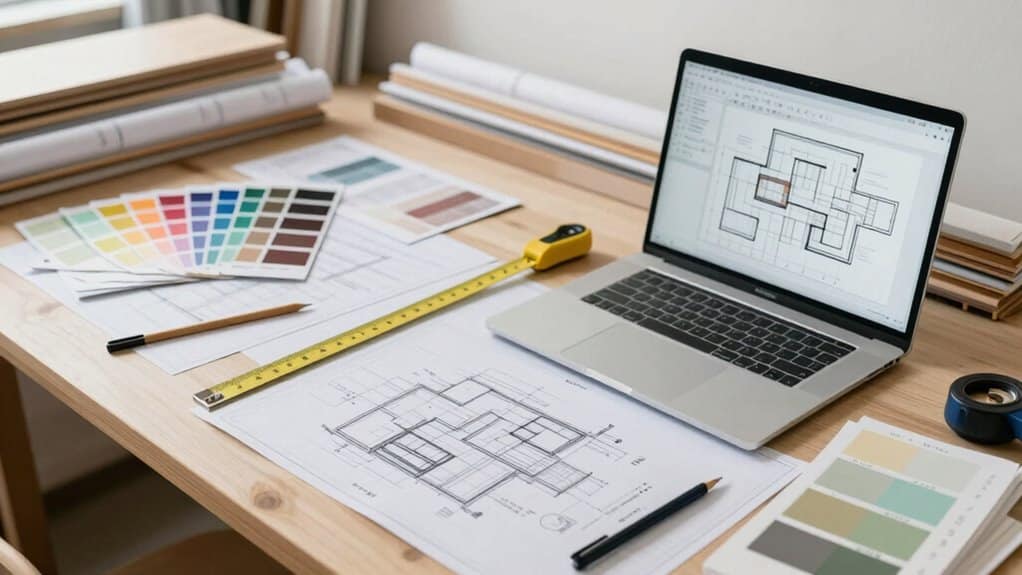
Understanding your scope and priorities starts with a clear plan of what you want to achieve and why it matters. In this phase, you define scope clarity by outlining tasks, goals, and expectations for the remodel, room by room and task by task.
You’ll decide where to focus efforts first, establishing project priorities that guide decisions when conflicts arise. A well-defined scope sets boundaries, answering what, where, when, why, and how, so everyone stays aligned before construction begins.
Document details like cabinet style, materials, color, and installation steps to prevent interpretation gaps. By documenting goals, specific tasks, and timelines, you reduce confusion, delays, and unexpected costs, making outcomes more predictable and your budgeting more accurate. Allocate extra funds in your budget for unexpected expenses to ensure financial resources are sufficient to complete the project.
Researching Local Costs and Comparable Projects
To estimate your remodel budget accurately, you’ll need to ground your plan in real local costs and solid comparisons. Researching local costs helps you account for regional labor rate variations, material availability, and price differences, so your numbers stay credible. Use local pricing data to frame per-square-foot expectations and tailor quotes to your area. Compare projects that resemble yours—kitchens, baths, or additions—to understand typical scopes and costs in your region. Choosing the right contractor can further refine your budget by ensuring quality work that avoids costly errors. Project comparisons also reveal which upgrades yield strong value in your market, guiding decisions before you commit. Keep an eye on benchmarks and historical data to avoid surprises, and lean on reputable sources to refine your budget. This approach reduces risk while delivering a realistic, regionally grounded plan.
Choosing Materials and Finishes Wisely
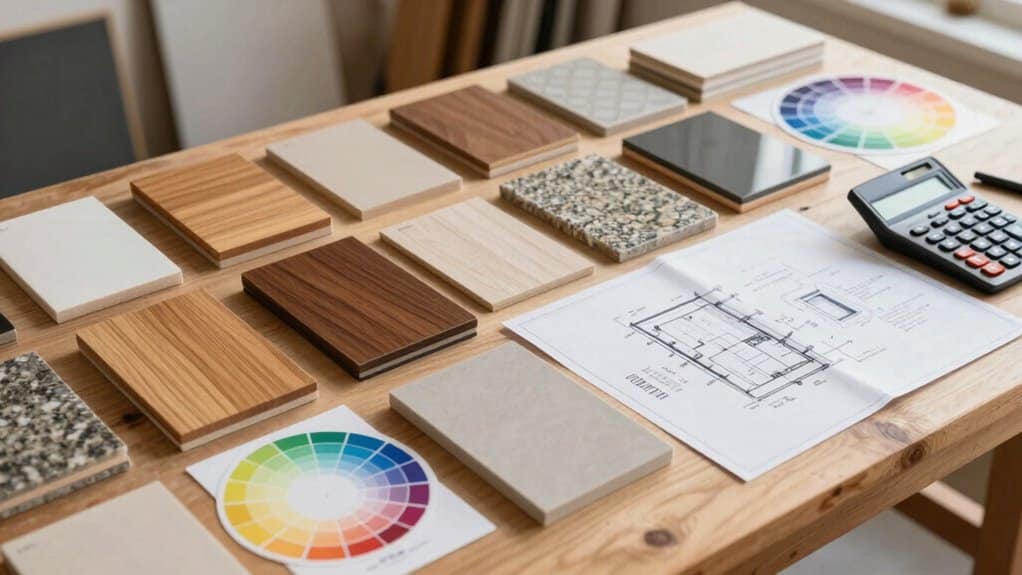
Choosing materials and finishes wisely means balancing cost, durability, and style from the start. You’ll decide how material types align with your budget and daily use, recognizing that materials occupy 40%-50% of the total remodel. For kitchens, expect $100-$250 per square foot, with low-end options at about $15 and high-end choices around $150. Finish quality matters: laminate countertops save money compared with quartz, while vinyl flooring challenges hardwood for cost. Plan for a 15% buffer against price shifts, since tariffs and inflation push up costs. Remember that strategic selections can boost resale value, especially exterior upgrades. Investing in energy-efficient appliances can reduce utility bills by 10-50%, providing long-term savings.
Getting Professional Estimates and Multiple Quotes
To get reliable estimates, you should gather multiple quotes from licensed professionals and compare their cost breakdowns side by side. Vet contractor credentials and track record to guarantee you’re selecting firms with solid references and appropriate insurance. Remember that labor costs in remodeling typically range from 20% to 40% of total project costs, so understanding this aspect is crucial for budget planning. This approach helps you spot pricing gaps, align expectations, and move toward a clear, accurate budget.
Get Multiple Quotes
Gather several professional estimates to get a clear picture of your remodel cost. To start, arrange site visits with contractors, architects, or designers for custom price estimates based on project details.
Consult multiple professionals directly for tailored estimates, avoiding broad averages. Use technology-driven tools for instant estimates from real renovation data before contractor visits, then compare contractor quotes against data-driven estimates to identify misaligned pricing.
Solidify the scope of work and product specifications after each estimate to proceed smoothly to a contract price. Seek competitive pricing by gathering bids from several remodelers and gathering sub-quotes from specialists during a 4-6 week estimate assembly.
Don’t skip getting second opinions to confirm accuracy and guard against surprises. Consider choosing a home improvement service that emphasizes a client-centric approach to ensure the remodel meets your exact specifications.
Compare Cost Breakdowns
When you compare cost breakdowns, start with getting professional estimates and multiple quotes to anchor your expectations in real numbers. This step helps you see how cost allocation aligns with your project scope, from structural changes to finishing touches. You’ll notice interior components like drywall, flooring, and cabinetry carry labor-heavy costs, while systems upgrades and windows or doors push the total higher. Use the ranges provided by professionals to frame your budget: whole-home remodels rise quickly with high-end finishes, yet smaller, partial upgrades can keep you within a tighter band. Compare line items for kitchen and baths, then consider how painting, flooring, and insulation contribute to the overall mix. Balancing scope, materials quality, and contingencies keeps your estimate realistic and actionable. In San Diego, the average kitchen remodel costs range from $40,000 to $80,000, so planning your finances early is crucial to avoid any surprises.
Vet Contractor Credentials
Vet contractor credentials by getting professional estimates from at least three licensed contractors and verifying everything before you compare numbers.
You’ll want to confirm credentials cover the required trades and check for active status, classifications, and any disciplinary actions. This is your opportunity for a thorough credential assessment and solid contractor verification before you shortlist bids.
- Gather each contractor’s license number, HIS registration if applicable, and business name
- Verify licenses on state boards and note any limitations or cancellations
- Collect documentation proving four years of journey-level experience per CSLB standards
- Review insurance, bonds, and references beyond basic licensing
- Request detailed, written estimates from three licensed contractors and compare them carefully
The average remodeling costs in San Diego start at approximately $10,000, which should be considered when reviewing estimates for your project. Carefully document every verification step to protect your project from unqualified hires and surprises.
Breaking Down Costs by Room and Category
As you break down costs by room and category, you’ll see how bedroom, bath, and kitchen line items stack up against overall project totals, helping you prioritize essentials over nice-to-haves.
By separating line items—materials, labor, permits, and contingency—you can compare ROI indicators and spot where savings or investments matter most.
This structured view sets the stage for informed decisions that keep your remodel on track and within budget.
Room Cost Breakdowns
Room cost breakdowns help you see where money goes in a remodel, so you can plan more accurately and avoid surprises. You’ll discover kitchen budgets dominate the bill, with kitchens often taking 15-30% of the total and base projects starting high in expensive markets.
Likewise, bathroom upgrades span a wide range, reflecting scope and fixtures, yet still influence overall budgeting. By breaking costs into rooms, you can compare tradeoffs and set priorities before you shop.
Consider how labor, materials, and layout changes shift expenses per space, and use this as a planning compass.
- Kitchen budgets
- Bathroom upgrades
- Bedroom and living space costs
- Small area and ancillary space investments
- Whole-house and systems considerations
Category Cost Insights
Category cost insights come from breaking costs down by room and category, which helps you compare where money goes and make smarter tradeoffs.
You’ll see cabinets drive most costs, with flooring and countertops following closely. Countertops span affordable to luxury options, potentially pushing total up to $65,000 in full remodels.
Flooring updates show up in interior upgrades for whole-home projects, varying by material quality. Paint and wallpaper offer budget-friendly cosmetic options for low-end changes.
Windows range from $300–$1,200 each, while full replacements run $4,500–$20,000. Labor spans from $20,000 in a bedroom project to higher rates with wall alterations and king-size homes.
Permits, inspections, and system work affect totals; central air, furnace, and electrical updates shape category costs, guiding kitchen budgeting and flooring choices.
Planning for Permits, Contingencies, and Hidden Fees

Planning for permits, contingencies, and hidden fees starts with understanding how costs flow from your project’s size, location, and complexity.
You’ll learn how permit types influence the bottom line, and why hidden fees can surprise you if you don’t plan ahead. Here’s what to contemplate:
- Permit types vary by scope, from small electrical or plumbing permits to larger building approvals.
- Location matters: costs differ by city and state, and regulations can add to your budget.
- Contingencies typically range 10-20% to cover regulatory surprises and price shifts.
- Hidden fees may include expedite charges, valuation-based fees, or flat versus percentage-based assessments.
- Compare permits and valuations across estimates to verify accuracy and avoid overpaying.
With this awareness, you’ll plan a realistic, resilient budget.
Creating a Realistic Timeline and Monitoring Budget
Creating a realistic timeline starts with a clear, structured plan and a practical understanding of how long each phase will take. You’ll map phases from pre-construction to finishes, using a well-ordered sequence that prevents work overlap and delays.
Timeline management means recognizing typical durations: minor updates in 2-3 weeks, full projects 3-6 months, and specific tasks like bathrooms or kitchens in 8-12 weeks or 6-12 weeks.
Plan for permits, design finalization, and material ordering early to avoid snags. Regular check-ins help you monitor progress, adjust schedules, and keep contractors accountable.
Budget tracking runs parallel, noting that backorders and delivery times can extend timelines. Advance material choices and prompt decisions prevent costly overruns, ensuring your project stays on track and within your financial target.
Wrapping It Up
You now know how to estimate a remodel budget without the surprises. Start by defining your scope and priorities, then research local costs and compare projects. Choose materials wisely and collect multiple professional estimates. Break costs down by room, plan for permits and contingencies, and track progress with a realistic timeline. Stay flexible but disciplined, monitor changes, and adjust as needed. With careful planning and clear communication, you’ll complete the project confidently and within your budget.
How to Finance Your Exterior Renovation Projects
Are you aware that nearly 80% of homeowners are planning some form of renovation project in the coming year? If you're among those eager to elevate your home's curb appeal or enhance its energy efficiency, financing your exterior renovation projects can feel overwhelming. This article is designed for homeowners looking to transform their properties without breaking the bank. We’ll dive into various financing options, from home equity loans and HELOCs to personal loans and government programs like FHA Title I Loans, catering to those who seek a blend of flexibility and affordability. Additionally, we’ll explore strategies such as cash-out refinancing and contractor financing that may provide exclusive deals. By understanding these pathways, you can confidently choose the best financial solution that aligns with your goals, ensuring your renovations boost your home's value while maintaining financial peace of mind. Let’s embark on this journey to find the most suitable financing options for your exterior renovation projects.
Evaluating Your Exterior Renovation Needs
How can you ensure a successful exterior renovation project?
To ensure your exterior renovation is comprehensive, begin by identifying the specific improvements needed, such as roofing, siding, windows, and doors.
Identify key improvements like roofing, siding, windows, and doors for a comprehensive exterior renovation.
Gather multiple contractor quotes to compare prices and services, ensuring you receive competitive estimates. It's also vital to assess your financial standing, including home equity and credit score, to explore suitable financing options.
- Set a contingency budget of 10% to 20% for unexpected expenses.
- Evaluate your debt-to-income ratio to understand your repayment capabilities.
- Research local regulations or permits needed for your project.
This detailed approach will help you make informed decisions that align with your budget.
Next, explore our guide on selecting the right contractor for your renovation.
Understanding Remodeling Costs and Budgeting
How can you effectively budget for exterior home renovations?
Effectively budgeting for exterior home renovations involves assessing costs and exploring financing options.
Start by estimating expenses for major upgrades: roofing replacements can range from $6,000 to over $25,000, while vinyl siding might cost between $10,000 and $60,000.
Don't forget to factor in energy-efficient window replacements, which typically range from $1,000 to $2,000 each.
To safeguard against unforeseen expenses, include a contingency buffer of 10% to 20%.
Obtaining multiple contractor quotes is essential for competitive pricing and refining your budget, ensuring a financially sound renovation.
Additionally, consider incorporating modern design techniques that can enhance both aesthetic appeal and functionality, potentially increasing the value of your home.
For more detailed insights, see our guide on maximizing your home renovation budget.
Exploring Home Equity Financing Options
How can you leverage your home’s equity for renovations?
If you're looking to finance exterior renovations, tapping into your home's equity can be an effective strategy. Home equity loans and home equity lines of credit (HELOCs) allow you to utilize your property’s value to cover renovation costs.
Home equity loans provide a lump sum at lower interest rates, while HELOCs offer a flexible credit line with variable rates, ideal for ongoing projects.
- Assess your home's appraised value and current mortgage balance to determine borrowing potential.
- Choose a repayment term that suits your budget, typically ranging from 5 to 30 years.
- Consider how renovations can enhance your property’s overall value.
For more insights on financing options, check out our comprehensive guide on home equity loans and lines of credit.
Considering Personal Loan Alternatives
When exploring personal loan alternatives for your exterior renovation, it's crucial to weigh the benefits against potential costs.
But what other financing options could provide a more cost-effective solution for your home improvement project?
Understanding the differences in interest rates between personal loans and home equity options could significantly impact your decision.
Unsecured Loan Benefits
What're the advantages of using unsecured personal loans for exterior renovations?
Unsecured personal loans can be a smart choice for financing exterior renovation projects due to their risk-free nature. Since you don't need to use your home as collateral, these loans allow you to tackle upgrades like landscaping or painting without the worry of losing your property.
Additionally, fixed interest rates provide predictable monthly payments, making it easier to budget for your renovations.
- Quick approval and disbursement, often within days
- Flexibility for urgent renovations
- No collateral required
Their higher interest rates compared to home equity options are offset by their accessibility and fast approval, making them ideal for minor improvements.
For more insights on financing options, check out our guide on home renovation financing strategies.
Interest Rate Comparison
How do personal loans compare to home equity loans for renovations?
When considering financing options for exterior renovations, personal loans have the advantage of fixed interest rates, which provide predictable monthly payments.
However, they typically carry higher interest rates, ranging from 10% to 36%, compared to home equity loans that offer rates between 4% and 8% due to their collateralized nature.
- Personal loans are ideal if you lack home equity.
- They usually have repayment terms of 2 to 7 years, suitable for smaller projects.
- Home equity loans can extend up to 30 years, providing greater flexibility for larger renovations.
For more insights on financing options, check out our guide on home renovation loans.
Utilizing Government Programs for Funding
Exploring government funding options for your exterior renovation projects can open doors to various financial resources.
But what other innovative financing solutions can help you achieve your home improvement goals?
Discover how local grants and incentives can provide additional support without the burden of repayment.
FHA Title I Loans
How can FHA Title I Loans simplify your exterior renovation projects?
FHA Title I Loans offer a convenient and government-backed financing option for homeowners looking to enhance their property's exterior. With up to $25,000 available for single-family homes, these loans can cover substantial renovation costs, including roofing and siding updates.
The lack of minimum credit score requirements makes them accessible to a wider range of homeowners, ensuring that more people can undertake essential improvements.
- Fixed interest rates provide predictable monthly payments.
- Funds can also support energy-efficient upgrades, boosting your home's value.
- Terms extend up to 20 years for manageable repayment plans.
If you're considering a renovation project, explore FHA Title I Loans further and see how they can support your goals.
For more insights on financing home improvements, check out our guide on renovation loans.
Energy-Efficient Mortgages (EEMs)
How can Energy-Efficient Mortgages (EEMs) benefit homebuyers?
Energy-Efficient Mortgages (EEMs) provide an innovative solution for financing eco-friendly home improvements by incorporating them directly into your primary mortgage.
By allowing borrowers to include enhancements such as insulation and energy-efficient windows, EEMs can significantly lower long-term utility costs and enhance home comfort.
- Lower interest rates make EEMs an attractive option.
- No additional down payment is required.
- Available for both new purchases and refinancing.
These benefits make EEMs accessible to a diverse group of homebuyers who prioritize sustainability.
For more insights on this financing option, check out our guide on sustainable home improvements.
Local Grants and Incentives
How can you fund your exterior renovation project without overspending?
Local government grants and incentives can significantly ease the financial burden of your renovation. For instance, FHA Title I Loans provide accessible funds for essential home improvements.
Additionally, many municipalities offer rebates or tax credits for energy-efficient upgrades, such as new windows, which can enhance property value while minimizing upfront costs.
- Investigate local weatherization initiatives for hidden funding opportunities.
- Check eligibility for historical preservation grants in your area.
- Ensure you meet income thresholds and project guidelines to maximize financial support.
By understanding these options, you can make your exterior renovations more budget-friendly.
For more information on specific grants available in your area, refer to your local government’s resources.
Taking Advantage of Cash-Out Refinancing
How can cash-out refinancing benefit your renovation budget?
Cash-out refinancing is a strategic option for funding exterior renovations. By refinancing your mortgage for more than the amount owed, you can tap into your home’s equity—often up to 80%. This allows you to finance significant upgrades like new roofing or siding, all while keeping your monthly payments stable with a fixed interest rate over a 15- to 30-year term.
- Access substantial cash for renovations.
- Benefit from potentially lower interest rates.
- Ensure long-term financial stability by evaluating total debt.
Before proceeding, assess the long-term financial implications to ensure it aligns with your goals.
For more insights on managing renovation costs, see our guide on smart home improvement financing.
Comparing Contractor Financing Solutions
How can contractor financing solutions benefit your home renovation projects?
Contractor financing solutions can provide significant advantages for homeowners looking to renovate. They offer flexible payment plans tailored to your budget, allowing you to manage costs effectively over time.
Additionally, many contractors collaborate with financing companies to provide promotional financing options, such as 0% interest for an introductory period, which can alleviate the burden of high upfront expenses.
Consider these key features:
- Deferred payments to ease financial stress during renovations.
- Quick approval processes that bypass traditional funding routes.
- Accessibility to funds directly through contractors, simplifying the financing journey.
With an experienced remodeling team in your corner, you can confidently move forward with your project, knowing that quality and professionalism are prioritized.
Explore these options further to determine which best aligns with your renovation goals.
For more insights on financing, see our guide on home improvement loans.
Conclusion
Financing your exterior renovation projects effectively aligns your budget with your home improvement goals. By applying the strategies outlined in this article, you can ensure that your renovation is not only successful but also financially manageable. Exploring options like home equity loans or personal financing can provide you with the necessary resources to enhance your property. As you embark on this journey, consider delving deeper into related guides and tips that can further support your renovation efforts. Take the first step towards transforming your home today!
10 Best DIY Tips for Exterior Renovation Beginners
Are you ready to transform your home's exterior but feeling overwhelmed by the prospect of renovation? You're not alone! Many homeowners face the daunting challenge of external renovations, often unsure where to begin or how to stay within budget. Our guide, "10 Best DIY Tips for Exterior Renovation Beginners," is designed to help you tackle these common obstacles.
In this article, you'll discover how to kick off your renovation journey with a solid plan and budget, ensuring that your efforts yield the best results without breaking the bank. We'll explore essential tools that make the job easier and safer, highlight cost-effective projects that can dramatically enhance your curb appeal, and share tips on mastering painting techniques with durable materials. Additionally, you'll learn how to elevate your outdoor space with energy-efficient lighting and seasonal plants. By engaging with DIY communities, you'll find the inspiration and support you need. Get ready to embrace your potential and make your exterior renovation dreams a reality!
Start With a Clear Plan and Budget

How to Create a Successful Exterior Renovation Plan?
To ensure your exterior renovation project is successful, start with a well-defined plan and budget.
Start with a clear plan and budget for a successful exterior renovation.
Begin by itemizing the updates you want for your home's exterior, which helps maintain organization and focus.
Next, research the costs of materials and labor to create a realistic budget, as expenses can range significantly based on project scope.
- Prioritize urgent repairs over cosmetic enhancements.
- Set aside a contingency fund of 10-20% for unexpected costs.
- Develop a timeline for coordinating contractors to streamline the workflow.
Additionally, consider incorporating sustainable renovation practices to enhance your home's efficiency and reduce long-term costs.
With a solid plan in place, you’re on your way to achieving your renovation goals.
For more tips on managing renovation timelines, check out our comprehensive guide.
Choose the Right Tools for the Job
Equipping yourself with the right tools is crucial for a successful exterior renovation.
But what specific tools should you prioritize to ensure your project runs smoothly and efficiently?
Let's dive into the must-have equipment that will elevate your renovation game while keeping budget considerations in mind.
Essential Renovation Tools
How can the right tools enhance your exterior renovation project?
Having the appropriate tools is essential for a successful exterior renovation. A brad nailer allows for quick and efficient fastening of trim and molding, ensuring a professional look.
To prevent errors during installations, such as siding or fencing, a reliable tape measure is vital. Additionally, a stud finder helps you securely attach heavier items by locating wall framing.
- Use an impact driver for versatile tasks like assembling outdoor furniture.
- Employ a gravity-assisted laser level to ensure perfect alignment of features like railings.
- Always double-check measurements to minimize costly mistakes.
For more tips on home improvement, check out our guide on essential renovation strategies.
Budget-Friendly Tool Options
How can you find affordable tools for home renovations?
When working on an exterior renovation, finding budget-friendly tools can significantly enhance efficiency without breaking the bank.
Start with essential items like a tape measure, level, and utility knife for precise measurements and cuts. A versatile cordless drill is invaluable for various tasks, from installing hardware to assembling furniture.
- Look for tool sets, which often provide better value than purchasing each item separately.
- Consider a brad nailer for quick and easy trim attachment.
- Don’t overlook a quality caulk gun for a polished finish.
By prioritizing these tools, you can effectively manage your renovation project.
For more tips on cost-effective renovations, check out our guide on DIY home improvement strategies.
Focus on Low-Cost, High-Impact Projects

How can you enhance your home's exterior on a budget?
Improving your home's facade doesn't have to be costly. By concentrating on low-cost, high-impact renovations, you can significantly boost curb appeal.
Start with a fresh coat of paint on your front door, which can range from $135 to $300, instantly transforming its look.
Additionally, consider upgrading exterior lighting fixtures, typically priced between $100 and $300; this not only enhances aesthetics but also increases safety.
- Refresh your driveway or siding with power washing, often under $100.
- Plant low-maintenance flowers or shrubs for as little as $50 to add vibrant color.
These simple projects can rejuvenate your home's exterior without straining your finances.
For more tips, check out our guide on affordable home improvements.
Prioritize Safety With Proper Gear
How can you prioritize safety while enhancing your home's curb appeal?
When undertaking budget-friendly home improvement projects, ensuring your safety is essential. Start by wearing safety goggles to shield your eyes from flying debris and harmful substances.
Additionally, gloves are crucial for protecting your hands against sharp edges and toxic materials, especially when handling paint or power tools.
- Use a dust mask or respirator during sanding or painting to avoid inhaling harmful fumes.
- Invest in non-slip footwear to reduce the risk of falls.
- Consider knee pads for comfort while kneeling during landscaping tasks.
By prioritizing safety gear, you can confidently engage in home renovations while minimizing potential hazards. Remember that proper ventilation is important to prevent any harmful fumes from accumulating during the renovation process.
Safety gear empowers your home renovations, reducing hazards and enhancing confidence.
For more tips on effective and safe home improvement, see our guide on essential DIY tools.
Master Basic Painting Techniques

To achieve a professional finish while mastering basic painting techniques, it's essential to start with proper surface preparation.
But what specific steps should you take to ensure your chosen high-quality paint performs effectively?
Understanding the importance of weather conditions can greatly enhance your outdoor painting experience.
Choose Paint Types Wisely
How can you choose the right paint types for exterior renovations?
Selecting the appropriate paint is crucial for enhancing the durability and aesthetic appeal of your exterior surfaces. High-quality 100% acrylic latex paints are recommended due to their excellent resistance to fading and mildew.
It's essential to choose paints specifically formulated for outdoor use, as they endure harsh weather, UV rays, and fluctuating temperatures.
- Apply a primer to enhance adhesion and prevent peeling.
- Test paint samples in different lighting for the best color selection.
- Use rollers with the "W" method for a smooth finish and brushes for edges.
For more guidance on painting techniques and materials, refer to our comprehensive guide on exterior home improvement strategies.
Prep Surfaces Thoroughly
How can you ensure surfaces are ready for painting?
To achieve a professional finish, start by thoroughly prepping your surfaces.
Begin with a power washer to eliminate dirt, grime, and any peeling paint, ensuring the new layer adheres effectively. Follow this with repairs using spackle or caulk for a smooth surface, and lightly sand the areas to enhance paint adhesion.
- Apply primer to bare wood or unpainted sections for better coverage.
- Use high-quality exterior paint and tools for durability.
- Focus on high-moisture areas to prevent future issues.
Proper surface preparation is essential for a successful paint job.
For more detailed guidance, see our guide on choosing the right paint tools.
Enhance Curb Appeal With Landscaping
How can landscaping elevate your home's curb appeal?
Enhancing your home's curb appeal through landscaping can significantly transform its appearance.
Start by choosing low-maintenance plants and shrubs that flourish in your region, creating a stunning visual without excessive upkeep. Additionally, define garden beds using materials like decorative stones or mulch to establish structure and deter weeds.
- Introduce seasonal flowers for year-round color.
- Research local native plants for ecological benefits.
- Use edging materials to enhance garden bed aesthetics.
By implementing these strategies, you not only boost curb appeal but also foster a sustainable environment.
For more detailed landscaping tips, see our guide on selecting the right plants for your climate.
Upgrade Outdoor Lighting for Ambiance
How can you enhance your outdoor lighting for better ambiance?
Upgrading your outdoor lighting can significantly improve your home's atmosphere. Start by selecting energy-efficient LED fixtures, which use up to 80% less energy than traditional bulbs, helping you save on electricity bills and reduce your environmental impact.
To create a layered effect, combine various lighting options, such as wall sconces, pathway lights, and string lights.
- Install motion sensor lights for added security and convenience.
- Choose weather-resistant fixtures to ensure durability against outdoor elements.
- Consider warm color temperatures for a cozy feel.
These enhancements not only beautify your space but also offer practical benefits. For further tips on garden design, check out our guide on creating the perfect outdoor oasis.
Refresh Entryway With Simple Updates
How can you refresh your entryway with simple updates?
Revitalizing your entryway can significantly enhance your home's curb appeal and create a welcoming atmosphere.
Start with a fresh coat of paint on your front door, a budget-friendly update that typically costs between $135 and $300.
Pair this with sleek door hardware—like modern knobs and handles—that ranges from $25 to $100 for an updated look.
- Invest in a stylish welcome mat (starting at $20) to keep your space clean.
- Add potted plants on either side of the door to create a warm vibe, costing around $50-$150.
- Install outdoor lighting fixtures (averaging $100-$300) to improve safety and highlight your home’s features.
For more tips on enhancing your home's exterior, check out our guide on outdoor decor.
Experiment With Color Samples
Experimenting with color samples is crucial for achieving the perfect exterior renovation.
Have you considered how different shades might transform your home's aesthetics?
Discover how to choose the right neutral tones and bold accents to create a stunning visual impact.
Test Before Committing
How can you accurately assess paint colors for your home's exterior?
To ensure you select the perfect hue, it's essential to test colors before finalizing your choice. Start by gathering several paint samples and applying them to a small, visible area of your home, ideally sized at 2ft x 2ft. This method allows you to see how each shade complements your home’s architecture and how it shifts in different lighting throughout the day.
- Observe the colors at various times for accurate representation.
- Utilize a color visualization tool for a digital preview.
- Always check samples outdoors, as natural light enhances color vibrancy.
Neutral Tones Advantage
How do neutral tones enhance exterior renovations?
Neutral tones like greys, beiges, and soft whites provide a versatile advantage in exterior renovations. They effortlessly blend with various architectural styles, enhancing curb appeal and creating a timeless aesthetic that appeals to potential buyers.
By using these shades, homeowners can establish a solid foundation for their exterior design.
To ensure the best results, consider these steps:
- Experiment with color samples on large poster boards.
- Test the colors in different lighting conditions on your home's surface.
- Observe how the tones interact with other design elements.
These strategies will help you make an informed decision, leading to a polished renovation.
For more tips on color selection, see our guide on exterior design trends.
Bold Accents Impact
How can bold accents enhance your home's exterior?
Incorporating bold accents into your home's exterior is an effective way to elevate its visual appeal. By adding elements like a vibrant front door or colorful shutters, you create striking contrasts against a neutral backdrop, enhancing curb appeal and leaving a lasting impression.
To ensure the colors harmonize, test samples on small exterior sections to observe their interaction with natural light.
When selecting these accents, consider your home's architectural style. A complementary bold color can highlight unique features and potentially increase perceived value, making your property more attractive to buyers or renters.
- Experiment with color samples before committing.
- Match accents to your home's architectural style.
- Consider the surrounding landscape when choosing colors.
For more tips on maximizing your home's appeal, check out our guide on exterior design trends.
Connect With Online DIY Communities
How can you benefit from connecting with online DIY communities?
Joining online DIY communities can significantly enhance your exterior renovation experience. Platforms like Reddit and Facebook groups are treasure troves of inspiration and practical advice from fellow home improvement enthusiasts.
Online DIY communities are invaluable for inspiration and practical advice from fellow home improvement enthusiasts.
These spaces encourage knowledge sharing, where you can learn from the successes and challenges faced by others. Engaging in these communities allows you to access valuable resources, including:
- Instructional videos and beginner-friendly guides
- Discussions that highlight effective solutions to common renovation problems
- Opportunities to participate in DIY challenges or collaborations
These interactions provide not only motivation but also the support needed to accomplish your renovation goals.
For more detailed strategies on maximizing your DIY efforts, check out our guide on effective home renovation tips.
Conclusion
Embarking on your exterior renovation journey can lead to stunning transformations that enhance your home's curb appeal. By applying the DIY tips outlined in this article, you not only elevate the aesthetic value of your property but also increase its market worth. Engaging with these strategies fosters a sense of accomplishment and creativity, making the process enjoyable and rewarding. As you take the first step, consider exploring more tips or reading related guides to deepen your knowledge and skills. Remember, your home is your canvas—start painting your masterpiece today!
10 Best DIY Bathroom Remodeling Tips for Homeowners
For a successful DIY bathroom remodel, start with a realistic budget of $1,500-$10,000 and a detailed timeline. Choose durable, water-resistant materials like ceramic tiles and quartz countertops, and practice essential skills through small projects before tackling bigger tasks. Focus on smart updates like paint, lighting, and fixture replacements that don't require moving plumbing. Protect existing features during renovation, and know when to call professionals for complex work. These fundamentals will set the foundation for your transformation journey.
Start With a Realistic Budget and Timeline
Three key factors drive successful DIY bathroom remodeling: thorough budgeting, realistic timelines, and careful planning.
For small bathrooms, you'll typically spend $1,500-$3,000, while primary bathrooms range from $5,000-$10,000. Smart budget allocation starts with setting aside 25% for cabinetry, 17% for plumbing fixtures, and 10-20% for contingencies.
Effective timeline management means planning around material lead times and breaking down tasks strategically.
You'll need several weeks for DIY work like tiling and painting, plus extra time for unexpected challenges. Additionally, consider setting aside funds for contingency costs to address any unforeseen issues that may arise during the remodel process.
Remember that proper planning now will save you from costly mistakes and delays later.
Choose Cost-Effective Materials That Last
While selecting materials for your bathroom remodel, you'll need to balance initial costs with long-term durability.
Focus on eco-friendly options like LED lighting and long-lasting finishes that won't need frequent replacement. Choose water-resistant materials that combine practicality with style, such as ceramic tiles for floors and walls, and quartz for countertops.
- Opt for quality quartz countertops at $50-100/sf, which resist stains and heat while requiring minimal maintenance
- Install ceramic tiles for both walls and floors to guarantee lasting water resistance
- Select LED fixtures for energy efficiency and extended lifespan
- Consider ready-to-assemble cabinets for durability at $100-300 each, saving on custom costs
Moreover, investing in quality materials aligns with the commitment to using quality materials in all remodeling projects, ensuring your bathroom remains both functional and stylish for years to come.
Master Essential DIY Skills Before Starting
Before tackling your bathroom remodel, you'll want to build confidence by practicing essential skills on smaller projects like replacing a faucet or retiling a backsplash.
You can sharpen your techniques by watching detailed video tutorials that demonstrate proper methods for plumbing, tiling, and basic electrical work.
Starting with manageable projects won't just help you develop vital abilities - it'll also help you identify which tasks you can handle yourself and which ones you should leave to professionals.
Practice on Small Projects
Since tackling a complete bathroom remodel can overwhelm even experienced DIYers, mastering essential skills through small practice projects will dramatically increase your chances of success.
Start with mock projects to develop your techniques before committing to a full renovation. Practice waterproofing, tiling, and fixture installation in low-stakes environments like laundry rooms or garage walls.
- Create a small test wall section to perfect your drywall and tiling skills
- Set up practice plumbing connections using spare fixtures
- Build a sample vanity installation in your garage
- Test waterproofing applications on non-critical surfaces
Watch Tutorial Videos First
Even experienced DIYers can benefit immensely from watching detailed tutorial videos before starting a bathroom remodel.
These video resources demonstrate proper tool handling, material selection, and installation techniques that can save you time and money. Tutorial benefits include step-by-step guidance for complex tasks like waterproofing and tile setting, while also highlighting common pitfalls to avoid.
You'll learn valuable problem-solving strategies, from addressing uneven surfaces to making emergency repairs.
Videos also show cost-effective alternatives to expensive materials and tools, helping you optimize your budget without compromising quality.
Furthermore, leveraging comprehensive bathroom remodeling services will enhance your project’s success and efficiency.
Watch multiple tutorials to gain different perspectives and approaches before tackling your project.
Optimize Your Bathroom Layout
Effective bathroom layouts start with smart storage solutions, like vertical shelving and recessed cabinets, to maximize every inch of available space.
You'll want to position fixtures strategically near windows to take advantage of natural light, which can make even small bathrooms feel more open and inviting.
Consider wall-mounted toilets and floating vanities to create cleaner sightlines while maintaining essential functionality in your remodeled space.
Space-Saving Storage Solutions
When planning a bathroom remodel, maximizing storage space becomes a critical factor in creating a functional and organized environment.
You'll want to focus on vertical space utilization and multi-functional storage solutions that adapt to your needs. Modern options like wall-mounted cabinets and over-toilet storage systems help you make the most of limited space while maintaining accessibility.
- Install multi-door cabinets with specialized compartments for toiletries and personal care items
- Choose durable materials like stainless steel 304 or moisture-resistant teak for longevity
- Integrate LED-embedded storage solutions that combine lighting with organization
- Consider modular systems that can be customized as your storage needs change
Maximize Natural Light
Building upon smart storage solutions, natural light can transform your bathroom into a bright, inviting sanctuary.
Start by evaluating window placement options, prioritizing south-facing installations for maximum sunlight. Consider skylight options or solar tubes for interior spaces where traditional windows aren't feasible.
Choose light colors and reflective surfaces like glossy tiles to amplify brightness throughout the space. Install transparent shower enclosures and strategically place mirrors to redirect natural light.
For ideal cross ventilation and dynamic lighting, position windows on adjacent walls. Remember to align task areas like vanities with natural light sources to reduce dependency on artificial lighting.
Smart Fixture Placement
Proper fixture placement serves as the foundation for a highly functional bathroom design. When planning your layout, consider zoning strategies that separate wet and dry areas while maintaining clear traffic paths.
Understanding standard fixture dimensions helps you create an efficient space that works for your daily routine.
- Position your sink, toilet, and shower as primary anchors, ensuring minimum clearances for comfortable use.
- Install wall-mounted fixtures to maximize floor space in narrow bathrooms.
- Place mirrors 24-30" above sinks and towel rails within easy reach of wet areas.
- Create distinct zones for toilets using partial walls or frosted glass for privacy.
Tackle Paint and Lighting Updates First

Two critical elements set the foundation for a successful bathroom remodel: paint and lighting updates.
Start by selecting the right paint finishes - semi-gloss or satin for walls and epoxy-based systems for tubs and showers. Before painting, thoroughly clean surfaces with TSP and repair any cracks or damage.
You'll want to update lighting fixtures strategically, layering ambient, task, and accent lighting to create the perfect atmosphere. Install water-resistant fittings in wet areas and consider under-cabinet LED strips for added ambiance.
Don't forget to coordinate your paint colors with both natural and artificial lighting choices.
Save Money With Smart Material Sourcing
Smart material sourcing can slash your bathroom remodeling costs by up to 50% without compromising quality or style.
When exploring material alternatives, consider visiting Habitat ReStores for donated fixtures and searching retailers for scratch-and-dent appliances. You'll find significant savings through strategic fixture sourcing while maintaining a high-end look.
- Check local salvage yards for vintage fixtures and cabinets that add character while reducing costs.
- Install grout-free wall panels instead of traditional tile to save on labor and maintenance.
- Choose laminate or solid-surface countertops over natural stone for durability at lower prices.
- Opt for vinyl flooring with modern finishes as a cost-effective alternative to hardwood.
Protect Existing Features During Renovation
Preserving your bathroom's existing features during renovation requires careful planning and protective measures to prevent costly damage.
When protecting surfaces, use adhesive plastic sheeting and foam edge protectors to shield floors, mirrors, and glass from construction debris.
Focus on preserving structures by anchoring new fixtures directly into wall studs and applying waterproof membranes behind shower enclosures.
Don't forget to seal penetration points around pipes and mark existing plumbing locations before demolition.
For maximum protection, isolate work zones with plastic barriers and use negative air machines to control dust migration throughout your space.
Update Fixtures Without Moving Plumbing

You'll find that updating your bathroom's appearance doesn't require extensive plumbing changes when you focus on swapping out dated hardware and fixtures.
Start by replacing worn faucets and cabinet handles with modern designs that match your existing plumbing connections and mounting patterns.
Consider installing a new water-efficient showerhead that fits your current shower arm, instantly transforming your shower's functionality and style while maintaining the original plumbing configuration.
Swap Out Old Hardware
One of the most impactful ways to modernize your bathroom without major construction involves swapping out dated hardware and fixtures.
By selecting coordinated hardware styles and modern finishes, you'll create a cohesive, updated look throughout your space. Focus on elements that make the biggest visual difference while requiring minimal tools and expertise.
- Replace cabinet knobs, drawer pulls, and door handles with matching finishes for a unified appearance
- Update shower heads, tub spouts, and drain covers to coordinate with sink fixtures
- Install modern towel bars, hooks, and toilet paper holders in contemporary styles
- Refresh mirror frames and lighting fixtures with decorative trim and updated designs
Replace Worn Faucets
Replacing worn bathroom faucets can dramatically enhance your sink's functionality and appearance without requiring extensive plumbing modifications.
Before choosing among modern faucet styles, measure your sink's mounting configuration to verify compatibility. You'll need basic tools like adjustable wrenches and pliers for installation.
To install your new faucet, first shut off the water supply and disconnect the old fixture. Clean the mounting surface thoroughly, then follow the manufacturer's installation tips carefully.
Position the new faucet with included gaskets, connect supply lines, and test for leaks. Consider WaterSense-certified models to balance water efficiency with performance.
Install New Showerheads
Similar to updating faucets, modernizing a shower head offers substantial impact without requiring major plumbing changes.
When selecting your new fixture, consider both shower head types and water efficiency ratings to maximize performance while minimizing water consumption. You'll need basic tools like an adjustable wrench and Teflon tape for a successful installation.
- Choose WaterSense-certified models to reduce water usage while maintaining strong pressure
- Review compatibility with your existing shower arm (standard 1/2" NPT threading)
- Apply Teflon tape clockwise on threads to prevent leaks
- Test connections and spray patterns after installation to verify proper function
Maximize Storage With Creative Solutions
Transforming your bathroom's storage capabilities doesn't require a complete overhaul of your existing space. Start by installing floating shelves above your toilet and around the bathtub to maximize vertical space while keeping essentials within reach.
Create wall niches lined with mirrors or trim to display cosmetics and daily items, adding both function and style to smaller bathrooms.
Consider adding pull-out shelves and deep drawers with dividers to your existing cabinetry.
You'll also want to incorporate shower niches to prevent products from cluttering your tub's edges. These practical solutions will help organize your space while maintaining a clean, streamlined look.
Know When to Call the Professionals
While smart storage solutions can enhance your bathroom's functionality, certain aspects of remodeling require professional expertise to guarantee safety and compliance.
When dealing with electrical systems, structural integrity, or hazardous materials, it's essential to hire licensed contractors who understand proper safety precautions and building codes.
Don't risk your family's well-being by attempting complex renovations beyond your skill level.
- Electrical and plumbing work requires certified professionals to prevent shock hazards and water damage
- Structural modifications affecting load-bearing walls need expert assessment
- Asbestos or lead paint removal demands specialized training and equipment
- Ventilation issues and persistent moisture problems require professional remediation to prevent mold growth
Conclusion
You've learned these essential DIY bathroom remodeling tips, yet ironically, you'll probably still make a few mistakes along the way - and that's perfectly fine. What matters is that you're now equipped to tackle this challenging project with confidence and knowledge. Remember, while saving money is great, knowing when to call professionals isn't admitting defeat - it's actually being a smart homeowner who values both quality and safety.