

Kitchen Remodel Permits in San Diego: When a No-Plan Permit Works and When You Need Full Review
A Kitchen Remodel Can Feel Simple at First — Until You Learn the City May Treat the Same Project Very Differently Depending on What You Change, What You Move, and What the Inspector Finds Once the Work Is Opened Up
Melissa thought she was planning a straightforward kitchen remodel.
The cabinets were dated. The counters were worn. The lighting was poor. She wanted a cleaner layout, better storage, a stronger hood, and a more modern look that finally matched the rest of her San Diego home. Like many homeowners, she assumed the permit question had a simple answer. If she was not adding square footage, not moving the kitchen to another room, and not tearing the house apart, she figured the city would treat the job as minor.
That assumption is where many projects start going sideways.
Because in San Diego, some kitchen remodels really can move through a lighter permit path. Others need full review from the start. And a project that looks simple on paper can quickly become a full-plan job the moment structural issues, wall changes, plumbing additions, historic review, or questionable existing conditions enter the picture.
That is why the smarter question is not just, “Do I need a permit for my kitchen remodel?”
The better question is, “Can this project qualify for a no-plan permit, or am I heading into full review whether I realize it yet or not?”
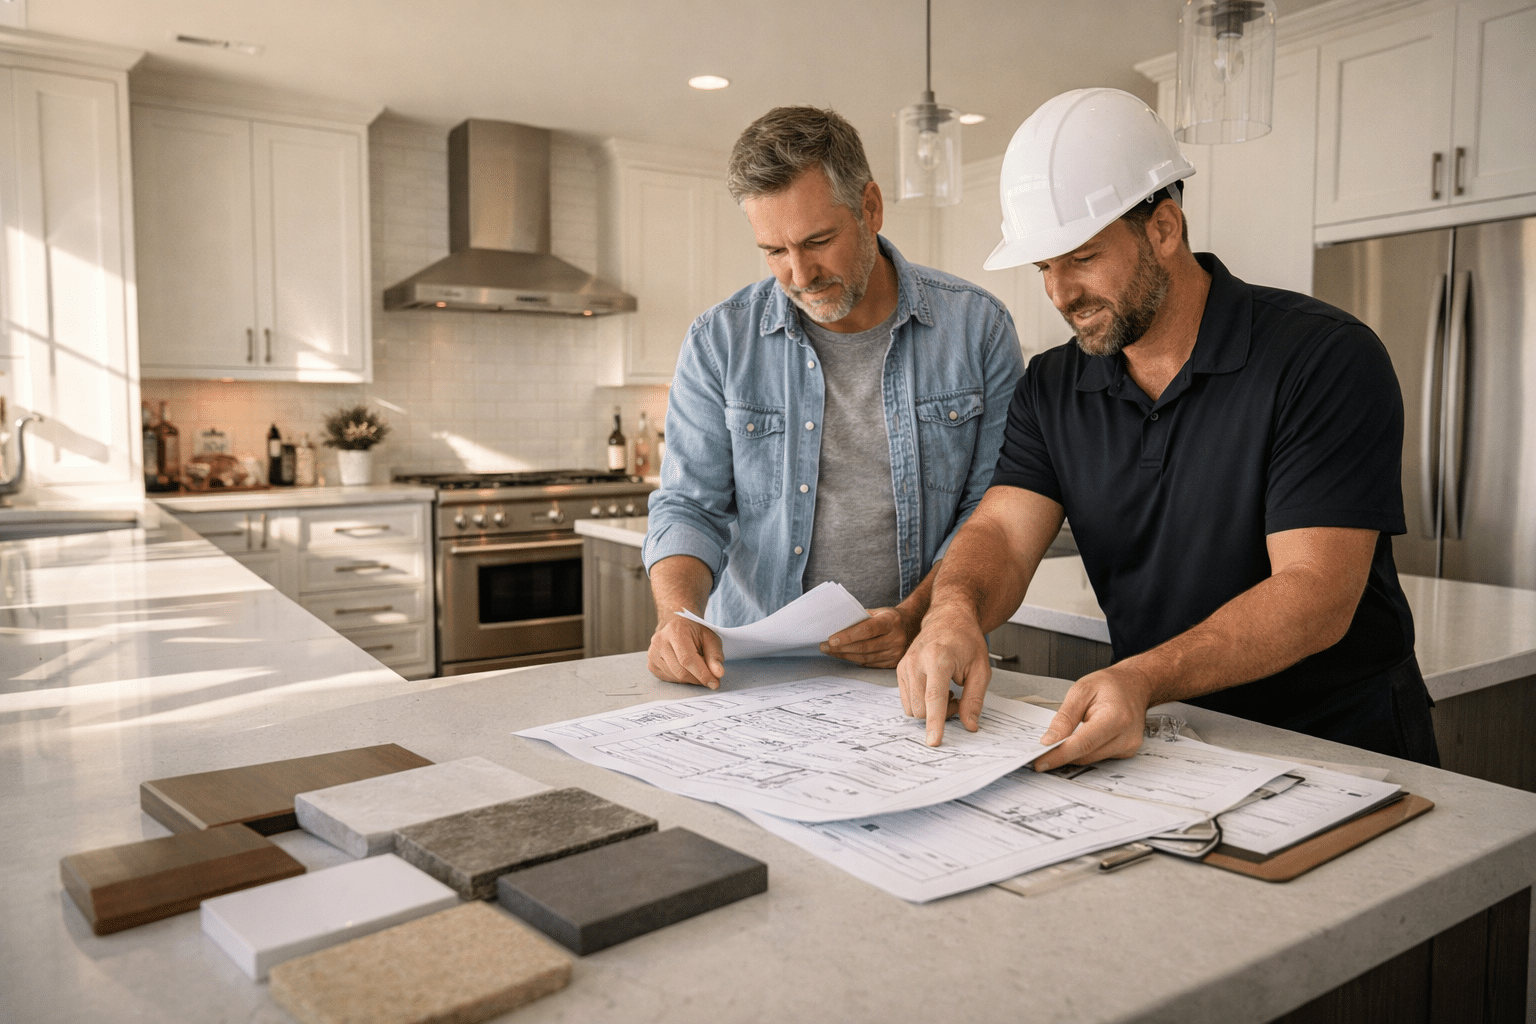
The Main Distinction Homeowners Need to Understand
For many San Diego homeowners, the confusion comes from hearing phrases like “simple permit,” “no-plan permit,” and “full review” used almost interchangeably.
They are not the same.
A no-plan building permit can apply to certain residential kitchen remodels when the work stays within a limited scope. That usually means remodeling an existing kitchen in an existing residential building without changing structural elements, wall framing, or exterior walls, and without adding plumbing fixtures.
A simple permit is a different concept. It is usually used for certain minor mechanical, electrical, or plumbing work that does not require plan review.
And then there is full review, which is where the city expects plans and a more complete review because the project is broader, more invasive, or harder to verify safely without drawings.
That distinction matters because homeowners often budget for one process and accidentally design another.
When a No-Plan Permit Can Work for a Kitchen Remodel
A no-plan permit can make sense when the kitchen remodel stays inside the existing envelope and avoids the types of changes that trigger deeper review.
In practical terms, this usually works best when the project looks like this:
- the kitchen remains in the same location
- no walls are being moved or reframed
- no exterior walls are being altered
- no structural elements are being removed, modified, or added
- no new plumbing fixtures are being added
- the work is limited to the interior remodel of the existing kitchen
- the home is an existing legally permitted residential structure
This is often the category for homeowners replacing cabinets, countertops, finishes, and some interior components while keeping the overall kitchen framework intact.
But this is where people get tripped up: qualifying for a no-plan permit does not mean the project is casual or unregulated. The work still has to comply with code. Inspections still matter. And if the inspector determines the work is more extensive than expected or the existing conditions cannot be verified properly, the city can require plans and shift the job into a different track.
In other words, a no-plan permit is not a free pass. It is a narrower permitting lane.
When You May Not Need a Building Permit at All
Some kitchen work is light enough that homeowners assume it should not trigger a permit, and in limited cases, that is true.
For example, purely cosmetic work may fall outside the permit requirement, especially when you are replacing finishes with similar materials and not affecting electrical, plumbing, or mechanical systems. In San Diego, the relocation of cabinets and countertops in certain residential kitchens can also fall under an exemption.
But homeowners should be careful here.
The moment a “cosmetic” remodel starts involving hidden systems, new wiring, moved receptacles, ventilation work, gas work, plumbing changes, drywall opened beyond a small repair context, or any question about what is behind the walls, the project can stop being cosmetic very quickly.
This is one of the biggest mistakes people make. They start with “just cabinets and counters,” then add recessed lights, move a sink, upgrade appliances, relocate outlets, install a new hood duct, or rework plumbing lines. By then, the permit answer is no longer the one they started with.
When Full Review Is Usually the Safer Assumption
A kitchen remodel usually moves into full review territory when the project affects more than finishes and straightforward interior replacement work.
That often includes situations like:
- removing or altering walls
- touching load-bearing construction
- changing wall framing
- modifying exterior walls or openings
- adding plumbing fixtures
- reconfiguring plumbing locations in a substantial way
- making changes that require plan review for electrical, plumbing, or mechanical systems
- remodeling in a historic district or on a historically designated property
- remodeling a building old enough to trigger historic review issues
- working in a property where the legality or condition of the existing construction is hard to verify
This is why experienced planning at the start matters. A homeowner may think the question is whether the city “will let us do the remodel.” But the real question is usually how the city wants the remodel documented and reviewed.
If your project changes the bones of the kitchen, not just the surfaces, full review is often the more realistic path.
Why “Simple Permit” Does Not Mean “Kitchen Permit”
Another point of confusion is the city’s simple permit system.
Homeowners sometimes assume that if a kitchen remodel includes electrical, plumbing, or exhaust work, the whole kitchen can move through a simple permit. That is not how it usually works.
A simple permit is intended for certain minor no-plan MEP work, such as some wiring work, some exhaust fan work, and certain plumbing repairs or replacements. It is not a substitute for full kitchen-remodel review when the project as a whole exceeds those limits.
So while part of your kitchen project may involve work that can fit a simpler permit path on its own, that does not automatically mean the overall remodel avoids plan review.
A kitchen is a combination project. Once the scope expands, the city is looking at the remodel as a whole, not just at one isolated permit-friendly item.
The Three Most Common Ways Homeowners Accidentally Turn a Light Remodel Into a Full-Review Project
1. They move something “just a little”
A sink moves a few feet. A gas line gets adjusted. An island gains a prep sink. A hood vent route changes. A wall outlet layout gets reworked more extensively than expected.
What sounds minor in conversation can be major in permitting.
2. They open walls and discover older work
Once demolition begins, surprises show up. Improper wiring. Past patchwork plumbing. Framing changes from an older remodel. Missing permits from earlier work.
At that point, the project can stop being easy to verify and start requiring a more formal review path.
3. They assume the house’s age will not matter
If the property is historic, within a historic district, or old enough to raise historic review questions, even a scope that looks no-plan eligible at first can become more complicated.
That does not mean the remodel cannot happen. It means the permit path may not be the short one the homeowner expected.
A Good Rule of Thumb Before You Finalize Design
If your kitchen remodel is mostly about replacing what is already there, inside the same room, without changing structure, without changing exterior walls, and without adding plumbing fixtures, you may be in no-plan territory.
If you are changing layout in a meaningful way, modifying walls, opening up the home, adding plumbing, upgrading multiple systems at once, or working in a property with historic or verification issues, you should assume full review is at least possible from day one.
That mindset helps protect your budget, your timeline, and your design decisions.
Because the worst time to learn your kitchen needs plans is after you have already priced it like it does not.
Why It Helps to Plan the Permit Strategy Before the Remodel Strategy
Many homeowners focus first on finishes, colors, cabinets, countertops, and appliance packages.
Those choices matter. But permit strategy comes earlier.
You want to know:
- which scope keeps the project lighter
- which choices trigger plan review
- whether the existing home conditions are likely to complicate permitting
- whether your dream layout is worth the extra review time and cost
- how to avoid redesigning the kitchen after permit realities catch up
That is where having the right design-build team makes a major difference. The goal is not just to design a beautiful kitchen. It is to design one that makes sense for your home, your budget, and the approval path in front of you.
Start With the Right Permit Strategy Before You Build
A kitchen remodel should feel exciting, not uncertain. But in San Diego, permit questions can reshape the entire project if they are handled too late.
If you are planning a kitchen remodel and want to know whether your project may qualify for a no-plan permit or whether full review is the smarter path, Creative Design & Build can help you evaluate the scope before costly mistakes are made. Our team helps homeowners across San Diego County plan, design, and execute remodels with the right strategy from the beginning.
Call Creative Design & Build today at (855) 445-9455 or email [email protected] to schedule your free in-home estimate. You can also visit us at 9275 Trade Place Suite H, San Diego, CA 92126. We proudly serve homeowners throughout San Diego County under License #1045112.
How to Legalize an Unpermitted ADU in San Diego (AB 2533 Guide)
Don’t Let an Unpermitted Backyard Unit Turn Into a Sale, Refinance, or Code Enforcement Problem — Understanding AB 2533 and San Diego’s Retroactive Permit Process Could Protect Your Property
Jason converted the detached garage behind his San Diego home in 2019. At first, it was meant to solve a family problem, not create one. His mother needed a place to stay nearby, and the garage already had enough room for a small bathroom, a kitchenette, and a sleeping area. The work got done quickly. Everyone moved on.
Then life changed.
A few years later, Jason wanted to refinance. The lender asked a question he wasn’t ready for: “Do you have permits for the secondary dwelling unit?”
He didn’t.
What had once felt like a practical home improvement suddenly became a property issue with real consequences. A sale could get delayed. A refinance could stall. Insurance questions could follow. A tenant situation could become risky. And if a complaint ever reached the city, the problem could become urgent overnight.
Like many homeowners, Jason assumed that because the work was already done, he had only two options: keep hiding it or tear it all out.
That is not always true.
For qualifying properties in the City of San Diego, AB 2533 created a more realistic path to legalize certain unpermitted ADUs and JADUs. That does not mean every unpermitted unit automatically becomes legal. It does mean some homeowners now have a clearer path forward than they did before.
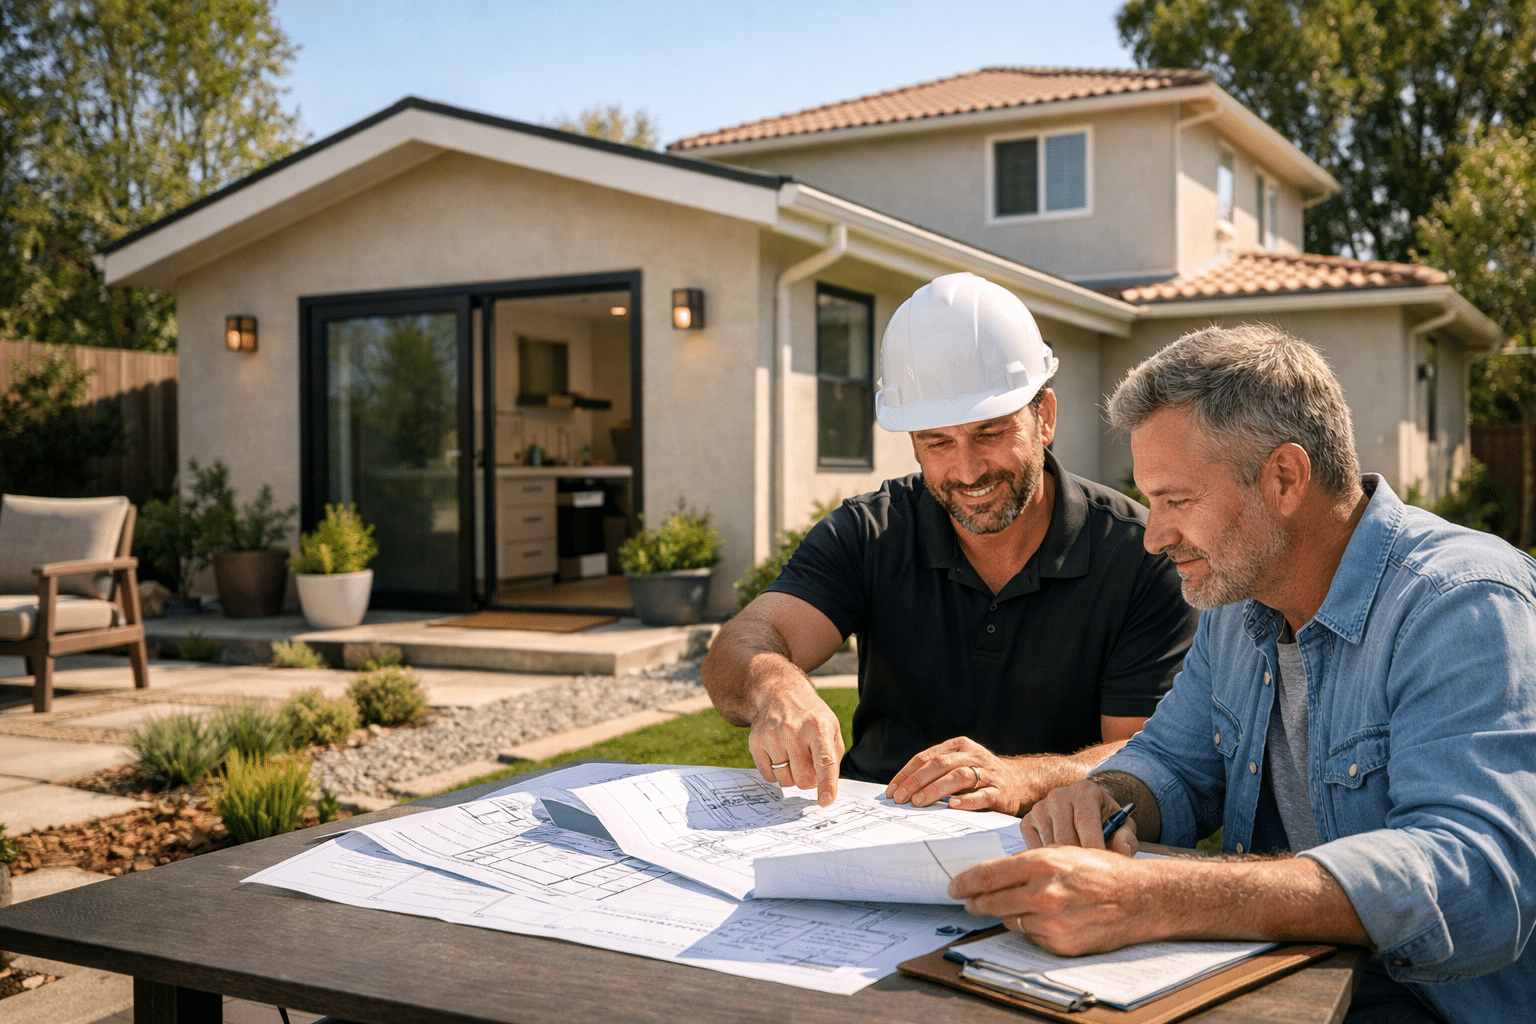
What Is AB 2533?
AB 2533 is the California law that changed the conversation around unpermitted ADUs. For many homeowners, the biggest takeaway is simple: if an ADU was constructed before January 1, 2020, the city generally cannot deny a permit application just because the unit violated building standards or ADU rules when it was created.
That is the part most people hear.
The part they miss is just as important: the law still centers on health and safety. If the unit is substandard, dangerous, or cannot satisfy the conditions required to avoid being treated as a substandard building, the path becomes much harder.
For homeowners in the City of San Diego, the issue is no longer only, “Was this built without permits?” The real question is, “Can this unit be documented, corrected where necessary, and brought to an approvable condition?”
That is a very different question — and for many properties, it is the difference between panic and a plan.
The Truth Many Homeowners Miss: AB 2533 Is Not Automatic Amnesty
A lot of homeowners hear the term “ADU amnesty” and assume the state now gives every garage conversion or backyard unit a free pass.
That is not what is happening.
What the law can do
For a qualifying older unit, AB 2533 can give you a real legalization path instead of shutting the door immediately because the space was created without permits.
In practical terms, that means:
- A qualifying ADU built before January 1, 2020 may still be eligible for retroactive permitting.
- The city’s focus shifts toward habitability, safety, and what must be corrected.
- A homeowner can get a confidential third-party inspection before filing, which can help avoid submitting blind.
- If corrections are needed to address health and safety issues, the process is supposed to move toward fixing the problem rather than punishing the owner just for coming forward.
What the law cannot do
AB 2533 does not magically erase every issue tied to an unpermitted unit.
It does not:
- Automatically legalize a unit the moment you discover the law.
- Protect unsafe or truly substandard construction.
- Guarantee that additions, alterations, or remodeling done later can ignore current code.
- Remove the need for plans, permit review, inspections, and correction work.
- Solve every issue for properties subject to Coastal Act requirements.
That last point matters more than many owners realize. A homeowner may have a qualifying unit and still face a more complicated process because of the property’s location or existing site constraints.
What Makes an ADU “Substandard”?
This is where many legalization efforts succeed or fail.
A homeowner may say, “The space looks fine,” but appearance is not the test. The city looks at whether the unit meets minimum habitability and life-safety expectations and whether the structure falls into substandard conditions that must be corrected.
Common red flags include problems like:
- missing or improper bathroom or kitchen fixtures
- no hot and cold running water
- inadequate heating
- poor ventilation or insufficient natural light
- unsafe or nonfunctional electrical, plumbing, or mechanical systems
- deteriorated foundations, floors, walls, or roof framing
- weatherproofing failures, leaks, broken exterior protection, or major moisture issues
- inadequate exits or missing fire-safety features
- spaces being used for living, cooking, or sleeping when they were never properly suited for that occupancy
This is why a lot of unpermitted garage conversions become complicated. A room can feel comfortable enough for short-term family use and still fall short of what is required for a legal dwelling unit.
The good news is that many units do not need to be demolished. They need to be evaluated honestly, documented accurately, and upgraded strategically.
How the San Diego Legalization Process Usually Works
For homes in the City of San Diego, the legalization path is not just one form and one inspection. It is a sequence.
Step 1: Confirm that the unit actually qualifies
The first question is whether the ADU fits the AB 2533 pathway at all.
That means figuring out:
- when the unit was built
- whether it is really functioning as an ADU or JADU
- whether the property is in the City of San Diego
- whether Coastal Act issues or other location-based restrictions could change the process
- whether the unit appears capable of avoiding substandard status after corrections
This first step matters because homeowners often spend money on plans before they answer the eligibility question correctly.
Step 2: Get a confidential inspection and feasibility review
One of the smartest moves is to evaluate the unit before you submit anything.
A confidential third-party inspection can help you understand:
- what is already acceptable
- what will likely need correction
- what could become expensive
- whether the space is a strong candidate for legalization or a more serious reconstruction effort
This is where experience matters. A homeowner who applies too early may trigger a process without understanding the true scope. A homeowner who waits too long may lose leverage, time, and money.
Step 3: Prepare accurate as-built plans and a site plan
You cannot legalize what you cannot clearly document.
For a serious application, you usually need a clear picture of what exists now, not what someone remembers building years ago. That often means preparing as-built drawings and a site plan that show the property boundaries, setbacks, lot coverage, location of the unit, nearby access, and other critical site information.
This stage also reveals some of the hidden issues that catch people off guard, including fire access concerns, setback realities, utility complications, and design conflicts between what exists and what the city can reasonably approve.
Step 4: Define the correction scope before filing
Not every issue has the same weight.
Some corrections are relatively straightforward: smoke alarms, carbon monoxide alarms, ventilation openings, or egress improvements.
Others can be far more serious: structural repairs, electrical system corrections, plumbing replacement, heating upgrades, or reworking parts of the building envelope.
A strong legalization strategy separates the scope into three buckets:
- what can stay
- what must be corrected
- what should not be touched until the permit path is clear
That distinction can save a homeowner from wasting money on the wrong work at the wrong time.
Step 5: Submit the building permit application
In the City of San Diego, the retroactive permitting process runs through a building permit application submitted online.
If the property already has a code enforcement issue or citation, that needs to be handled carefully and reflected appropriately in the application scope.
This step is where poor planning usually shows. If the plans are vague, the site information is incomplete, or the correction strategy is unrealistic, delays start stacking up.
Step 6: Complete corrections and pass inspections
Even when the city allows the legalization path, the work is not done until the required corrections are completed and inspections are passed.
That can include life-safety improvements, documentation updates, utility-related corrections, access issues, and other code items that must be addressed before the unit is recognized through the permit process.
This is why legalization is not just paperwork. It is a design, permitting, and construction problem that has to be solved in the right order.
Common Upgrades Homeowners Should Expect
Every property is different, but some items show up again and again in unpermitted ADU cases.
Homeowners should be prepared for upgrades such as:
- smoke alarms and carbon monoxide alarms
- emergency escape or rescue openings
- light and ventilation corrections
- heating installation or replacement
- plumbing and electrical repairs
- sanitation fixture corrections
- weatherproofing repairs
- framing or structural reinforcement
- fire access or site-related modifications
The key point is this: a unit does not have to be perfect on day one to have a path forward, but it usually does need to be correctable.
Real-World Scenarios That Catch Owners Off Guard
Scenario 1: The family garage conversion that becomes a rental
What begins as a room for a parent, adult child, or guest often turns into a long-term housing solution. Years later, the owner decides to rent it out for income.
That is usually the moment the risk changes.
Once a space becomes part of your financial plan, the cost of leaving it unpermitted gets much higher. Rent, liability, insurance, and future resale value all become part of the equation.
Scenario 2: The refinance or sale that uncovers everything
Many owners assume no one will ever ask.
Then the appraiser notices the separate entrance. The buyer asks for permit history. The lender wants documentation. The title process raises questions. Suddenly, an issue that sat quietly for years is now sitting in the middle of a transaction timeline.
At that point, “we’ll deal with it later” is no longer a strategy.
Scenario 3: The coastal property surprise
Some homeowners have a strong AB 2533 case on paper and still run into a second layer of complexity because of where the home is located.
If the property is in an area subject to Coastal Act regulations, the normal city bulletin path is not the whole story. Extra approvals can enter the picture, and the process may not be as simple as homeowners expect.
That is why location matters just as much as construction date.
Understanding the Cost Reality
One of the biggest mistakes homeowners make is asking, “How much does it cost to legalize an unpermitted ADU?” as if there is one number.
There isn’t.
The real question is: how close is the unit already to a safe, documentable, approvable condition?
Your total cost may involve:
- feasibility review and inspection
- as-built drawings and site documentation
- permit fees and review costs
- correction work for code and life-safety items
- electrical, plumbing, HVAC, or structural upgrades
- possible utility-related work
- final inspections and project close-out
A clean, well-built garage conversion with minor life-safety issues is a very different job from a badly altered structure with major electrical problems, no heat, poor drainage, and no proper exit strategy.
AB 2533 may create opportunity, but it does not make the process free. The homeowners who protect themselves best are usually the ones who start with a realistic assessment instead of guessing.
Red Flags That Signal You Should Start Now
If any of these sound familiar, it is probably time to stop postponing the issue:
- you plan to sell or refinance in the next year
- you want to rent the unit legally
- the space was converted from a garage, workshop, or storage area
- electrical, plumbing, or mechanical work was added without permits
- you have received a complaint, warning, or code notice
- your insurance, lender, appraiser, or buyer has started asking questions
- you are considering “just remodeling it a little more” before figuring out the permit path
That last one is especially risky. New work added onto old unpermitted work can make the situation harder, not easier.
Don’t Wait Until a Buyer, Lender, or Inspector Forces the Issue
Most homeowners do not deal with an unpermitted ADU because they are careless. They deal with it because life moved quickly, the space solved a real problem, and the urgency of the moment outweighed the paperwork.
But once the unit exists, the question becomes whether you control the process — or whether the process eventually controls you.
Critical timing issues include:
- sale and refinance problems surfacing with no warning
- code complaints turning a quiet issue into an active one
- incorrect repair work making the final legalization process more expensive
- documentation gaps causing permit delays when time matters most
Why professional help matters:
- the first step is knowing whether the unit has a viable path
- the second is documenting existing conditions correctly
- the third is designing the right correction scope
- the fourth is coordinating permit work and construction so the project actually moves forward
This is not just a code issue. It is a property strategy issue.
Protect Your Property the Right Way
If you have an unpermitted ADU, garage conversion, guest unit, or backyard living space in San Diego, do not wait until a sale, refinance, tenant issue, or city complaint forces the problem on someone else’s timeline.
Creative Design & Build helps homeowners turn complex property problems into real project plans. We can evaluate the existing space, prepare the plans, coordinate the permit process, and complete the upgrades needed to move the unit toward compliance.
Call Creative Design & Build today at (855) 445-9455 or email [email protected] to schedule your free in-home estimate. We are located at 9275 Trade Place Suite H, San Diego, CA 92126, serve homeowners throughout San Diego County, and operate under License #1045112.
How ADU Rental Income Affects Property Taxes in California
Adding an ADU changes your California property taxes mainly through a small, separate value tied to the new unit, while your home’s Prop 13 value stays protected. SB 1164 keeps the overall bill predictable during the shift. You’ll see a modest increase from the ADU’s value, typically isolated from the main home’s assessment. Rental income from the ADU is taxable, but you can deduct expenses and depreciation. Interested in how to optimize your scenario? Stay with this guide.
Assessing the ADU and Its Impact on Your Property Tax
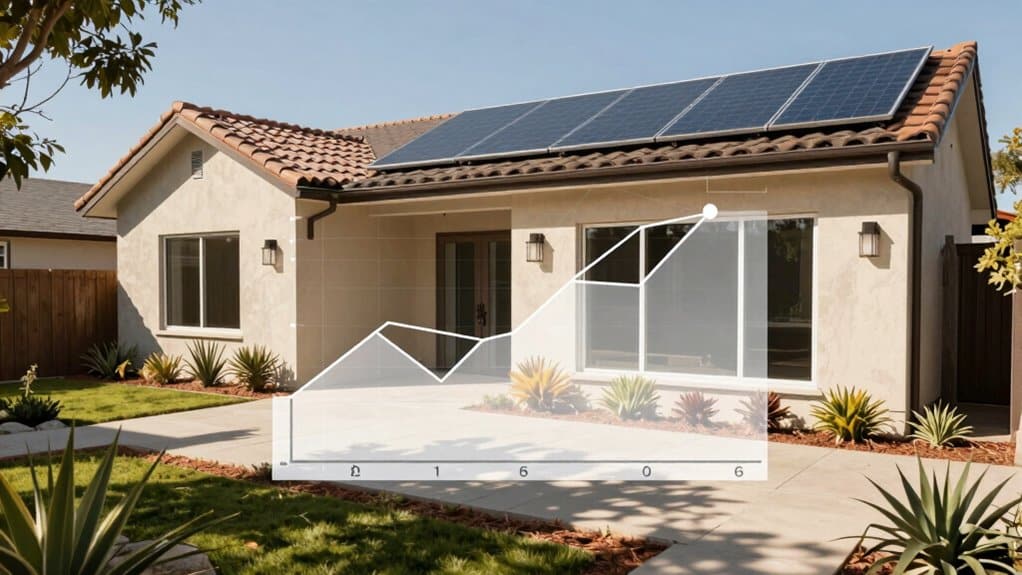
Evaluating the ADU and its impact on your property tax starts with understanding how the blended assessment works.
You’ll keep your primary residence’s Prop 13 protected value, while the ADU adds value separately to the existing property assessment. Think of it as a home addition that isn’t a full reassessment, so the blended assessment reflects only the marginal ADU value.
SB 1164 helps by preserving the current assessment unchanged, easing you into the process.
When considering ADU valuation, authorities look at construction cost or market value at completion, using standardized rates and factors like size, quality, and location.
The result feeds into your property assessment, guiding the eventual tax implications without overhauling your base.
How Reassessment Works When an ADU Is Added
When you add an ADU, the county reassesses only the new or marginal value the ADU brings to your property. The existing home's assessed value stays the same, while the ADU’s value is calculated using ADU valuation methods and market comparables.
The new total is then added to your property's base value, triggering a separate assessment for the marginal addition.
- Focus on construction costs, size, and location to determine value
- Use market data from local comparable ADUs to refine estimates
- Consider any applicable property tax exemptions that may apply to your situation
This approach keeps assessments fair and predictable.
You’ll receive a notice of the new assessment and retain the right to appeal if you believe the value isn’t properly supported by the data.
Additionally, enhanced family connectivity and independent living opportunities offered by ADUs can significantly boost their market appeal and overall property value.
How Blended Tax Rates and SB 1164 Affect Your Bill
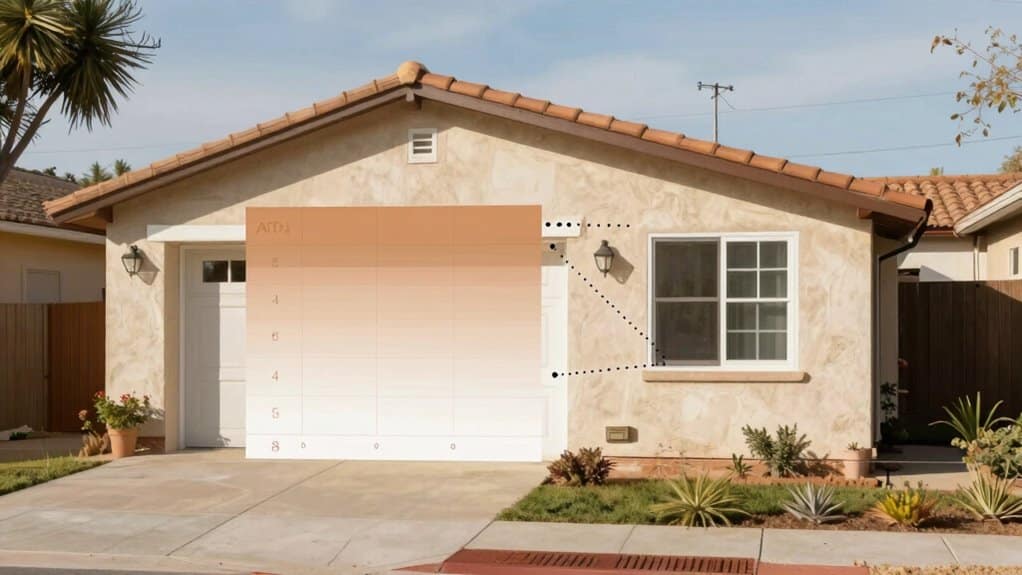
SB 1164 changes how your ADU affects your bill by using a blended assessment instead of a full property reappraisal.
With blended rates, the ADU’s value adds to your existing home’s assessed value, but the primary residence isn’t fully revalued. You’ll still see the base 1% Prop 13 rate, plus local levies and bonds, which typically yield effective rates around 1.1% to 1.3%.
The ADU portion is taxed at its determined market value, usually near 1%, and annual increases stay capped at 2%. This approach isolates the ADU’s tax impact, reducing dramatic jumps.
In practical terms, your tax implications hinge on ADU size and local rate adds, rather than a complete reassessment of your entire property. Blended assessment offers predictability and fairness.
Rental Income From an ADU: Taxable Income and Deductions
Rental income from an ADU is taxable, so you’ll report what you earn on federal and state returns as part of your overall income.
In California, rental profits create tax liabilities, and income includes monthly rent plus any lease cancellation fees. The income is treated as a passive activity, so you report it on Schedule E for federal returns and on the appropriate California forms.
You’ll also deduct ordinary, necessary expenses to reduce taxable income, which can lower your overall bill.
- deductible expenses include maintenance, repairs, and fixture replacements
- property management fees, and owner-paid utilities are deductible
- depreciation of the ADU lowers taxable income over time
Practical Scenarios: Typical Tax Changes and Net Profit With an ADU
A practical look at how ADU investments affect taxes and net profit helps you plan smartly after adding an accessory dwelling unit.
In these scenarios, you’ll see how modest to substantial ADU costs shift yearly tax bills and cash flow. For a 500 sq ft ADU in San Diego, your tax rises 650–825 dollars, while rents of 1,500–3,000 dollars monthly generate strong after-tax profits.
With higher-cost builds, monthly rent generally outpaces the tax increase by 14–20 times, creating meaningful net gains after the first year.
Consider ADU financing options to manage upfront costs and timing of reassessment, and note property appreciation effects may amplify long‑term value.
These patterns show how tax planning and rent income align to support smart investments.
ADUs not only provide potential rental income but can also increase property value by 20% to 30%, making them a strategic choice for homeowners looking to enhance their property's worth and functionality.
Wrapping It Up
You’ll see that adding an ADU can raise assessed value and property taxes, but rules like SB 1164 and blended rates shape the bill. Rental income adds taxable income, with deductions available for qualified expenses. By understanding reassessment timing and possible exemptions, you can plan effectively. Stay attentive to local assessments and documentation, and model scenarios to gauge net profit. With careful budgeting and accurate records, you’ll make informed decisions about your ADU investment.
When Structural Engineer Review Is Required
Structural engineer review is required whenever your project presents significant risk, complex design, or regulatory thresholds that trigger independent checks. You’ll need peer reviews in certain jurisdictions, and independent design reviews for seismic or performance-based work. Foundations, lateral load paths, and superstructure connections must be verified for safety and code compliance. Licensing and professional responsibility matter, with proper documentation and qualified supervision. If you keep exploring, you’ll gain clearer steps for ensuring a compliant, durable structure.
Peer Review Mandates Across Jurisdictions
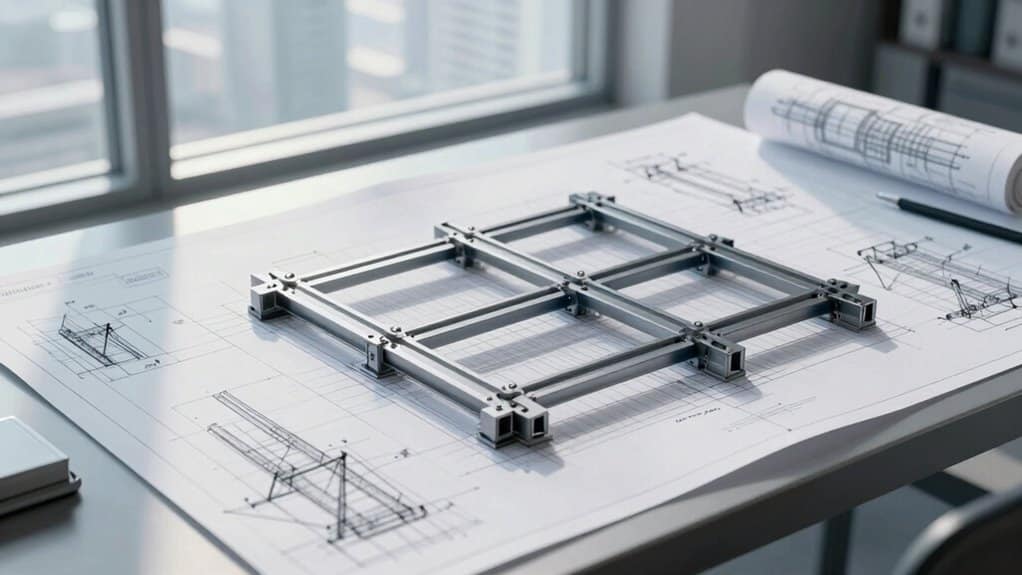
Peer review requirements vary widely by jurisdiction, and understanding these differences helps you plan safer, compliant projects.
Across Massachusetts, Connecticut, California, and Chicago, rules hinge on height, area, occupancy, and code compliance, creating distinct pathways for review. You’ll notice jurisdictional differences: some mandates arise from state codes, others from city or county policy, and a few invite voluntary participation to speed permits.
Design complexities grow where thresholds push structures into mandatory evaluation, or where owner-selected reviewers bring specialized expertise. In California, a licensed structural engineer must review construction documents, while Chicago offers optional peer review to accelerate approvals.
This mosaic means you must anticipate who reviews your plan, what they assess, and how findings affect timelines and safety. The core goal remains robust, code-aligned designs.
Projects Requiring Independent Design Review
Independent design review is triggered by specific seismic and performance criteria throughout a project, so you’ll want to identify early which rules apply to your scope.
If your plan includes base isolation, viscous damping, or nonlinear response history analyses, independent review is likely required to verify safety and reliability.
You’ll also need to reflect on performance-based approaches and site-specific geotechnical conditions, as these factors can mandate peer evaluation to guarantee robust design outcomes.
Independent Review Triggers
Independent Design Review is triggered when a project meets specific complexity and risk criteria that warrant an objective design check.
You’ll see independent assessments come into play when building complexity crosses defined thresholds, aligning with the Australian Building Codes Board’s view of how complex a project is.
Location matters, too: being in a natural disaster-prone area counts as one criterion, so Darwin projects gain an added trigger, and a single complexity element can push a review.
Public risk, design complexity, and innovative design types all inform the trigger, ensuring the review addresses potential critiques or deficiencies before issuance.
You’ll work with reviewers who maintain independence, objectivity, and clear communication throughout the process.
Seismic Design Necessities
Seismic design is a key focus when a project requires an independent design review, because the stakes are high and the details matter. You assess local seismicity, fault proximity, and expected ground motion to establish project-specific design criteria.
Soil conditions, liquefaction potential, and site amplification effects require evaluation during the design review process. Site parameters and free-field ground motion characteristics are integral to seismic analysis review, while geotechnical assessment forms provide a foundational step in the preliminary phase.
Ground motion basis selection influences retrofit design criteria and seismic performance ratings. You examine lateral load-resisting systems, verify code-compliant reinforcement and connections, and guarantee regularity reduces torsional effects.
Seismic assessments and robust design methodologies guide nonlinear analysis, performance-based design, and retrofit strategies with professional rigor.
Foundation, Superstructure, and Lateral Load Assessments
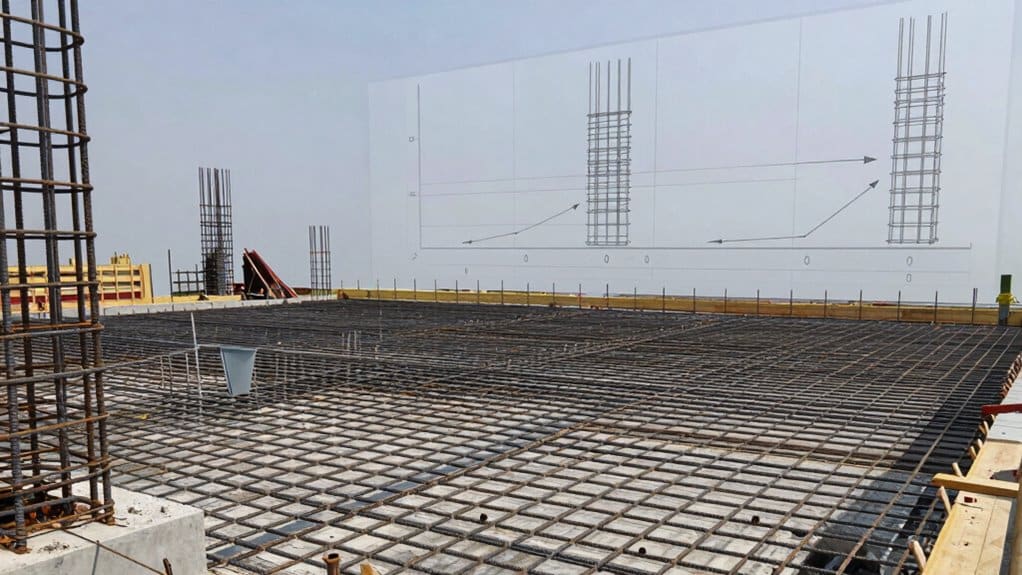
Foundation, Superstructure, and Lateral Load Assessments are about ensuring you can confirm Foundation Compliance Checks, verify Lateral Load Path Review, and validate Superstructure Design Verification.
You’ll look at how foundations carry loads, how lateral forces move through the building, and how the overall frame resists stresses, using clear criteria and codes.
This discussion sets the stage for precise, evidence-based recommendations your team can trust.
Foundation Compliance Checks
Foundation compliance checks combine careful on-site evaluation with precise documentation to verify that a structure meets both safety and loan-eligibility standards.
You’ll review soil bearing capacity, settlement, and moisture-related heaving, while inspecting cracks, footing stability, and drainage around the foundation. The process guarantees permanent installation, code compliance, and loan eligibility, especially for manufactured homes under HUD’s PFGMH guidelines.
You assess foundation durability by documenting footing sizes, piling or pier conditions, and slabs for alignment and deterioration with photos. Certification comes from engineer review of field data, notes, and photos, aligning with engineering standards.
You also confirm moisture intrusion controls and proper grading to prevent future movement, supporting lenders’ confidence in the overall structural integrity.
Lateral Load Path Review
Lateral Load Path reviews examine how forces move from the load-bearing parts of a structure to its foundation, through the superstructure, and into the ground.
You assess how a continuous path transfers lateral shear, uplift, and overturning forces, guaranteeing no gaps disrupt the flow. A solid path continuity means each element connects securely to the next, from shear walls to footings, with embedment depth and bolt spacing verified per code.
1) Foundation connections guarantee anchorage systems transfer forces without discontinuity.
2) Superstructure links, like nails, screws, and hold-downs, maintain force transfer to resistance elements.
3) Diaphragms and collectors distribute forces evenly and support path continuity across elevations.
4) Deficiency criteria flag non-continuous paths, misaligned framing, or inadequate blocking that impair transfer.
Superstructure Design Verification
When you verify a structure’s design, you’re confirming that the foundation, superstructure, and lateral load systems work together as a coherent whole.
You’ll conduct a thorough Superstructure Design Verification, tying together foundation details, framing plans, and load paths. Start with design optimization to guarantee material use is efficient without compromising safety.
During structural analysis, verify that framing plans align across drawings, floors meet loading conditions, and the system remains strong and serviceable under expected forces. Independent calculations on representative members validate adequacy, while a constructability review helps avoid construction issues and supports long-term durability.
This process confirms compliance with codes, performance criteria, and project design criteria, then documents results with visuals and measurements. Your role, as the engineer of record, remains central throughout.
Code and Specification Verification Standards
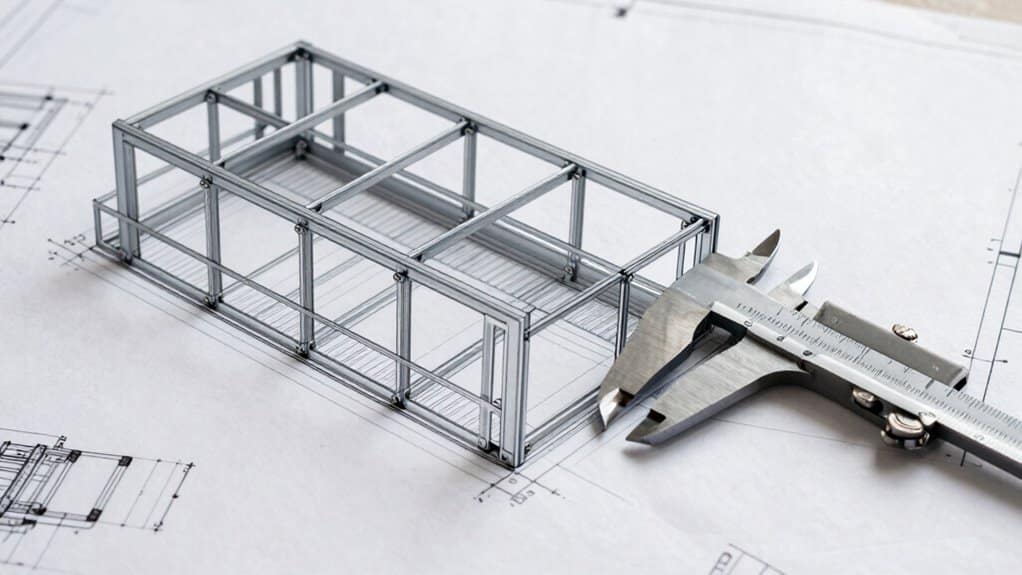
Code and specification verification standards guarantee that structural designs meet accepted requirements before construction begins. You verify code compliance by cross-checking with IBC, ASCE/SEI 7-22, and model codes that reference material standards without restating them in full.
Design verification then confirms that each component matches current acceptances for concrete, steel, and other materials.
- Confirm alignment with IBC 2024 and IEBC 2024 for new and existing buildings.
- Cross-check ACI 318/350 for concrete, and AISC 360 for steel sections and connections.
- Use verification tools to automate clause-referenced reports and load checks.
- Ascertain ongoing updates through ASCE five-year cycles and regional code adaptations.
This process emphasizes code compliance and design verification, delivering trustworthy, well-documented results for construction-ready designs.
Licensing, Professional Responsibility, and Legal Implications
Licensing, professional responsibility, and legal implications shape how structural engineers practice every day. You pursue licensing to prove you’re competent beyond a basic PE, especially for designated structures like buildings and bridges.
Licensing implications include passing FE early, then gaining four years of supervised, progressive experience, and finally meeting SE I and II exams for advanced competency.
Licensing requires FE success, four years of supervised experience, then SE I and II exams for advanced competency.
Professional accountability rests on accurate records, amplified work histories, and proper supervision by licensed engineers. You’ll need references—three licensed PEs and others with equivalent expertise—and may face firm licensure requirements with a professional-in-responsible-charge.
Legal consequences await non-compliance, from penalties to loss of good standing if you skip renewals or continuing education. States differ in recognition, but responsibility and public safety demand thorough, ethical practice.
Special Considerations for High-Razard and Performance-Based Designs
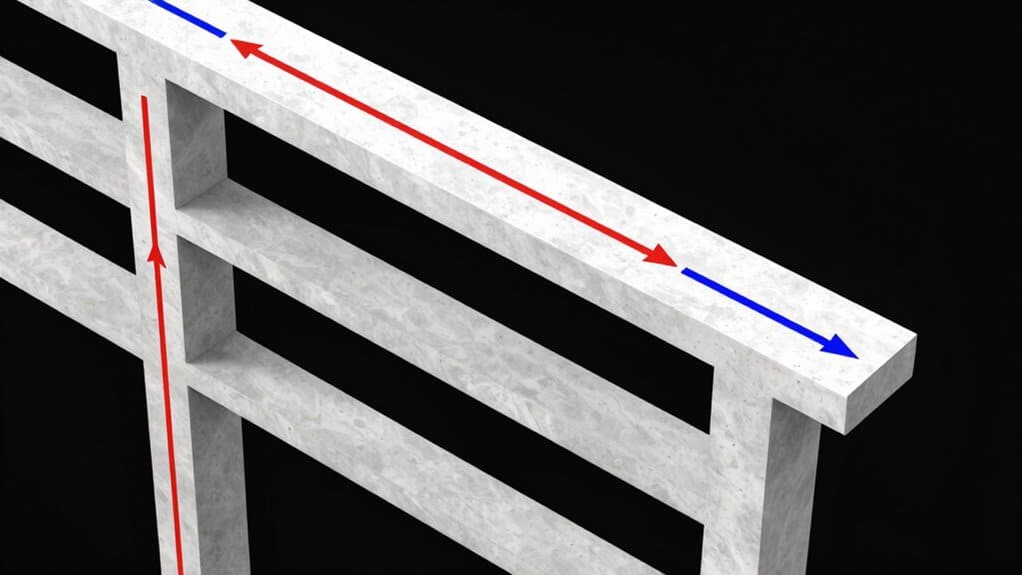
High-risk designs demand a careful, evidence-based approach that prioritizes safety without compromising practicality.
In these cases, you’ll confront complex criteria and rely on robust analysis to guide decisions. You should expect thorough evaluation of how environments influence performance, with emphasis on accurate modeling and clear risk judgments.
This topic highlights how high risk assessments and performance modeling shape design choices, ensuring resilience without unnecessary conservatism.
- Assess high-risk scenarios using site conditions, loads, and fault sources.
- Apply nonlinear response-history analysis to verify seismic performance.
- Verify wind, flood, and material behavior against code and project criteria.
- Integrate retrofitting status, drift limits, and site-specific hazard analyses into decisions.
Wrapping It Up
Conclusion: You’ll see that recognizing when a structural engineer review is needed protects people, property, and progress. By checking jurisdiction mandates, project scope, and critical elements like foundations and lateral systems, you confirm the appropriate independence and accuracy. Verification standards, licensing duties, and risk considerations shape responsible practice. Adopting a clear decision process helps you balance safety with efficiency, ensuring high-importance designs meet code, performance goals, and professional obligations without unnecessary delay.
California Title 24 Energy Standards Explained for Home Remodels
California Title 24 sets the energy rules you must meet when remodeling a home. You’ll trigger requirements for windows, insulation, ducts, lighting, HVAC, and electrical systems based on the scope of work, not every repair. The 2025 code tightens standards with more duct sealing, stronger ventilation, and new electrification options, plus solar and battery mandates for many projects. You’ll use HERS testing and California-certified energy models to demonstrate compliance before permits. If you keep reading, more specifics await.
What California Title 24 Covers for Home Remodels
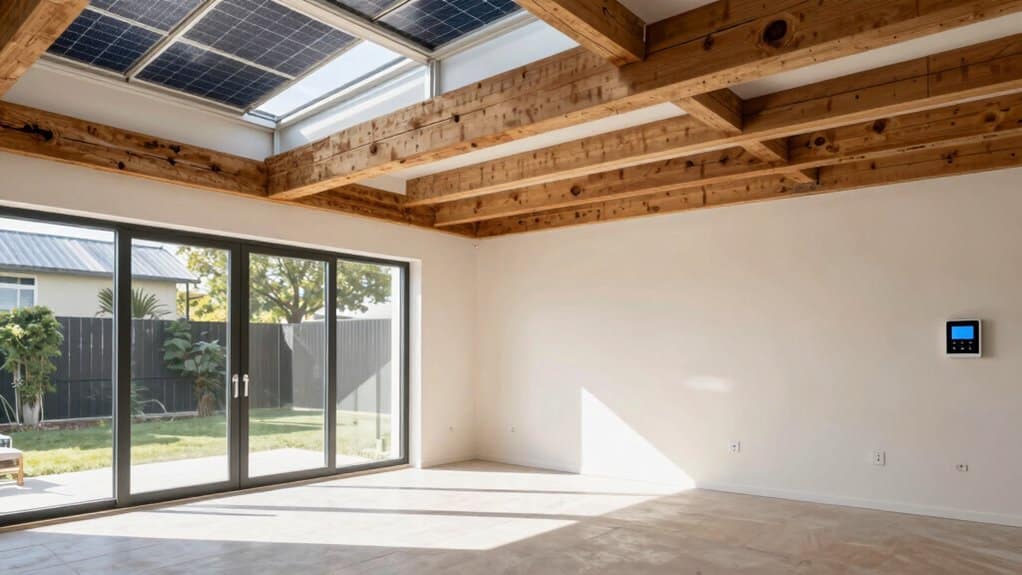
California Title 24 sets the rules for what counts as a remodel from an energy-efficiency standpoint, so you’ll want to know when changes trigger its requirements.
In short, certain renovations activate compliance, while some repairs do not. If you replace or enlarge windows and doors, upgrade HVAC systems, modify ducts, or alter insulation, you’re facing Title 24 compliance.
Lighting changes in kitchens, bathrooms, and garages, plus water heater upgrades, also count toward energy upgrades.
Distinctions matter: alterations, which modify energy usage, require full compliance certification, whereas simple repairs don’t.
Distinctions matter: alterations require full energy-compliance certification, while simple repairs do not.
Building envelope work—roofs, exterior walls, and insulated floors—can trigger standards, especially when you add space or change usage.
Permits and pre-construction documentation often formalize these compliance challenges before any work begins.
Key Changes for 2025 Energy Code Adoption
The 2025 Energy Code adoption brings notable shifts that affect nearly every project, from new builds to alterations.
You’ll face more stringent requirements across buildings, reflecting a roughly 30% increase in stringency versus 2022 standards. The scope now covers new construction, additions, and alterations for residential and nonresidential buildings, with single-zone heat pump baselines expanded.
HVAC and envelope rules tighten, including mandatory duct sealing, an R-22 (or 0.043 U-factor) ceiling/roof insulation, and reduced whole-house fan and attic vent area.
Electrification expands options for space heating, water heating, cooking, and pool heating, accelerating the shift from natural gas.
PV and battery mandates grow, promoting energy resilience. Expect enhanced lighting controls and sensors, all aligning under energy efficiency goals within the building codes framework.
How Ventilation and Heat Pumps Impact Remodels
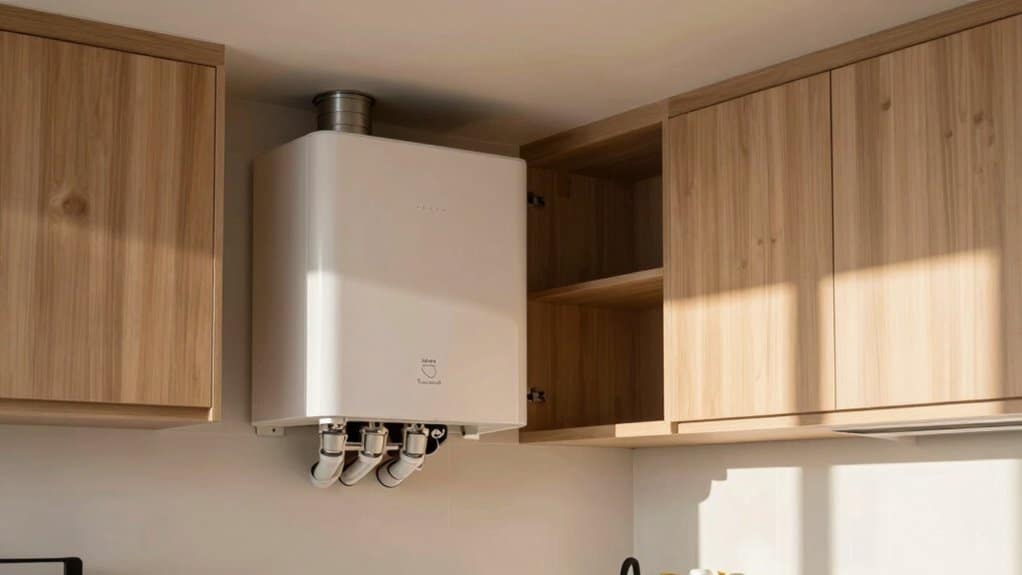
As the 2025 Energy Code expands, ventilation and heat pump requirements increasingly shape remodel projects.
You’ll see the minimum ventilation volume rise to 1 cfm per 100 sq. ft. plus 7.5 cfm per occupant, with occupants based on bedrooms. A 3-bedroom, 1,800 sq. ft. townhouse needs about 48 cfm continuous ventilation, and the new formula uses the larger of occupant-based or area-based rates.
Whole-house ventilation becomes mandatory, via a continuous bathroom fan or central HVAC supply/return. In multifamily buildings, balanced ventilation is required, and HERV paths may apply to improve cost-effectiveness.
Whole-house ventilation becomes mandatory via continuous bathroom fan or central HVAC supply/return; balanced ventilation required in multifamily buildings.
Heat pump efficiency matters, with updated VRF options and prescriptive verification by HERS raters. Expect stronger duct sealing, testing, and upgraded airflow controls as you remodel.
Ventilation strategies and heat pump efficiency matter.
Solar, Batteries, and Electric-Ready Requirements
Solar, Batteries, and Electric-Ready Requirements are shaping how you plan new residential, commercial, and multifamily projects.
Title 24 mandates solar PV systems for new builds, sized by floor area and occupancy factors, with calculations like kWPVdc = (CFA × A) / 1000.
New 2025 updates raise PV capacity in certain occupancies and apply to nonresidential and high-rise multifamily projects.
Battery storage is now required alongside PV for many commercial properties, sized by Section 140.10 equations, with a 25% PV size reduction when paired with qualifying storage.
You’ll use tools such as the Solar PV Calculator and California Solar Shade Analysis to verify access and sizing.
Compliance may apply from January 1, 2026, for permits issued afterward.
solar panel integration, battery storage requirements.
Compliance Tools and Resources for Remodel Projects
Compliance tools and resources for remodel projects keep you aligned with Title 24 requirements at every stage.
You’ll use HERS verification for mechanical changes, additions, and major remodels to confirm post-installation efficiency, performed by certified HERS raters.
Title 24 calculations happen before permits, with energy models submitted by your energy consultant and generated through California Certified Energy Reading programs.
Title 24 calculations precede permits, using energy models crafted via California Certified Energy Reading programs.
CEC-approved tools, like EnergyPro and CBECC, simulate envelope, lighting, HVAC, and water heating performance, ensuring official permit documents are valid.
Compliance forms help identify the right Part 6 forms, while MAEDbS lists approved luminaires your designer must specify.
Local AHJs verify JA-marked products and forms, guiding your permitting, planning, and post-construction commissioning alongside energy consultants for continued compliance.
Wrapping It Up
You’ll find California Title 24 remodeling rules clearer than you’d expect, with practical steps you can take now. As codes evolve, focus on energy efficiency, ventilation, and the growing role of heat pumps, solar, and storage. Keep plans aligned with 2025 changes, verify requirements for electric-ready spaces, and use available compliance tools to stay on track. By staying proactive and organized, you’ll simplify approvals, save energy, and deliver a safer, more comfortable home renovation.
Permit Requirements for ADUs and Additions in San Diego County
In unincorporated San Diego County, ADU and addition permits depend on your zoning, unit type, and lot. You’ll need detailed site plans, architectural drawings, and setback and height information, plus potential environmental or septic documents. Detached ADUs can be up to 1,200 sq ft; JADUs up to 500 sq ft; attached units have their own size rules. Expect a 60‑day target for approvals after a complete application. If you keep exploring, you'll uncover key steps and timelines in detail.
ADU Eligibility and Zoning in Unincorporated San Diego County
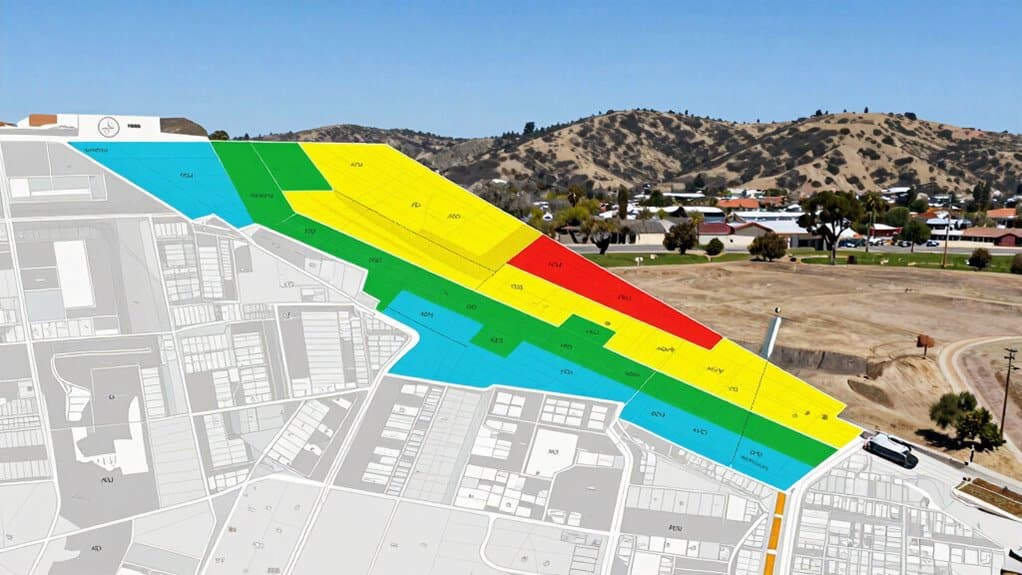
In unincorporated San Diego County, ADU eligibility and zoning hinge on whether your lot is residential and how you plan to use the space.
If your property is zoned for residential use with an existing or proposed single-family dwelling, you’re eligible for one detached ADU, and you can convert permitted spaces within an accessory structure or the dwelling itself. A junior ADU is also permitted alongside a detached ADU on single-family lots.
For multifamily sites, residential zoning allows two detached ADUs or space-conversions, with height and conversion limits.
You’ll face overlay and fire-zone considerations that affect feasibility. Understand ADU financing options early, and anticipate zoning compliance challenges to avoid delays or redesigns.
Size Limits and Unit Types for ADUs
Size limits for ADUs are defined clearly, with different caps depending on whether the unit is detached, attached, or a JADU.
You’ll find that detached ADUs can reach up to 1,200 square feet, with a minimum of 150 square feet, and no dependency on the primary residence’s size.
Attached ADUs are limited to 50% of the primary residence, capped at 1,200 square feet, though studios or one-bedroom units may go up to 850 square feet and two-bedroom units up to 1,000 square feet, with a 150-square-foot minimum.
JADUs cap at 500 square feet, starting from 150 square feet, created within the existing home.
Setbacks, Height, and Placement Requirements

Setbacks, height, and placement rules determine how you can position an ADU on your property while meeting safety and zoning standards.
You’ll see that side setbacks vary: newly constructed detached ADUs require a minimum 4-foot side setback, with zero side setbacks allowed for some small detached units, while exterior side yards on corner lots need 4 feet from easements or streets.
Rear setbacks also differ, with zero rear setbacks for certain small detached ADUs outside high fire zones and a mandatory 4-foot rear setback in Very High Fire Hazard zones.
Height rules matter too: under 16 feet you may enjoy reduced setbacks, but taller structures face stricter limits.
Placement requires a 6-foot separation from other structures, and front encroachment can be allowed under recent state and local rules for eligible sizes.
Setback regulations and height limitations guide every decision.
Required Permit Documents and Review Timeline
Maneuvering the required permit documents and the review timeline starts with knowing what you must submit and when. You’ll need detailed site plans and architectural drawings to prove zoning and building code compliance, plus documentation showing residential zoning and an existing primary dwelling.
Site plans must display setbacks, building separations, and lot coverage, while architectural plans specify square footage, height, and entrance locations for your ADU or JADU. Environmental notes may be required, such as septic plans or fire department approvals in wildfire-prone areas.
The permit review process aims to finalize approvals within 60 days of a complete application, with San Diego County usually taking 4–10 weeks. Incomplete submissions trigger corrections that pause the clock, and streamlined pathways may apply if standards are met.
When planning for an ADU, it's crucial to understand the benefits of incorporating sustainable features and working closely with professionals to enhance property value.
Additions, Ownership, and Special Programs for 2026 ADUs
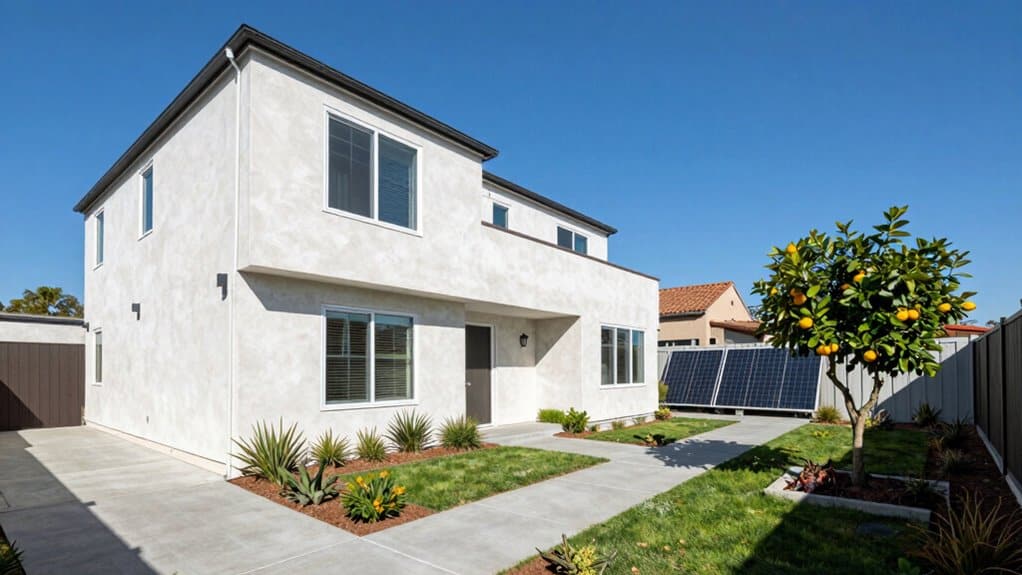
ADUs in 2026 bring notable changes to ownership, occupancy, and special programs, making it easier for property owners to maximize usable space while meeting state and local requirements.
You’ll find that ADU ownership can’t be sold separately from the primary residence under standard rules, except in approved affordable housing programs or SB 9 lot splits, which must meet strict zoning and affordability criteria.
Owner-occupancy is no longer required for most ADUs, allowing you to rent both the main house and ADU if you choose.
JADUs retain occupancy rules, but new AB 1154 removes them for JADUs with separate bathrooms.
Multifamily sites gain flexibility with expanded detached ADU limits.
Special programs, including bonus and standard plan options, help streamline approvals and reduce costs.
Wrapping It Up
You’ll find that ADUs and additions in unincorporated San Diego County follow clear rules focused on safety and livability. By understanding eligibility, size limits, setbacks, and permit documents, you’ll streamline the process and avoid delays. The process emphasizes proper planning, timing, and coordination with county review steps. With careful preparation and attention to requirements, you can confidently pursue thoughtful upgrades that enhance value and housing options while staying compliant and informed throughout 2026.
Garage Conversion Vs Detached ADU: Pros, Cons, Permits, Costs
Garage conversions convert your existing garage into usable space at a lower cost and with quicker timelines, while detached ADUs add privacy and independent living space but at higher upfront investment. Pros include better yard use for conversions, and rental income for ADUs; cons cover limited layout in conversions and greater permitting for ADUs. Costs vary widely—$10k–$150k for conversions vs $100k–$300k for detached units—plus permitting needs. If you want more details, you’ll gain clearer guidance as you explore options.
Garage Conversion: Overview and Key Benefits
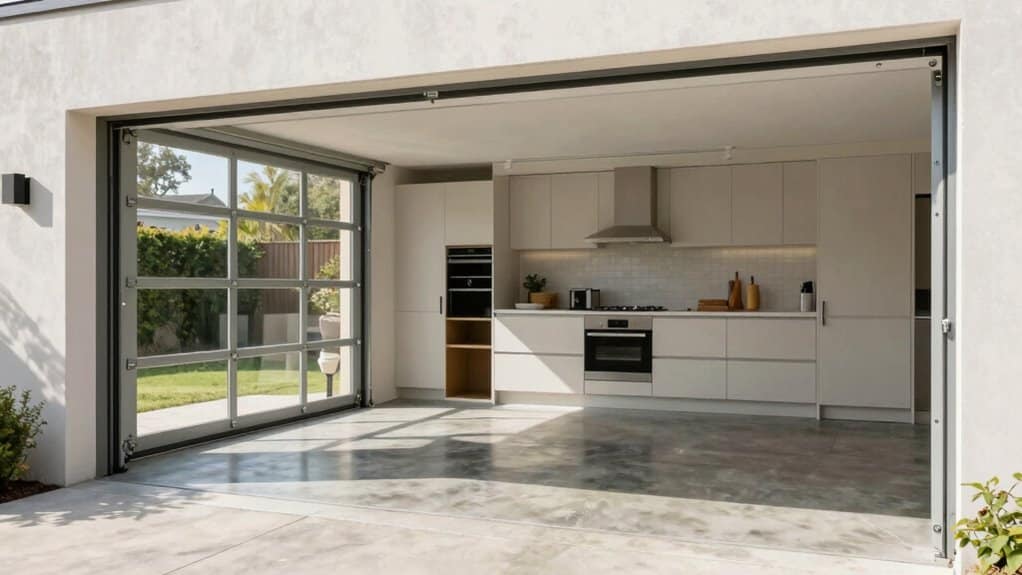
A garage conversion transforms an underused space into valuable living square footage without the upheaval of a full home addition. You repurpose the existing structure to create an extra bedroom, home office, guest suite, or playroom, adding usable space without sacrificing outdoor yard area. The conversion process integrates proper insulation and heating, enabling seamless connection with the rest of your home. It’s considerably more affordable than traditional extensions, since the basic structure is already in place, reducing labor and materials. This approach delivers strong return on investment and can increase resale value by 10-20% when done well. Design options let you tailor layouts, windows, and finishes to fit your needs while maximizing comfort and storage potential. Our garage conversion service explains the existing-garage assessment and the work to discuss before comparing proposals.
Detached ADU: Overview and Key Benefits
Detached ADUs offer notable space and privacy you’ll appreciate, with a separate entrance and living areas that keep you autonomous from the main home. They also deliver a strong ROI by boosting rental income and property value, while providing flexible options for multigenerational living or caregiver housing. In short, you gain a private, efficient micro-housing solution that can enhance your property's financial and functional appeal. Additionally, ADUs boost market appeal by appraising 20-30% higher than homes without them, making them a smart investment choice in competitive markets.
Key Benefits Overview
Detached ADUs offer distinctive advantages that make them a compelling option for homeowners. You get design flexibility from ground up, tailoring layouts to fit modern studios or cozy cottages. Separate structures let you choose unique styles and materials without the constraints of existing buildings, supporting a standalone design that appeals to independent living. You’ll find greater architectural variety compared to attached or converted spaces, with flexibility in size typically 600-1,000 square feet for smaller households. These units also boost property value by adding usable living space and offering rental income, which helps cover mortgage or expenses. They support multigenerational living, aging in place, and a steady income stream, aligning with design trends and homeowner preferences. Additionally, Creative Design and Build Inc. ensures that the ADUs are crafted with high-quality materials and modern construction techniques for durability and energy efficiency.
Space and Privacy Value
Space and privacy come into sharper focus with a detached ADU, as its standalone nature preserves your main home's flow while offering a separate living space.
This setup supports space optimization by using a compact footprint and efficient layouts, letting you maximize backyard potential without overwhelming the property. Built-in storage and a smaller kitchen and bathroom minimize footprint while preserving usability.
The standalone structure provides complete separation from the main house, delivering strong privacy enhancement for renters, guests, or a dedicated home office or studio. A dedicated entrance and facilities help maintain autonomy and reduce family distractions, improving focus.
Seamless integration with gardens and patios preserves outdoor flow, while flexible zoning accommodates irregular lots and setbacks for harmonious living. Tailored ADU Solutions ensure that the designs align with the homeowner's vision and maximize property potential.
Financially Strong ROI
Financially strong ROI for a detached ADU hinges on a blend of upfront cost efficiency, solid rental demand, and favorable tax incentives.
You can expect robust returns across options, from budget modular ADUs at 13.4% annual ROI to mid-range setups near 10.1%.
Rental income varies by market, with Seattle, San Diego, and Florida examples showing compelling cash flow, even after costs.
Property value appreciation supplements income, as ADUs can boost resale values and overall home worth.
Construction costs range widely, but modular builds offer faster timelines and reduced on-site work, improving financial forecasting.
Consider investment strategies that combine rent, tax benefits, and potential appreciation.
Use careful budgeting, track performance, and align ADU goals with long‑term financial objectives.
A detached ADU can enhance the overall charm of Santee community by integrating seamlessly with existing homes and boosting property value.
Cost Comparison: Garage Conversion Vs Detached ADU
When evaluating costs, a garage conversion typically costs far less upfront than building a detached ADU, but the exact figure depends on the existing structure and required upgrades.
You’ll see lower initial costs because you’re using the current space, yet older garages may need wiring, plumbing, or roof work. A garage conversion can range roughly from $10,000 to $150,000, depending on scope, with a two-car option hitting around $120,000.
A detached ADU starts higher, often $100,000 to $300,000, due to new foundations and full utilities. Consider cost factors like site work, materials, and labor, which drive totals.
With respect to rental income, expect about $1,000–$1,800 monthly for conversions and roughly $1,600–$2,500 for detached units, influencing overall ROI and timelines.
Permits and Approvals: Garage Vs Detached ADU
Permits and approvals for garage conversions and detached ADUs require careful navigation through local and state rules, and getting this right sets the project up for smoother construction.
You’ll face permit requirements that cover building, electrical, plumbing, and mechanical work, plus zoning approvals to confirm eligibility.
Application processes demand complete design plans, site surveys, and compliance documentation before submission.
Detached ADUs often require extra reviews, like site plans and fire-safety or historical permits, which can extend timelines.
Both paths rely on state licenses and local approvals to move forward confidently.
In some areas, fast-track options exist for garage conversions, while other jurisdictions maintain stricter limitations.
- permit requirements and application processes for both options
- evidence of zoning compliance and site plan requirements
- review timelines and resubmission steps
- differences in California, New York, and city-level rules
Layout, Space, and Privacy Considerations
Garage conversions and detached ADUs differ not just in structure, but in how layout, space, and privacy flow into daily living.
You’ll feel layout flexibility limited in a garage due to fixed walls, roof, and foundational elements that cap usable space.
With a detached ADU, you gain design freedom, including one or two bedrooms and customizable ceilings, windows, and lighting, boosting space optimization.
With a detached ADU, you gain design freedom and optimized space.
Privacy concerns are more pronounced in a conversion because of shared walls with the main home, whereas a detached unit offers independent entry and complete separation.
Consider utility access: garage conversions leverage existing connections, while detached ADUs require new hookups.
Outdoor integration matters too, as garage conversions preserve yard space, while detached structures reshape landscaping and setbacks.
ADUs provide flexible living solutions for family members or tenants and often yield a higher ROI compared to traditional additions.
ROI and Long-Term Value
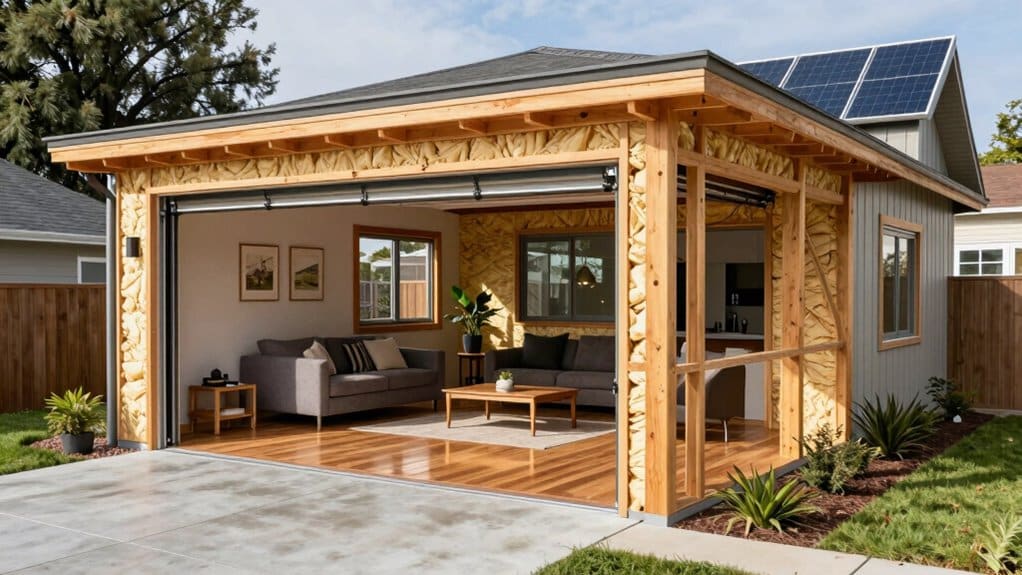
ROI and long-term value aren’t just about upfront costs—they hinge on steady rent, appreciation, and ongoing maintenance. You’ll see garage conversions typically offer strong ROI with lower initial capital, while detached ADUs can yield higher returns but require more investment; the key is balancing cash flow with potential property value growth. As you compare, consider long-term trends in value appreciation and how annual operating costs affect your net gains. Additionally, ADUs can increase property value by 20-30%, providing significant financial benefits in the right markets.
Long-Term ROI Trends
Long-term ROI from garage conversions and detached ADUs shows strong potential, with both paths delivering meaningful value over time. You’ll see steady equity growth as functional spaces add resale appeal, especially when finishes and utilities are well executed.
Market Trends influence ROI, while smart Investment Strategies help you maximize returns through durable design and efficient costs. Over time, conversions tend to maintain higher percentage recoveries than broader home additions, yet ADUs offer sizable absolute value gains via rental income and increased property value in active markets.
- Market Trends shape long-term value, with location and demand driving appreciation and rent potential
- Investment Strategies emphasize quality finishes, efficient workflows, and cost control
- Rental income from ADUs supports ongoing returns alongside resale gains
- Equity accumulation benefits from usable square footage and strategic upgrades
Value Growth Impact
Value growth from home improvements hinges on how you manage both cost and market demand.
When you compare garage conversions to detached ADUs, you’ll notice different value growth paths. Garage conversions typically deliver value appreciation in the 20-30% range, with a $80,000-$180,000 addition common for many homes.
In high-demand markets, both options show 20-30% value rises, but detached ADUs can push toward the upper end, sometimes 25% or more, and even higher appraisals in sizable lots.
ROI remains strong: conversions often yield 70-80% with solid cash-on-cash returns, while detached ADUs commonly reach 70-80% cost recouped in value per NAHB data.
Ultimately, garage conversions usually pay back faster, 3-6 years, whereas detached ADUs trend toward 4-7 years, guided by market demand and cost.
Practical Decision Guide: Which Option Fits Your Property
Considering whether to convert a garage or build a detached ADU hinges on your property’s size, budget, and long-term goals, and the choice can greatly shape how you use your yard and home.
Your decision hinges on property size and zoning regulations, as they determine footprint, setbacks, and allowable square footage. If you have a small lot, a garage conversion keeps yard space intact and speeds permitting. A larger lot offers more flexibility for a detached ADU, preserving green space yet requiring careful planning.
Budget timing also matters: garage projects cost less and finish faster, while detached ADUs demand more time and capital but can yield higher rental returns. Consider long-term value, privacy, and how neighbors view each option.
- Assess property size and zoning regulations to identify feasible footprints
- Compare costs, permitting timelines, and potential revenue
- Weigh impact on yard, privacy, and future resale value
- Align choice with long-term lifestyle and goals
Discuss the alternatives with our ADU builders to compare a new dwelling with a conversion against the needs of your property.
Wrapping It Up
If you’re choosing between a garage conversion and a detached ADU, weigh cost, permits, and space first. A conversion is cheaper and quicker but uses your existing footprint and may limit exterior access. A detached ADU offers privacy and flexibility, with higher upfront costs and longer approvals. Consider your property’s lot, zoning, and long-term plans. Use this guide to balance budget, lifestyle needs, and value—making a well-informed decision that enhances livability and resale potential.
Hidden Remodeling Costs Homeowners Frequently Overlook
Hidden remodeling costs sneak in from several angles you might overlook. Expect structural assessments and temporary supports to protect against collapse, plus permit fees that can surprise your budget. Plumbing and electrical work can spike costs, especially if major overhauls or panel upgrades are needed. Don’t forget temporary housing, storage, and change orders—plus a prudent contingency for unforeseen issues. And ongoing maintenance after the project ends can quietly drain funds. If you keep exploring, you’ll uncover practical ways to plan ahead.
Unexpected Structural Issues That Inflate Renovation Budgets

Unexpected structural issues can quietly derail a renovation budget, turning a straightforward remodel into a major project when you least expect it.
When you remove a load-bearing wall, you risk collapse if you skip proper support. You’ll need temporary beams or columns to redistribute weight, and if you ignore this, ceilings sag and walls crack.
When removing a load-bearing wall, don’t skip temporary support or you risk ceiling sag and wall cracks.
Structural assessments help catch problems before they snowball, and renovation inspections verify that engineers’ plans are correctly implemented.
Foundation cracks or settling pose another surprise: vertical cracks signal settling, horizontal ones indicate pressure issues. Repairs, like underpinning or pier installation, can cost thousands more.
Inadequate framing for new loads, especially in additions, demands reinforced joists or steel, raising costs. Regular assessments protect budgets and safety.
Retiling is essential for maintaining hygiene and functionality, and neglecting this update can also contribute to unexpected increases in renovation costs.
Hidden Code Compliance and Permitting Pitfalls
Hidden code compliance and permitting pitfalls can quietly derail a project if you don’t plan for them upfront. You’ll face permit pitfalls that can surprise you with fees, reviews, and hearings beyond the basic construction cost. Building, historic district, electrical, plumbing, and zoning permits each carry distinct fees that add up quickly, from hundreds to thousands of dollars. Compliance costs often extend beyond initial estimates as inspectors require upgrades or documentation to meet current standards. You may discover outdated systems or materials during inspections, triggering unplanned work and delays. Early coordination with local authorities helps you anticipate requirements, avoid stop-work orders, and reduce last-minute surprises. It is crucial to ensure that your contractor has the necessary licensing and legal compliance to avoid legal risks and potential project setbacks.
Plumbing and Electrical Surprises That Drive Costs up
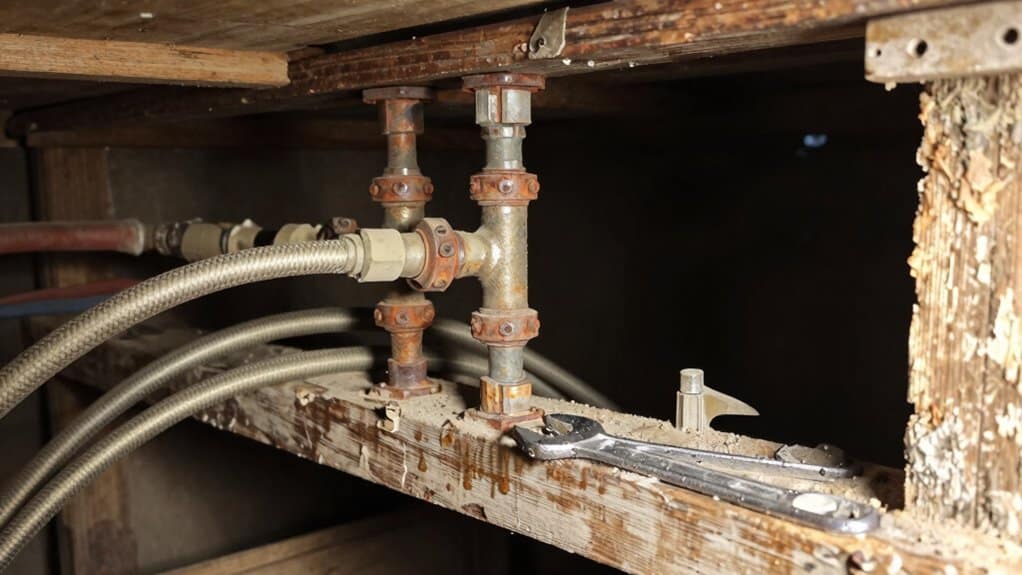
Many remodeling projects hit a snag when plumbing and electrical work reveals itself as more costly than expected.
Many remodels surprise you when plumbing and electrical costs climb higher than expected.
You’ll often face plumbing surprises that push budgets higher, from minor fixes at 150–350 dollars to major overhauls like full re-plumbing or main sewer work that can reach 2,000–15,000.
Electrical upgrades follow a similar arc: basic repairs stay under 400 dollars, but panel upgrades or new circuits run 500–2,000, with older homes needing more substantial safety updates.
In bathrooms, intensive plumbing work can lift typical remodel costs, while standard full bath projects commonly land in the 12,000–25,000 range.
Labor cost increases, 3.4% year over year, amplify these figures, so plan for steady, informed decisions and budget cushions for plumbing surprises and electrical upgrades.
Before starting a remodel, it is crucial to obtain detailed estimates from contractors to help mitigate unexpected expenses and align budget expectations with the project's scope.
The True Price of Temporary Housing and Living Disruptions
Temporary housing and living disruptions during a major remodel can quietly become one of the project’s biggest temptations to underestimate. When a renovation stretches 2–3 months, you’ll likely face temporary housing costs that quietly add up.
In Denver, expect monthly rents around $1,700 for a one-bedroom, with total housing bills for the period ranging from about $3,400 to $5,100. If you opt for extended-stay hotels, costs can run from $4,000 to $6,000 per month.
Add storage and moving, and expenses climb by thousands more. You’ll also encounter higher daily living costs and meal-service options that replace home cooking.
Plan for furnishing temporary spaces, meanwhile, as initial investments can be substantial. A proactive budget reduces stress and unexpected financial strain.
Change Orders and Contingencies: Why Budgets Spiral
Change orders and contingencies aren’t rare annoyances; they’re real drivers of budget growth you’ll see from the first bid to the final bill.
As you track changes, you’ll notice discretionary vs. non-discretionary shifts each add about 4% to 8% of costs, and overall averages often swing 10% to 25% higher than the original plan.
Change Order Realities
Change orders and contingencies are a real driver of budget spirals in construction projects. You’ll see change orders average about 10% of the total contract value, with some projects hitting 25%.
Major builds commonly run 10 to 15% in change order terms, while contract modifications of 5 to 10% are expected in many endeavors.
On residential work, projects priced 250K–500K average 6.3 change orders, more than double those under 250K, and higher-priced homes over 500K use more orders too, though the growth slows.
Change order impacts include delayed processing, pricing gaps, and cascading costs to later phases.
To avoid financial strain, it's crucial to allocate budget for unexpected expenses during the initial planning phase, ensuring that you can accommodate these potential changes without compromising your project.
Contingency Necessities
Contingency planning is essential because budgets rarely stay perfectly on track once a remodeling project begins. You’ll use a contingency percentage to cover surprises, from site conditions to price shifts.
The standard range is 5% to 15% of the total budget, with higher-risk projects needing 10% to 20% and larger loans sometimes requiring 20% to 30%. This isn’t extra money for frivolous changes—it’s protection against real risks identified in a risk assessment.
Budget forecasting should allocate contingencies across components, such as kitchens, bathrooms, and structural work, while considering project complexity. A dedicated team with over 35 years of experience can ensure stress-free remodeling and help you manage these contingencies effectively.
Remember that 1 in 3 renovations overrun their costs, so maintain disciplined tracking and update figures as design details firm up. This approach supports steady progress and informed decision-making.
Inspection Gaps: The Hidden Costs of Mold and Water Damage
Hidden remodeling costs often hide in plain sight, because mold and water damage can linger behind walls long after a home inspection seems complete.
When you plan renovations, you’ll want to evaluate mold inspection and water damage risks that aren’t always obvious.
Costs vary: a typical mold inspection runs about $300-$400 for smaller homes, with national averages higher, and on-site testing adding $250-$500 plus lab analysis.
Invasive techniques raise prices, and more samples boost the bill.
Remember that hidden water intrusion can mask mold spread, so accurate testing matters.
A thorough inspection reduces future surprises, yet remember that some cases require follow-up remediation, which can range from a few hundred to several thousand dollars.
Prioritize professional oversight to avoid conflicts.
Long-Term Maintenance Hidden Costs After a Remodel

As you plan a remodel, you’ll want to contemplate the long-term maintenance costs that quietly mount after the project wraps up. Ongoing upkeep, hidden long-term repairs, and regular upkeep expenses can strain budgets just as much as the initial construction costs, so identifying them early helps you stay prepared. It's crucial to consider contingency funds for unexpected issues like mold repair that might arise during or after the remodeling process.
Ongoing Maintenance Costs
Ongoing maintenance costs after a remodel quietly accumulate as homes age and systems wear in. You’ll notice these expenses grow with time because labor and material prices stay high, and aging components demand frequent attention. Ongoing maintenance, not just big upgrades, drains budgets when unexpected wear shows up. Hidden expenses include steady replacements for aging roofs, windows, and mechanicals, along with routine servicing that prevents major failures. With labor shortages pushing costs higher, even small fixes can feel like sizable surprises. Regular maintenance of kitchen cabinets and drawers can prevent the need for costly replacements down the line. By planning for regular upkeep, you can spread costs and avoid debt from sudden repairs. Track seasonal needs, prioritize safety-critical items, and set aside a maintenance fund to keep your home reliable, efficient, and comfortable over the long term.
Hidden Long-Term Repairs
Long-term repairs after a remodel can quietly reshape your budget, even when the big projects seem finished. You’ll uncover hidden needs as structures settle, and these costs can linger long after construction ends.
Prioritize long term inspections and structural assessments to catch issues early, before they escalate into major expenses. You may face foundational challenges, water damage, or pests that weren’t obvious at first glance, especially in older homes.
Planning for contingencies helps you avoid surprises when the bill arrives. By staying proactive, you preserve safety and value, rather than reacting to costly breakdowns. With careful monitoring, you reduce the chance of sudden shutdowns or inconvenient repairs disrupting daily life.
- Structural assessments reveal hidden risks before they grow
- Long term inspections identify moisture and mold threats
- Foundation checks catch settlement早
- Pest assessments prevent unseen damage
- Proactive findings guide budget-aware decisions
Regular Upkeep Expenses
Regular upkeep expenses after a remodel can quietly accumulate, especially as your home ages and labor costs rise. You’ll notice regular service needs emerge—often tied to aging systems and frequent wear.
Routine inspections help you spot small issues before they become costly failures, and they align with rising repair costs driven by labor inflation. As projects age, labor remains a dominant share of expenses, so budgeting for ongoing maintenance is smart.
Your 42-year-old home and many pre-1980 structures mean more frequent checks on windows, roofing, HVAC, and doors. Expect steady maintenance spending, with continued demand for routine updates.
Wrapping It Up
You’ll finish with a clearer picture of renovation costs and what really drives them. By spotting hidden issues early, you can avoid surprises and keep projects on track. Stay proactive with inspections, permits, and contingencies, and communicate openly with your team. Remember that maintenance matters long after the remodel, so plan for ongoing care. With careful budgeting and realistic expectations, you’ll restore and refresh spaces confidently while minimizing disruptions and stress. Your informed approach makes the difference.
ROI of Remodeling Projects: What Adds the Most Value to Your Home
Exterior upgrades yield the strongest home-value returns, especially a high-quality garage door and durable siding. A stylish garage door often tops ROI lists, with 194% in 2024 and up to 268% in 2025, while fiber-cement or vinyl siding recoups most costs and boosts curb appeal. Pair these with energy-efficient windows, solid entry doors, and even stone veneer where appropriate. Minor kitchen updates also help. If you keep exploring, you’ll uncover more strategies and concrete costs.
Cost-Effectiveness of Exterior Upgrades: Doors, Siding, and Stone Veneer
Exterior upgrades like doors, siding, and stone veneer offer strong returns by boosting curb appeal and home value.
When you consider cost-effectiveness, you’ll find fiber-cement siding replacement yields the highest ROI at 113.7%, while vinyl siding recoups 96.5%.
If you’re aiming for standout value, manufactured stone veneer shines with a 207.9% ROI, and regional data in the DMV shows about 94% ROI for stone veneer on a $10,000 project, adding roughly $9,400 in value.
For broader choices, siding options vary, yet exterior upgrades generally return 60-90% of costs.
You gain not only aesthetics but improved durability and energy efficiency.
Stone veneer and siding options both contribute greatly to resale value, guiding your decision toward impactful, cost-conscious improvements.
Additionally, energy-efficient window and door updates can lead to annual savings of up to $465, making them a smart investment for boosting property value and reducing utility costs.
The Big ROI Drivers: Garage Doors and Entry Doors That Sell
Garage doors and entry doors are standout value leaders, delivering strong ROI and boosting curb appeal in a single upgrade.
You’ll notice faster sales, higher energy efficiency, and a clearer path to recouping your investment, with garage doors often leading ROI in multiple studies.
As you explore these doors, focus on the value they add to both aesthetics and resale potential, aligning with the goal of selling faster and smarter.
Door Value Leaders
Numbers aren’t just trivia here—they signal a clear trend: doors sold as value drivers deliver outsized ROI. When you consider garage and entry doors together, you’re looking at top-tier returns that outpace many other projects.
The data show remarkable regional strength and steady cost efficiency, making this a smart focus for value. Think about how door design and materials influence both curb appeal and performance. Modern options can lift list price by about 1–4%, while enduring materials guarantee long-term value.
Enhanced security adds peace of mind buyers notice. With ROI persisting upward—from 102.7% in 2023 to 268% nationally in 2025—the case for upgrading doors is compelling and practical.
- ROI leaders: garage doors and entry doors as prime value drivers
- Emphasis on door design and door materials choices
- Security and weather performance boost perceived value
- Cost efficiency supports strong resale impact
- Regional gains reinforce broad applicability
To further enhance curb appeal and performance, consider incorporating outdoor lighting and pathway designs that complement the home's architecture.
Curb Appeal Boost
You’ve seen how doors can drive strong value, and now the spotlight shifts to curb appeal—the first impression that sets the tone for a home sale.
Curb appeal matters because visually impactful changes are perceived as high-value by buyers, helping your home stand out. A new garage door boosts overall curb appeal and delivers the highest ROI, with ROI numbers climbing into the 190s to 270% range in recent reports.
An upgraded entry door complements this look, adding solid value at comparatively low cost. Together, these updates shape value perception and can accelerate offers.
The typical garage door cost sits around $4,500, while a steel entry door averages about $2,355, making curb appeal upgrades efficient, influential, and financially prudent.
ROI Spotlight: Doors
Curious how a front-facing upgrade can reshape your home's value? Doors dramatically influence curb appeal and resale outcomes, with garage and entry doors delivering standout ROI.
In 2024, garage door replacements averaged 194% ROI, rising to 268% in 2025, topping many projects. Entry doors, especially steel, reached 188% ROI in 2024, and some regions see profits over 315%.
These upgrades cost less than most exterior improvements while delivering strong returns, and they often outpace kitchens or baths. Beyond price, new doors enhance door security and energy efficiency, reducing heat transfer and boosting resale value.
Local data show regional gains, with notable ROI in Chicago and Pacific regions. Consider door security, energy efficiency, and overall functionality when planning your next upgrade.
Furthermore, modern appliances in the kitchen can significantly enhance buyer perception, creating a welcoming environment for new owners.
- High ROI drivers: garage doors and entry doors
- Lower cost, higher value than many remodels
- Regional variations to watch
- Energy efficiency boosts resale value
- Enhanced security adds peace of mind
Siding and Windows: Balancing Curb Appeal With Value
Siding and window upgrades are prime examples of balancing curb appeal with value, because the right choices deliver both a striking first impression and solid resale gains. You’ll find vinyl siding offers a solid 70–75% ROI, with regional averages around 70%, while fiber cement siding can reach about 88.4% nationally. Both protect against moisture and reduce future repair costs, yet siding often delivers the strongest visual impact for buyers, boosting curb appeal. Window replacement yields 60–70% ROI, with vinyl windows around 67.1% and wood around 66% regionally, delivering energy efficiency and a noticeable appearance upgrade. Prioritize based on resale goals, energy savings, and market competition; consider siding aesthetics and window efficiency as linked contributors to overall value. For homeowners in San Diego, outdoor additions such as pergolas and backyard decks can also enhance both home value and outdoor usability.
Inside Scoop: Minor Kitchen Remodels That Pay Back
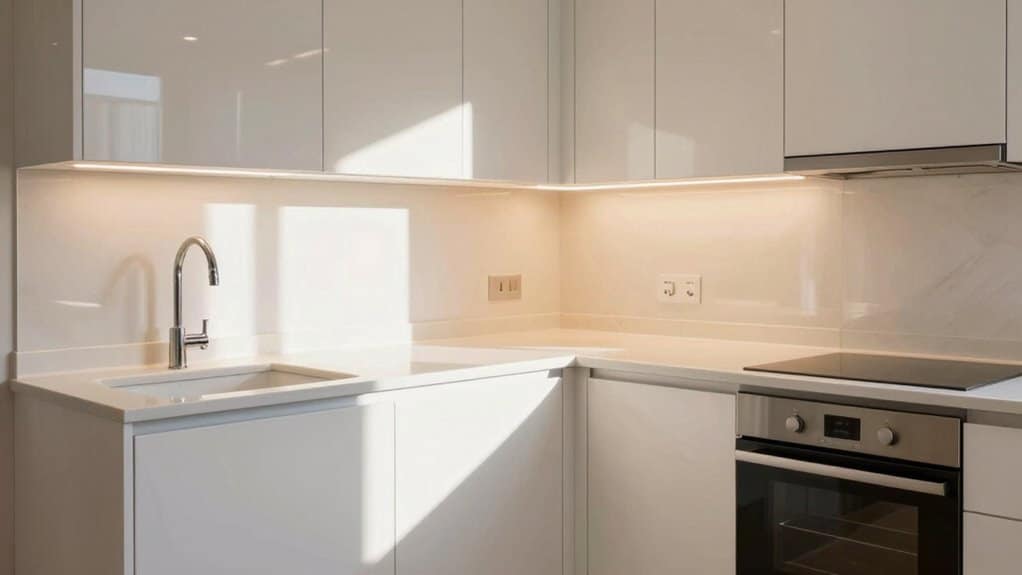
Minor kitchen remodels can be a smart investment when you’re selling a home, because small, well-chosen changes often deliver strong returns without the upheaval of a full renovation.
You’ll see ROI rise when you focus on practical updates that buyers notice, like refreshed cabinets, new appliances, and better lighting. National and Chicago data show solid paybacks, with high-ROI upgrades guiding how you spend.
With kitchen trends leaning toward efficiency and style, careful choices stay affordable while boosting value. Consider how remodeling tips can maximize appeal without overdoing it.
Your goal is a balanced, modern look that feels fresh and functional. A key area to focus on is the value of kitchen remodels which not only enhances aesthetics but also adds significant property value.
- Cabinet refacing
- Energy-efficient appliances
- Quartz or granite countertops
- Improved lighting
- Tile backsplash
Material Choices That Maximize Resale Value
When you choose exterior upgrades, you’ll see how durable siding, energy-efficient windows, and strong entry doors each influence resale value. This matters because fiber cement siding, efficient windows, and modern doors consistently deliver solid ROI and curb appeal that buyers notice. Additionally, upgrading to architectural shingles enhances both style and durability, offering a lifespan of 20-30 years and reducing the need for frequent replacements.
Exterior Upgrades ROI
Exterior upgrades can greatly influence resale value, and choosing the right materials makes a measurable difference. You’ll see strong ROI from upgrades like garage doors, steel entry doors, and stone veneer, with notable impact on curb appeal and durability.
When selecting exterior materials, prioritize value-driven choices that balance aesthetics, cost, and performance. Sustainable materials and well-designed landscaping enhancements can amplify overall appeal and energy efficiency, while remaining mindful of regional preferences and resale expectations.
Consider how each option stands up to weather, maintenance, and security concerns, because longevity translates to higher perceived value. Informed decisions today help maximize your home’s market position and homeowner satisfaction tomorrow.
- Garage Door Replacement tops visible transformation with high ROI
- Steel Entry Door boosts security, energy efficiency, curb appeal
- Manufactured Stone Veneer delivers dramatic visual impact
- Fiber-Cement Siding Replacement offers durability and value
- Entry Door Alternatives (Fiberglass) provide weather resistance and customization
For roofing, asphalt shingles are a cost-effective choice that also offer fire resistance, making them a preferred option in regions like California.
Durable Siding Options
Durable siding options matter because the right choice can boost curb appeal while withstanding weather and time.
When you choose fiber cement, you gain strong ROI and long life, often 50+ years with proper maintenance, plus design flexibility that mimics wood or stucco without the upkeep.
Vinyl siding offers affordability, with 70% to 97% cost recapture at resale and 20 to 30-year lifespans, removing painting requirements but requiring periodic replacement.
Engineered wood provides upscale look at a middle price point, delivering aesthetic value with lower maintenance than traditional wood.
Steel siding adds durability and low maintenance, reinforcing value through long-term performance.
Consider the balance of siding materials and maintenance requirements to maximize resale value.
Energy-Efficient Windows Value
Energy-efficient windows can boost resale value while trimming ongoing costs, so choosing the right materials matters as much as the upgrade itself. You’ll see solid ROI from vinyl or wood, with general window replacement ROI around 60-70% and national averages near 70-80%.
Energy savings enhance appeal, since Energy Star windows cut utility bills and often reduce energy use by up to 30%. Features like double- or triple-pane glass, Low-E coatings, and gas fills boost efficiency while lowering maintenance burdens.
As you compare options, remember energy savings and buyer appeal drive quicker sales and higher offers. Ultimately, energy-efficient choices help your home feel newer and more comfortable, attracting buyers who recognize long-term value.
- Energy savings and buyer appeal
- Curb appeal from upgraded aesthetics
- Reduced drafts and better noise insulation
- Fewer maintenance concerns for buyers
- Higher perceived value in competitive markets
Practical Guide to Prioritizing Remodeling Projects for Highest Returns
To prioritize remodeling projects for the highest returns, start by focusing on the items that consistently deliver the strongest cost recovery and resale boosts.
Exterior upgrades top the list, with garage door replacements delivering the highest ROI and steel door replacements close behind, making them powerful early bets.
If you want substantial value, consider manufactured stone veneer, though it carries a higher upfront cost.
For ongoing value, fiber-cement or vinyl siding recoups most of its price at resale and outdoor improvements, such as landscaping improvements and outdoor amenities, support broad appeal.
Mid-range kitchen and bathroom updates also perform well, especially minor kitchen remodels and midrange baths.
When planning, balance outdoor living space expansions and durable exterior work to maximize overall ROI across markets.
Wrapping It Up
You’ll get the most value by prioritizing projects with proven returns, like entry and garage doors, sturdy siding, and energy-efficient windows. Consider minor kitchen updates and smart material choices that boost resale appeal without breaking the bank. Balance curb appeal with durable, cost-effective options, and align projects with your home’s style. Plan carefully, track costs, and focus on improvements that buyers notice first. With a thoughtful approach, you’ll maximize value while preserving your budget and timeline.
Low-Cost ADU Design Ideas (Under $100k)
If you’re designing a low-cost ADU under $100k, start with sturdy prefab models or compact micro units, which keep costs predictable and construction quick. Garage conversions offer fast ROI, while 150–250 sq ft layouts maximize space with smart zoning and efficient features like low‑E windows. Explore prototype designs for small backyards and Sitka/Loft kit options to speed permitting. With flexible financing and modular panels, you can tailor a resilient, livable space—plus you’ll learn more as you continue.
Cost-Effective Prefab ADUs Under $100K
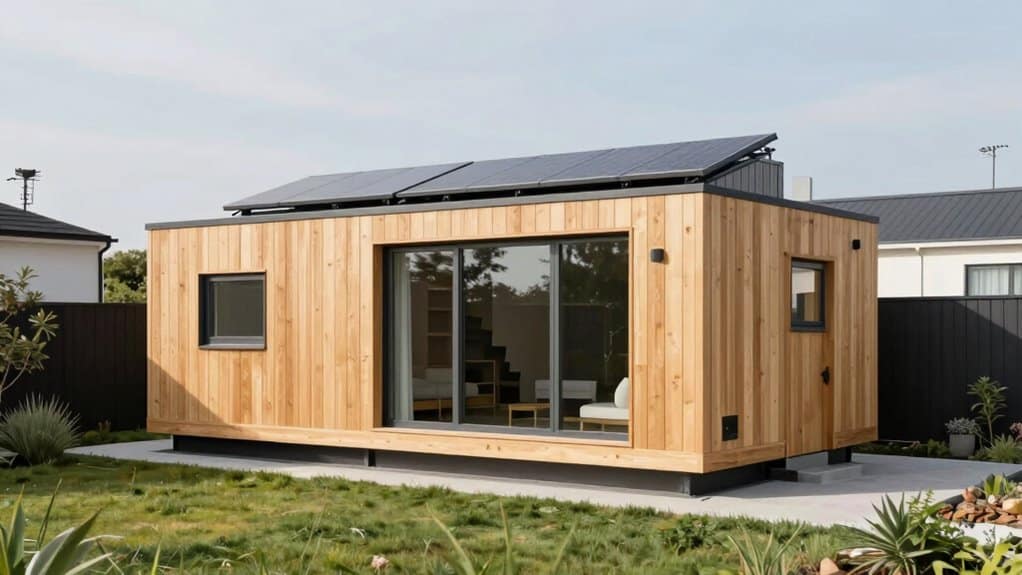
There are several cost-effective prefab ADU options under $100K that make small, quality living spaces attainable without breaking the bank.
You can choose affordable models like Buhaus at 160 sq ft for $96,000, PackPrefab’s Flip Classic A and B at $99,999 each, and Expandable Deluxe lines at $99,999 each.
PrefabADU offers multiple models under $100K, with one under $45K, while Cavco LT16562A provides 875 sq ft at a base price of $90,820.
PrefabADU offers multiple models under $100K, with one under $45K, while Cavco LT16562A provides 875 sq ft at a base price of $90,820.
These options illustrate prefab efficiency by reducing construction time and waste, delivering turnkey solutions.
You'll explore micro units from PrefabADU and BlueView’s broader range, noting wind, seismic, and code compliance.
These affordable ADUs, such as the Boxabl Casita, integrate durable materials and smart designs to maximize space and functionality.
This affordability supports guest housing, rentals, or home value growth through well-planned, efficient designs.
Garage Conversions: Fastest ROI for Budget Builds
Garage conversions offer the fastest return on investment for budget builds, especially when you leverage an existing structure rather than starting from scratch. You’ll see compelling numbers: costs range broadly, but an average ADU conversion lands around $50,000-$150,000, with per-square-foot pricing near $150-$300. In San Diego, expect higher averages, yet the payoff remains strong. With ROI often surpassing 65-80% and payback in roughly 3–6 years, you’ll recoup costs quickly, especially when rental income ranges from about $1,200 to $3,500 monthly. Beyond cash flow, a garage conversion can boost property value by 20-35%, sometimes adding $150,000-$250,000 on a typical home. Plan for permits and quality construction, and consider garage layouts that maximize usable space and rental potential. It is crucial to optimize space to reflect personal style and ensure seamless integration with the existing home.
Tiny Home Micro Units: 150–250 Sq Ft Solutions
Tiny Home Micro Units offer practical, space-smart living in a compact footprint. In 150–250 sq ft, you get a 1 bed, 1 bath, and kitchenette layout that fits tight urban lots and builds in about 90 days.
The 150 sq ft model uses a loveseat that converts to a full bed, while the 250 sq ft version adds an enlarged bathroom and linen closet for added comfort.
Both share concrete slab foundations, low E windows, and efficient insulation, keeping costs manageable. You’ll find standard features like a tankless water heater and mini split HVAC, plus durable finishes and compact storage.
These micro unit benefits include quick permitting and real living space status, enhancing property value, while design flexibility lets you tailor layouts to site and budget. Adding an ADU can significantly increase your property's market appeal, making it a smart investment choice for homeowners looking to enhance both enjoyment and financial returns.
Prototype Designs and Floor Plans for Small Backyards
Prototype designs and floor plans for small backyards emphasize efficient use of every inch while balancing livability and cost. You’ll find studio layouts that merge living, sleeping, and cooking areas into open spaces, reducing partitions to maximize perceived space. Open concept design, aided by vaulted ceilings, prevents cramped feelings even in 496–500 square foot footprints. When privacy is needed, sliding doors provide separation without adding permanent walls. These plans often feature open great rooms with built-in storage, keeping functionality intact in tight layouts. Modular and pre-designed ADU options offer 350–470 square feet at affordable costs, helping you meet budgets. Kitchenettes near the main living area maximize efficiency, while vertical storage and multi-functional furniture maintain organization in compact environments. Additionally, flexible financing options are available to accommodate various budgets, ensuring homeowner confidence during the project.
How Kits and Sitka/Loft Options Maximize Space on a Budget
Prefab kit options and Sitka/Loft-style layouts offer a practical path to maximizing space on a budget.
You’ll see how kit customization speeds up design and permits, while modular panels cut waste and labor. Off-site assembly means faster completion and lower disruption, so you can move in sooner without breaking the bank.
These approaches emphasize space optimization through compact footprints and smart zoning, like lofted sleeping areas or separate work zones in a single unit.
These compact footprints and smart zoning create lofted sleep areas and dedicated work zones within a single unit.
- Kit customization flexibility lets you tailor layouts without spiraling costs.
- Space optimization relies on loft and modular designs to carve usable areas from small footprints.
- Prefab efficiencies reduce material waste and on-site labor, trimming overall price.
- Sitka/Loft options maximize room connections, storage, and natural light within under-$100k budgets.
Vista - Creative Design & Build offers customized ADU solutions that embrace both practicality and aesthetic appeal, ensuring homeowners receive spaces that perfectly suit their lifestyles.
Wrapping It Up
You're exploring cost-effective ADU ideas that fit tight budgets without sacrificing functionality. By prioritizing prefab options, garage conversions, and tiny-home layouts, you can maximize space, speed up construction, and stay under $100k. Focus on modular designs, efficient floor plans, and scalable kits to tailor to backyards and sites. With careful planning, you’ll achieve comfortable, compliant spaces that add value. Stay practical, compare options, and choose solutions that balance cost, quality, and livability. Your affordable ADU journey starts here.
How to Estimate Your Remodel Budget (And Avoid Cost Surprises)
To estimate your remodel budget, start by clearly defining scope and priorities for each room, then ground every cost in local prices. create per-room budgets with distinct line items for materials, labor, permits, and contingency. Expect 20–40% of costs for labor and keep a 10–20% contingency for surprises. Compare multiple licensed quotes and watch materials’ share, typically 40–50%, plus a 15% price-buffer. If you keep this approach, you’ll stay on track and uncover more practical tips to follow.
Understanding Your Scope and Priorities

Understanding your scope and priorities starts with a clear plan of what you want to achieve and why it matters. In this phase, you define scope clarity by outlining tasks, goals, and expectations for the remodel, room by room and task by task.
You’ll decide where to focus efforts first, establishing project priorities that guide decisions when conflicts arise. A well-defined scope sets boundaries, answering what, where, when, why, and how, so everyone stays aligned before construction begins.
Document details like cabinet style, materials, color, and installation steps to prevent interpretation gaps. By documenting goals, specific tasks, and timelines, you reduce confusion, delays, and unexpected costs, making outcomes more predictable and your budgeting more accurate. Allocate extra funds in your budget for unexpected expenses to ensure financial resources are sufficient to complete the project.
Researching Local Costs and Comparable Projects
To estimate your remodel budget accurately, you’ll need to ground your plan in real local costs and solid comparisons. Researching local costs helps you account for regional labor rate variations, material availability, and price differences, so your numbers stay credible. Use local pricing data to frame per-square-foot expectations and tailor quotes to your area. Compare projects that resemble yours—kitchens, baths, or additions—to understand typical scopes and costs in your region. Choosing the right contractor can further refine your budget by ensuring quality work that avoids costly errors. Project comparisons also reveal which upgrades yield strong value in your market, guiding decisions before you commit. Keep an eye on benchmarks and historical data to avoid surprises, and lean on reputable sources to refine your budget. This approach reduces risk while delivering a realistic, regionally grounded plan.
Choosing Materials and Finishes Wisely
Choosing materials and finishes wisely means balancing cost, durability, and style from the start. You’ll decide how material types align with your budget and daily use, recognizing that materials occupy 40%-50% of the total remodel. For kitchens, expect $100-$250 per square foot, with low-end options at about $15 and high-end choices around $150. Finish quality matters: laminate countertops save money compared with quartz, while vinyl flooring challenges hardwood for cost. Plan for a 15% buffer against price shifts, since tariffs and inflation push up costs. Remember that strategic selections can boost resale value, especially exterior upgrades. Investing in energy-efficient appliances can reduce utility bills by 10-50%, providing long-term savings.
Getting Professional Estimates and Multiple Quotes
To get reliable estimates, you should gather multiple quotes from licensed professionals and compare their cost breakdowns side by side. Vet contractor credentials and track record to guarantee you’re selecting firms with solid references and appropriate insurance. Remember that labor costs in remodeling typically range from 20% to 40% of total project costs, so understanding this aspect is crucial for budget planning. This approach helps you spot pricing gaps, align expectations, and move toward a clear, accurate budget.
Get Multiple Quotes
Gather several professional estimates to get a clear picture of your remodel cost. To start, arrange site visits with contractors, architects, or designers for custom price estimates based on project details.
Consult multiple professionals directly for tailored estimates, avoiding broad averages. Use technology-driven tools for instant estimates from real renovation data before contractor visits, then compare contractor quotes against data-driven estimates to identify misaligned pricing.
Solidify the scope of work and product specifications after each estimate to proceed smoothly to a contract price. Seek competitive pricing by gathering bids from several remodelers and gathering sub-quotes from specialists during a 4-6 week estimate assembly.
Don’t skip getting second opinions to confirm accuracy and guard against surprises. Consider choosing a home improvement service that emphasizes a client-centric approach to ensure the remodel meets your exact specifications.
Compare Cost Breakdowns
When you compare cost breakdowns, start with getting professional estimates and multiple quotes to anchor your expectations in real numbers. This step helps you see how cost allocation aligns with your project scope, from structural changes to finishing touches. You’ll notice interior components like drywall, flooring, and cabinetry carry labor-heavy costs, while systems upgrades and windows or doors push the total higher. Use the ranges provided by professionals to frame your budget: whole-home remodels rise quickly with high-end finishes, yet smaller, partial upgrades can keep you within a tighter band. Compare line items for kitchen and baths, then consider how painting, flooring, and insulation contribute to the overall mix. Balancing scope, materials quality, and contingencies keeps your estimate realistic and actionable. In San Diego, the average kitchen remodel costs range from $40,000 to $80,000, so planning your finances early is crucial to avoid any surprises.
Vet Contractor Credentials
Vet contractor credentials by getting professional estimates from at least three licensed contractors and verifying everything before you compare numbers.
You’ll want to confirm credentials cover the required trades and check for active status, classifications, and any disciplinary actions. This is your opportunity for a thorough credential assessment and solid contractor verification before you shortlist bids.
- Gather each contractor’s license number, HIS registration if applicable, and business name
- Verify licenses on state boards and note any limitations or cancellations
- Collect documentation proving four years of journey-level experience per CSLB standards
- Review insurance, bonds, and references beyond basic licensing
- Request detailed, written estimates from three licensed contractors and compare them carefully
The average remodeling costs in San Diego start at approximately $10,000, which should be considered when reviewing estimates for your project. Carefully document every verification step to protect your project from unqualified hires and surprises.
Breaking Down Costs by Room and Category
As you break down costs by room and category, you’ll see how bedroom, bath, and kitchen line items stack up against overall project totals, helping you prioritize essentials over nice-to-haves.
By separating line items—materials, labor, permits, and contingency—you can compare ROI indicators and spot where savings or investments matter most.
This structured view sets the stage for informed decisions that keep your remodel on track and within budget.
Room Cost Breakdowns
Room cost breakdowns help you see where money goes in a remodel, so you can plan more accurately and avoid surprises. You’ll discover kitchen budgets dominate the bill, with kitchens often taking 15-30% of the total and base projects starting high in expensive markets.
Likewise, bathroom upgrades span a wide range, reflecting scope and fixtures, yet still influence overall budgeting. By breaking costs into rooms, you can compare tradeoffs and set priorities before you shop.
Consider how labor, materials, and layout changes shift expenses per space, and use this as a planning compass.
- Kitchen budgets
- Bathroom upgrades
- Bedroom and living space costs
- Small area and ancillary space investments
- Whole-house and systems considerations
Category Cost Insights
Category cost insights come from breaking costs down by room and category, which helps you compare where money goes and make smarter tradeoffs.
You’ll see cabinets drive most costs, with flooring and countertops following closely. Countertops span affordable to luxury options, potentially pushing total up to $65,000 in full remodels.
Flooring updates show up in interior upgrades for whole-home projects, varying by material quality. Paint and wallpaper offer budget-friendly cosmetic options for low-end changes.
Windows range from $300–$1,200 each, while full replacements run $4,500–$20,000. Labor spans from $20,000 in a bedroom project to higher rates with wall alterations and king-size homes.
Permits, inspections, and system work affect totals; central air, furnace, and electrical updates shape category costs, guiding kitchen budgeting and flooring choices.
Planning for Permits, Contingencies, and Hidden Fees
Planning for permits, contingencies, and hidden fees starts with understanding how costs flow from your project’s size, location, and complexity.
You’ll learn how permit types influence the bottom line, and why hidden fees can surprise you if you don’t plan ahead. Here’s what to contemplate:
- Permit types vary by scope, from small electrical or plumbing permits to larger building approvals.
- Location matters: costs differ by city and state, and regulations can add to your budget.
- Contingencies typically range 10-20% to cover regulatory surprises and price shifts.
- Hidden fees may include expedite charges, valuation-based fees, or flat versus percentage-based assessments.
- Compare permits and valuations across estimates to verify accuracy and avoid overpaying.
With this awareness, you’ll plan a realistic, resilient budget.
Creating a Realistic Timeline and Monitoring Budget
Creating a realistic timeline starts with a clear, structured plan and a practical understanding of how long each phase will take. You’ll map phases from pre-construction to finishes, using a well-ordered sequence that prevents work overlap and delays.
Timeline management means recognizing typical durations: minor updates in 2-3 weeks, full projects 3-6 months, and specific tasks like bathrooms or kitchens in 8-12 weeks or 6-12 weeks.
Plan for permits, design finalization, and material ordering early to avoid snags. Regular check-ins help you monitor progress, adjust schedules, and keep contractors accountable.
Budget tracking runs parallel, noting that backorders and delivery times can extend timelines. Advance material choices and prompt decisions prevent costly overruns, ensuring your project stays on track and within your financial target.
Wrapping It Up
You now know how to estimate a remodel budget without the surprises. Start by defining your scope and priorities, then research local costs and compare projects. Choose materials wisely and collect multiple professional estimates. Break costs down by room, plan for permits and contingencies, and track progress with a realistic timeline. Stay flexible but disciplined, monitor changes, and adjust as needed. With careful planning and clear communication, you’ll complete the project confidently and within your budget.
How to Prepare Your Home for a Remodeling Project (Room by Room Checklist)
Begin with a clear plan and budget, then secure permits. Start room by room: in the kitchen, check layout, storage, and finishes; in the bathroom, verify plumbing, fixtures, and ventilation; in the living areas, inspect flooring, lighting, and any needed structural checks; in the bedroom, plan storage and comfort upgrades. Develop a realistic timeline and milestones, and gather multiple contractor quotes. Stay organized with a phased approach, tracking progress and potential delays. If you keep going, you’ll gain practical steps to apply.
Kitchen: Assessing Layout, Storage, and Finishes
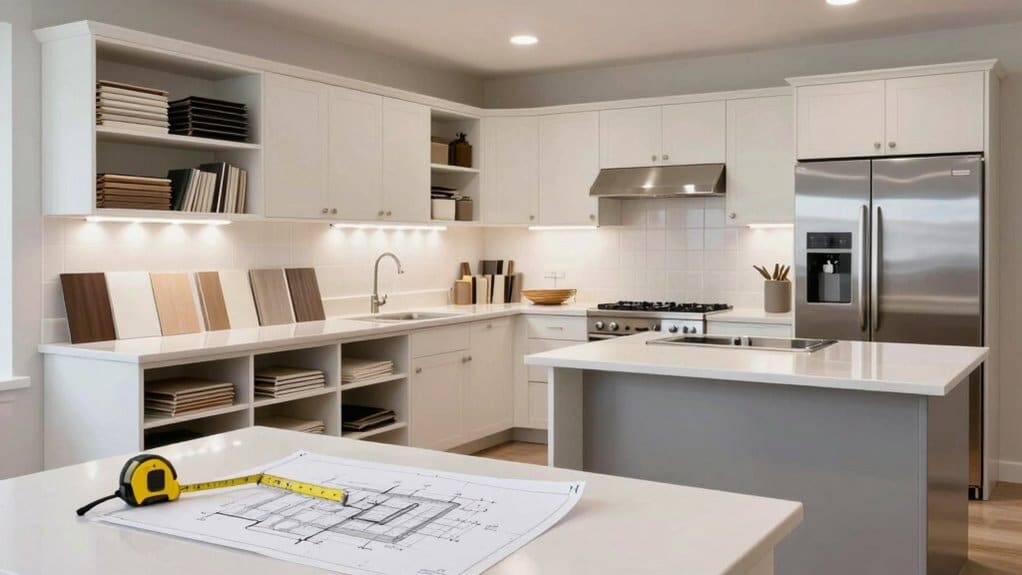
Evaluating your kitchen’s layout, storage, and finishes begins with a clear view of how you move through the space each day.
You’ll assess the current layout for workflow efficiency, spotting traffic bottlenecks and awkward movements that slow you down. Note daily challenges like limited counter space and how you place appliances, since space utilization matters from storage to function.
Consider that nearly half of homeowners reconstruct their layouts, using this as motivation to plan thoughtfully.
Nearly half update their layouts, turning ambition into thoughtful, practical kitchens.
For storage solutions, check existing setups for pots, pans, and utensils, and identify clutter hotspots and underutilized corners.
Prioritize pull-out pantry shelves and custom cabinetry, allocating substantial attention to sleek, soft-close cabinets that blend with durable finishes. This sets a solid foundation for a balanced, practical kitchen, making it essential to evaluate your kitchen’s layout and how it impacts overall functionality.
Bathroom: Plumbing, Fixtures, and Ventilation Needs
You’ll start by checking plumbing integrity, ensuring pipes and connections are age-appropriate and free of corrosion.
Next, you’ll consider fixture efficiency, selecting low-flow options and WaterSense-certified components to save water without sacrificing performance.
Finally, you’ll verify ventilation essentials, confirming proper venting and airflow to prevent sewer gas and maintain a healthy bathroom environment. Additionally, it's wise to inspect kitchen drain systems regularly to prevent future plumbing issues that could affect the bathroom.
Plumbing Integrity
Plumbing integrity in a bathroom project means guaranteeing every valve, drain, vent, and connection works together reliably.
You’ll verify accessibility for toilet, sink, and shower valves, test their functionality, and replace corroded parts when needed.
Install missing shut-off valves to enable quick curb-side shutoffs during future repairs, and confirm valves operate without leaks when turned.
For drain-line sizing, measure pipe diameter for sinks, showers, and tubs, and consider upsizing a shower drain if you’re adding multiple heads or a rain shower.
Ascertain drains stay clog-free after installation and keep gutters unobstructed during final checks.
Proper-venting remains essential; confirm vents on all fixtures, add vents for relocated or new fixtures, and address slow drains or odors.
Leak-detection testing seals the approach with confidence. Additionally, ensure all plumbing works comply with local plumbing codes to avoid future issues.
Fixture Efficiency
Fixture efficiency in a bathroom blends water savings with reliable performance, so you get comfort without waste.
You’ll prioritize water saving faucets that keep strong flow while cutting usage, and you’ll look for WaterSense labels to verify efficiency.
Choose functional options like single-handle or double-handle models in chrome or brushed nickel, with hands-free convenience from motion-activated designs.
Pair faucets with compatible sinks—undermount, vessel, or pedestal—for a cohesive look and easier cleaning.
For toilets, select efficient toilets with EPA WaterSense labeling to balance flush performance and water use, including comfortable heights and both one-piece and two-piece configurations.
Smart options exist, yet still focus on reliability; prioritize smooth installation and straightforward maintenance.
This approach supports responsible, stylish bathroom updates.
Ventilation Essentials
Ventilation plays a key role in bathroom comfort and health, especially after upgrading fixtures and selecting water-saving options. You’ll evaluate ventilation types to guarantee effective moisture control and odor management.
For small bathrooms, aim for 50 CFM, while larger spaces require 100 CFM or more or follow 1 CFM per square foot up to 100 square feet, then base on fixtures beyond that.
Place exhaust fans near the shower or tub, with a secondary vent near the toilet in larger rooms. Use smooth, insulated ducts and vent directly outside to maximize efficiency.
Compliance matters: mechanical ventilation is mandatory in windowless baths, and recirculation is prohibited. Combine fans with operable windows when possible, and verify local codes and HVI ratings for performance.
Living Room: Flooring, Lighting, and Structural Checks
Kicking off the Living Room remodel, start with a clear plan for flooring, lighting, and structural checks to form a solid foundation for everything that follows.
You’ll inspect the subfloor after clearing furniture, then remove old materials and check for damage, moisture, or unevenness. Choose durable options like laminate, engineered wood, or tile, ensuring proper installation aligns with design goals and room traffic, preserving living room flooring longevity.
For lighting, evaluate wiring, outlets, and fixtures for code compliance, then add task lighting and recessed fixtures while maximizing natural light with window upgrades.
Concerning structural checks, identify load-bearing walls, assess built-ins or fireplaces, and confirm mold or pest risks are addressed.
Concerning structural checks, identify load-bearing walls, assess built-ins or fireplaces, and confirm mold or pest risks are addressed.
Prioritize structural integrity to support future cosmetic updates and maintain design alignment throughout the project.
Bedroom: Storage Solutions and Comfort Upgrades
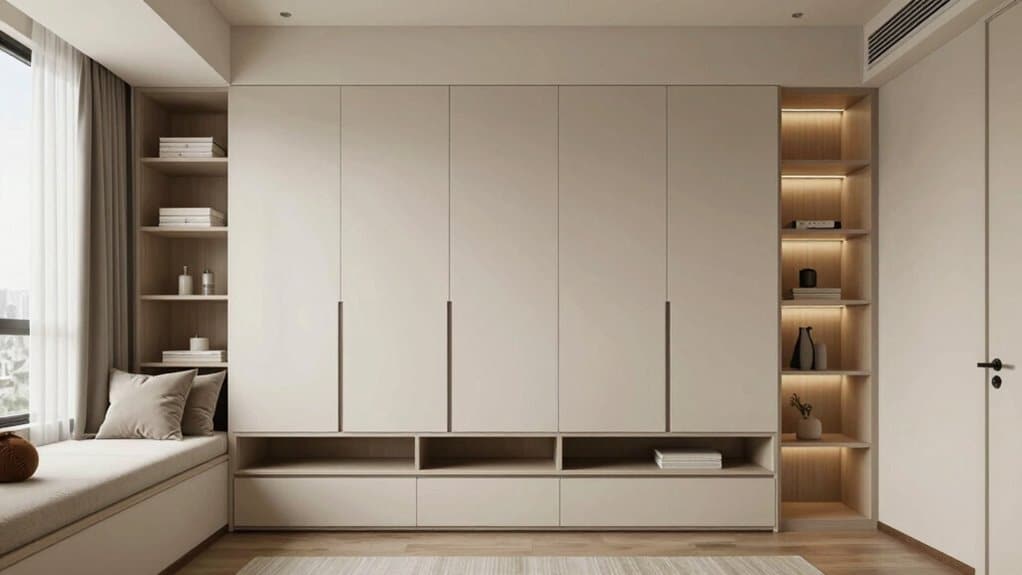
Built-in closet ideas offer smart space optimization, from adjustable shelves to modular organizers that grow with your needs.
Pair these with comfort-boost upgrades like seating nooks, soft lighting, and accessible storage to elevate daily use.
As you plan, consider how built-ins and thoughtful finishes can streamline your routines and reinforce a cohesive bedroom aesthetic.
Built-in Closet Ideas
A built-in closet can transform a bedroom by seamlessly integrating storage with style, providing a cohesive space that feels larger and more organized.
In this section, you’ll explore smart configurations that maximize every inch. Use custom shelving to tailor heights and widths for folded items, accessories, and seasonal gear. Modular systems let you expand or reconfigure without major renovations, ideal for changing needs.
Adjustable racks and hanging solutions keep garments accessible and visible, reducing clutter and making mornings smoother. Drawers with full-extension tracks improve reach, while shallow bins handle small items neatly.
Center shelves, deep drawers, and dedicated hanging sections combine for efficient organization. With thoughtful placement and durable materials, your built-in closet becomes a quiet, functional backbone of room design.
Comfort-Boost Upgrades
A comfortable bedroom starts with how you sleep, and that means prioritizing storage pieces that keep your space neat while also enhancing comfort.
You’ll explore mattress upgrades and cooling bedding to support better rest, while ergonomic accessories ease daily strain.
Multifunctional beds offer storage options and gently integrated tech, blending convenience with calm aesthetics.
Smart tech features, like sleep tracking and built-in USB ports, help you monitor and improve your environment.
- mattress upgrades and surrounding bedding for ideal temperature and support
- cooling bedding that stabilizes comfort through the night
- ergonomic accessories to reduce pressure and improve posture
- multifunctional beds with hidden storage and practical enhancements
- smart tech elements that track sleep and simplify charging
These choices create a balanced, efficient, and restful bedroom upgrade.
General Planning: Budget, Vision, and Permits

Planning your home remodel starts with a clear map: a realistic budget, a compelling vision, and a solid permit plan. You’ll allocate funds for construction costs, design fees, materials, labor, permits, and a contingency for surprises.
Research local costs and obtain multiple contractor quotes to compare. Include line items for demolition, utilities, structural work, systems, rooms, exterior, interior, site tasks, fixtures, and finishes.
Set a realistic budget reflecting priorities, noting that older couples and families with child safety needs may differ.
Develop a vision alignment by gathering inspiration and defining a finished result that covers permitted, designed, built, purchased, installed, and fitted items.
Hire a designer or architect to translate ideas into actionable plans, ensuring permit requirements and team selection support cohesive project planning.
Construction Phases Overview: Timeline and Milestones
Constructing a remodel follows a logical sequence of phases, each with clear goals, timelines, and milestones. You’ll follow a defined construction timeline, from site prep to final touches, with milestones that mark progress and quality checks.
Phase 1 clears space and establishes a safe workflow, then Phase 2 brings in framing, rough-ins, and inspections. Phase 3 moves drywall and insulation, preparing for finishes, while Phase 4 handles finishes, trim, and cabinetry to transform the space.
Phase 5 wraps up with a punch list, inspections, and final cleanups, confirming code compliance and usability. Expect a total duration of 8–10 weeks, potentially longer with change orders or material delays. Stay proactive, and track milestones to stay on schedule and within budget.
- Site preparation and demolition
- Rough work and mechanics
- Drywalling and insulation
- Finishes, trim, and cabinetry
- Final touches and completion
Room-by-Room Task Prioritization: Essential vs. Wish List
Room-by-room planning helps you separate must-do essentials from nice-to-have upgrades, ensuring your remodel stays focused and on budget.
In the kitchen, prioritize structural integrity, then plumbing and electrical upgrades, followed by countertops, backsplashes, and energy-efficient appliances. These essential features create a solid foundation for future aesthetic enhancements.
For the bathroom, address ventilation, plumbing, and casing for water integrity first, then plan vanity and storage updates, with lighting installed to support safe, daily use.
Living spaces demand a load-bearing assessment and proper HVAC and electrical updates before finishes.
Wrapping It Up
Plan and prioritize room by room, starting with clear goals, a solid budget, and required permits. Keep a practical timeline and check each phase against your vision. For kitchens and baths, lock in layouts, storage, and ventilation; for living spaces and bedrooms, focus on flooring, lighting, and comfort. Use the checklist to distinguish essentials from wish-list items, and stay flexible as you progress. With steady planning, your remodeling project stays orderly and on track.