10 Best DIY Bathroom Remodeling Tips for Homeowners
For a successful DIY bathroom remodel, start with a realistic budget of $1,500-$10,000 and a detailed timeline. Choose durable, water-resistant materials like ceramic tiles and quartz countertops, and practice essential skills through small projects before tackling bigger tasks. Focus on smart updates like paint, lighting, and fixture replacements that don't require moving plumbing. Protect existing features during renovation, and know when to call professionals for complex work. These fundamentals will set the foundation for your transformation journey.
Start With a Realistic Budget and Timeline
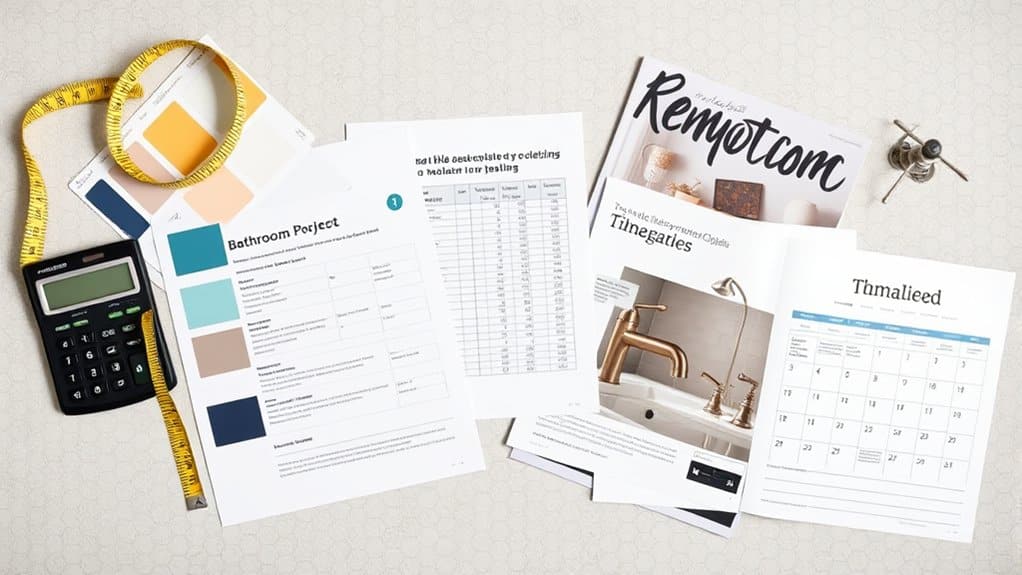
Three key factors drive successful DIY bathroom remodeling: thorough budgeting, realistic timelines, and careful planning.
For small bathrooms, you'll typically spend $1,500-$3,000, while primary bathrooms range from $5,000-$10,000. Smart budget allocation starts with setting aside 25% for cabinetry, 17% for plumbing fixtures, and 10-20% for contingencies.
Effective timeline management means planning around material lead times and breaking down tasks strategically.
You'll need several weeks for DIY work like tiling and painting, plus extra time for unexpected challenges. Additionally, consider setting aside funds for contingency costs to address any unforeseen issues that may arise during the remodel process.
Remember that proper planning now will save you from costly mistakes and delays later.
Choose Cost-Effective Materials That Last
While selecting materials for your bathroom remodel, you'll need to balance initial costs with long-term durability.
Focus on eco-friendly options like LED lighting and long-lasting finishes that won't need frequent replacement. Choose water-resistant materials that combine practicality with style, such as ceramic tiles for floors and walls, and quartz for countertops.
- Opt for quality quartz countertops at $50-100/sf, which resist stains and heat while requiring minimal maintenance
- Install ceramic tiles for both walls and floors to guarantee lasting water resistance
- Select LED fixtures for energy efficiency and extended lifespan
- Consider ready-to-assemble cabinets for durability at $100-300 each, saving on custom costs
Moreover, investing in quality materials aligns with the commitment to using quality materials in all remodeling projects, ensuring your bathroom remains both functional and stylish for years to come.
Master Essential DIY Skills Before Starting
Before tackling your bathroom remodel, you'll want to build confidence by practicing essential skills on smaller projects like replacing a faucet or retiling a backsplash.
You can sharpen your techniques by watching detailed video tutorials that demonstrate proper methods for plumbing, tiling, and basic electrical work.
Starting with manageable projects won't just help you develop vital abilities - it'll also help you identify which tasks you can handle yourself and which ones you should leave to professionals.
Practice on Small Projects
Since tackling a complete bathroom remodel can overwhelm even experienced DIYers, mastering essential skills through small practice projects will dramatically increase your chances of success.
Start with mock projects to develop your techniques before committing to a full renovation. Practice waterproofing, tiling, and fixture installation in low-stakes environments like laundry rooms or garage walls.
- Create a small test wall section to perfect your drywall and tiling skills
- Set up practice plumbing connections using spare fixtures
- Build a sample vanity installation in your garage
- Test waterproofing applications on non-critical surfaces
Watch Tutorial Videos First
Even experienced DIYers can benefit immensely from watching detailed tutorial videos before starting a bathroom remodel.
These video resources demonstrate proper tool handling, material selection, and installation techniques that can save you time and money. Tutorial benefits include step-by-step guidance for complex tasks like waterproofing and tile setting, while also highlighting common pitfalls to avoid.
You'll learn valuable problem-solving strategies, from addressing uneven surfaces to making emergency repairs.
Videos also show cost-effective alternatives to expensive materials and tools, helping you optimize your budget without compromising quality.
Furthermore, leveraging comprehensive bathroom remodeling services will enhance your project’s success and efficiency.
Watch multiple tutorials to gain different perspectives and approaches before tackling your project.
Optimize Your Bathroom Layout
Effective bathroom layouts start with smart storage solutions, like vertical shelving and recessed cabinets, to maximize every inch of available space.
You'll want to position fixtures strategically near windows to take advantage of natural light, which can make even small bathrooms feel more open and inviting.
Consider wall-mounted toilets and floating vanities to create cleaner sightlines while maintaining essential functionality in your remodeled space.
Space-Saving Storage Solutions
When planning a bathroom remodel, maximizing storage space becomes a critical factor in creating a functional and organized environment.
You'll want to focus on vertical space utilization and multi-functional storage solutions that adapt to your needs. Modern options like wall-mounted cabinets and over-toilet storage systems help you make the most of limited space while maintaining accessibility.
- Install multi-door cabinets with specialized compartments for toiletries and personal care items
- Choose durable materials like stainless steel 304 or moisture-resistant teak for longevity
- Integrate LED-embedded storage solutions that combine lighting with organization
- Consider modular systems that can be customized as your storage needs change
Maximize Natural Light
Building upon smart storage solutions, natural light can transform your bathroom into a bright, inviting sanctuary.
Start by evaluating window placement options, prioritizing south-facing installations for maximum sunlight. Consider skylight options or solar tubes for interior spaces where traditional windows aren't feasible.
Choose light colors and reflective surfaces like glossy tiles to amplify brightness throughout the space. Install transparent shower enclosures and strategically place mirrors to redirect natural light.
For ideal cross ventilation and dynamic lighting, position windows on adjacent walls. Remember to align task areas like vanities with natural light sources to reduce dependency on artificial lighting.
Smart Fixture Placement
Proper fixture placement serves as the foundation for a highly functional bathroom design. When planning your layout, consider zoning strategies that separate wet and dry areas while maintaining clear traffic paths.
Understanding standard fixture dimensions helps you create an efficient space that works for your daily routine.
- Position your sink, toilet, and shower as primary anchors, ensuring minimum clearances for comfortable use.
- Install wall-mounted fixtures to maximize floor space in narrow bathrooms.
- Place mirrors 24-30" above sinks and towel rails within easy reach of wet areas.
- Create distinct zones for toilets using partial walls or frosted glass for privacy.
Tackle Paint and Lighting Updates First

Two critical elements set the foundation for a successful bathroom remodel: paint and lighting updates.
Start by selecting the right paint finishes - semi-gloss or satin for walls and epoxy-based systems for tubs and showers. Before painting, thoroughly clean surfaces with TSP and repair any cracks or damage.
You'll want to update lighting fixtures strategically, layering ambient, task, and accent lighting to create the perfect atmosphere. Install water-resistant fittings in wet areas and consider under-cabinet LED strips for added ambiance.
Don't forget to coordinate your paint colors with both natural and artificial lighting choices.
Save Money With Smart Material Sourcing
Smart material sourcing can slash your bathroom remodeling costs by up to 50% without compromising quality or style.
When exploring material alternatives, consider visiting Habitat ReStores for donated fixtures and searching retailers for scratch-and-dent appliances. You'll find significant savings through strategic fixture sourcing while maintaining a high-end look.
- Check local salvage yards for vintage fixtures and cabinets that add character while reducing costs.
- Install grout-free wall panels instead of traditional tile to save on labor and maintenance.
- Choose laminate or solid-surface countertops over natural stone for durability at lower prices.
- Opt for vinyl flooring with modern finishes as a cost-effective alternative to hardwood.
Protect Existing Features During Renovation
Preserving your bathroom's existing features during renovation requires careful planning and protective measures to prevent costly damage.
When protecting surfaces, use adhesive plastic sheeting and foam edge protectors to shield floors, mirrors, and glass from construction debris.
Focus on preserving structures by anchoring new fixtures directly into wall studs and applying waterproof membranes behind shower enclosures.
Don't forget to seal penetration points around pipes and mark existing plumbing locations before demolition.
For maximum protection, isolate work zones with plastic barriers and use negative air machines to control dust migration throughout your space.
Update Fixtures Without Moving Plumbing

You'll find that updating your bathroom's appearance doesn't require extensive plumbing changes when you focus on swapping out dated hardware and fixtures.
Start by replacing worn faucets and cabinet handles with modern designs that match your existing plumbing connections and mounting patterns.
Consider installing a new water-efficient showerhead that fits your current shower arm, instantly transforming your shower's functionality and style while maintaining the original plumbing configuration.
Swap Out Old Hardware
One of the most impactful ways to modernize your bathroom without major construction involves swapping out dated hardware and fixtures.
By selecting coordinated hardware styles and modern finishes, you'll create a cohesive, updated look throughout your space. Focus on elements that make the biggest visual difference while requiring minimal tools and expertise.
- Replace cabinet knobs, drawer pulls, and door handles with matching finishes for a unified appearance
- Update shower heads, tub spouts, and drain covers to coordinate with sink fixtures
- Install modern towel bars, hooks, and toilet paper holders in contemporary styles
- Refresh mirror frames and lighting fixtures with decorative trim and updated designs
Replace Worn Faucets
Replacing worn bathroom faucets can dramatically enhance your sink's functionality and appearance without requiring extensive plumbing modifications.
Before choosing among modern faucet styles, measure your sink's mounting configuration to verify compatibility. You'll need basic tools like adjustable wrenches and pliers for installation.
To install your new faucet, first shut off the water supply and disconnect the old fixture. Clean the mounting surface thoroughly, then follow the manufacturer's installation tips carefully.
Position the new faucet with included gaskets, connect supply lines, and test for leaks. Consider WaterSense-certified models to balance water efficiency with performance.
Install New Showerheads
Similar to updating faucets, modernizing a shower head offers substantial impact without requiring major plumbing changes.
When selecting your new fixture, consider both shower head types and water efficiency ratings to maximize performance while minimizing water consumption. You'll need basic tools like an adjustable wrench and Teflon tape for a successful installation.
- Choose WaterSense-certified models to reduce water usage while maintaining strong pressure
- Review compatibility with your existing shower arm (standard 1/2" NPT threading)
- Apply Teflon tape clockwise on threads to prevent leaks
- Test connections and spray patterns after installation to verify proper function
Maximize Storage With Creative Solutions
Transforming your bathroom's storage capabilities doesn't require a complete overhaul of your existing space. Start by installing floating shelves above your toilet and around the bathtub to maximize vertical space while keeping essentials within reach.
Create wall niches lined with mirrors or trim to display cosmetics and daily items, adding both function and style to smaller bathrooms.
Consider adding pull-out shelves and deep drawers with dividers to your existing cabinetry.
You'll also want to incorporate shower niches to prevent products from cluttering your tub's edges. These practical solutions will help organize your space while maintaining a clean, streamlined look.
Know When to Call the Professionals
While smart storage solutions can enhance your bathroom's functionality, certain aspects of remodeling require professional expertise to guarantee safety and compliance.
When dealing with electrical systems, structural integrity, or hazardous materials, it's essential to hire licensed contractors who understand proper safety precautions and building codes.
Don't risk your family's well-being by attempting complex renovations beyond your skill level.
- Electrical and plumbing work requires certified professionals to prevent shock hazards and water damage
- Structural modifications affecting load-bearing walls need expert assessment
- Asbestos or lead paint removal demands specialized training and equipment
- Ventilation issues and persistent moisture problems require professional remediation to prevent mold growth
Conclusion
You've learned these essential DIY bathroom remodeling tips, yet ironically, you'll probably still make a few mistakes along the way - and that's perfectly fine. What matters is that you're now equipped to tackle this challenging project with confidence and knowledge. Remember, while saving money is great, knowing when to call professionals isn't admitting defeat - it's actually being a smart homeowner who values both quality and safety.
Simple Bathroom Remodeling Tips for Small Spaces
You can transform your small bathroom into a functional and stylish haven with a few simple remodeling tips. Start by maximizing vertical space with tall cabinets and wall-mounted shelves to keep clutter at bay. Opt for light colors to brighten the room and create the illusion of more space. Incorporate multi-functional fixtures, like wall-mounted sinks, to optimize floor area. Enhance natural lighting with mirrors and sheer treatments, and don't forget to add personalized touches through decor and plants. With these tips, your small bathroom can be both practical and inviting, and there's so much more to explore!
Maximize Vertical Space

Maximizing vertical space is essential when remodeling a small bathroom, as it allows you to create more storage without sacrificing floor area. One effective way to achieve this is by incorporating tall cabinets and wall-mounted shelving. These solutions not only provide ample storage but also keep items organized and easily accessible.
You can install hooks and racks on the walls to hang towels and accessories, which helps minimize clutter while making the most of your wall space. Consider opting for floating vanities or sinks that give the illusion of more floor space, making the bathroom feel larger and more open.
Additionally, using vertical tile designs in the shower area can visually elongate the space, enhancing the perception of height in small bathrooms. This simple trick can transform your shower into a stunning focal point.
Don't forget decorative baskets or bins on upper shelves to store items out of sight while adding a stylish touch. By utilizing these vertical storage solutions, you'll make your small bathroom functional and aesthetically pleasing.
Embrace the potential of your space and enjoy a more organized, spacious feel!
Choose Light Colors
To create a more open and inviting atmosphere in your small bathroom, choosing light colors can make a significant difference. Light colors, like whites and soft pastels, brighten your space, making it feel more open and airy.
When you adopt a neutral color palette, you not only enhance the perception of size but also create a seamless flow throughout your small bathroom design.
Using light-colored paint or tiles on walls and floors reflects natural light, amplifying brightness in compact areas. This simple change can transform your bathroom from cramped to cozy.
For an added touch, consider incorporating light oak vanities against white walls. This combination offers a pleasing contrast while maintaining a fresh and light aesthetic.
Light colors are versatile, easily complementing various design themes—from modern to traditional. This flexibility ensures that your small bathroom can have a cohesive look, no matter your style preferences.
Incorporate Multi-Functional Fixtures

In a small bathroom, incorporating multi-functional fixtures can be a game changer for both style and practicality.
Start by opting for wall-mounted sinks and toilets; these fixtures free up valuable floor space, giving your compact bathroom an open, airy feel. A vanity with built-in storage solutions is another smart choice; it maximizes functionality while keeping your essentials neatly organized and accessible.
Consider a combined shower and bathtub unit to save space, offering both bathing and showering options without crowding your bathroom. Fixtures that incorporate storage, like mirrored cabinets, not only provide a reflective surface but also serve as a discreet place to store toiletries.
Lastly, think about foldable or extendable fixtures, such as a drop-leaf vanity or a folding shower seat. These adapt to your needs, allowing you to enjoy your space without it feeling cramped when you're not using them.
Utilize Smart Storage Solutions
When you're remodeling a small bathroom, smart storage solutions can make a world of difference.
Think about utilizing vertical space with open shelves or wall-mounted cabinets to keep essentials organized without sacrificing floor area.
You can also consider multi-functional furniture, like storage benches, to maximize both seating and storage while maintaining a tidy and stylish look.
Vertical Space Utilization
Maximizing vertical space is essential for small bathrooms, and smart storage solutions can make a significant difference. Start by installing tall cabinets or shelving units that reach the ceiling. This approach effectively taps into your vertical storage potential, ensuring every inch of space is utilized.
Consider adding wall-mounted shelves above the toilet to store toiletries and decorative items. This not only frees up valuable floor space but also keeps your essentials within easy reach.
To further reduce clutter, incorporate hooks and racks on the walls for hanging towels and accessories. This method keeps items organized and off countertops, creating a more spacious feel.
If you're looking for a sleek appearance, opt for floating vanities or sinks mounted on the wall. They create an illusion of more floor space while offering additional storage underneath.
Lastly, utilize decorative baskets or bins on your shelves. They not only keep toiletries organized but also add a stylish touch to your bathroom.
Multi-Functional Furniture Options
Incorporating multi-functional furniture can dramatically enhance the functionality of your small bathroom. By choosing pieces that serve multiple purposes, you can maximize space without sacrificing style. For instance, a storage bench or ottoman not only provides a place to sit but also offers hidden storage for towels or toiletries. This is especially useful when you're working within a tight budget.
Consider installing wall-mounted cabinets to save valuable floor space while keeping your essentials organized. These cabinets can efficiently store toiletries and towels, ensuring everything is within easy reach.
A vanity with built-in drawers is another excellent option, allowing you to keep your countertop clutter-free while securely hiding away personal items.
To further optimize your space, use decorative baskets on open shelves. They can keep your essentials tidy and accessible, adding a touch of style to your decor.
Enhance Natural Lighting

To brighten up your small bathroom, consider using sheer window treatments that let in plenty of natural light while still keeping your space private.
Positioning mirrors strategically across from windows can also reflect that sunlight, making the room feel larger and more inviting.
With these simple changes, you can create a more airy and open atmosphere in your bathroom.
Use Sheer Treatments
Sheer window treatments can transform your small bathroom by flooding it with natural light while ensuring your privacy. These elegant coverings allow sunlight to pour in, creating a bright and inviting space. By using sheer fabrics, you can soften harsh sunlight, reducing glare and making your bathroom feel more comfortable.
In a small bathroom, light, airy sheer treatments can visually enlarge the area. They draw the eye outward, promoting an open feel that counters any cramped sensation. Unlike heavy drapes that can weigh down the space, sheer window treatments keep the ambiance light and breezy, making your bathroom a pleasant retreat.
Moreover, sheer treatments offer versatility; you can easily layer them with other window coverings to control light and add style. This flexibility means you can adapt the look and function of your bathroom to suit different times of day or personal preferences.
Position Mirrors Strategically
Natural light can work wonders in a small bathroom, and positioning mirrors strategically is a fantastic way to enhance that brightness. By placing large mirrors directly across from windows, you can effectively reflect natural light throughout the space, creating a more inviting atmosphere. This simple trick maximizes brightness and makes your bathroom feel larger and airier.
Consider experimenting with unique mirror shapes that not only serve practical purposes but also add artistic flair to your design. Mirrors don't just have to hang on walls; try incorporating mirrored surfaces on cabinets or decor items to amplify light reflection even further. This technique can create an illusion of a bigger space, making your bathroom feel expansive.
Varying the heights of your mirrors can also capture light from different angles, improving the overall sense of openness. A well-placed mirror not only reflects light but also adds depth and dimension, transforming even the tiniest bathrooms into inviting retreats.
Add Personal Touches
Adding personal touches to your small bathroom can transform it into a space that truly reflects your style. By infusing your personality into the design, you'll create an inviting atmosphere that feels uniquely yours. Here are some ideas to get you started:
- Incorporate unique decor items like vintage mirrors or personalized artwork to enhance character.
- Choose colorful towels and accessories that can easily be swapped out, keeping the space fresh with each season.
- Utilize decorative storage solutions such as stylish baskets or custom shelving to maintain organization and add visual interest.
- Select eye-catching light fixtures that serve as statement pieces, showcasing your taste while illuminating the room.
Don't forget to bring in some greenery! Plants not only improve air quality but also add a touch of life to your small bathroom.
By combining these elements, you'll create a relaxing retreat that's both functional and stylish.
Conclusion
With just a few thoughtful changes, your small bathroom can transform into a serene oasis. By maximizing vertical space and choosing light colors, you're not just saving room but creating an inviting atmosphere. Incorporating multi-functional fixtures and smart storage solutions makes daily routines easier, while enhancing natural light brightens the space. Don't forget to add personal touches that reflect your style. Embrace these tips, and watch your small bathroom evolve into a charming retreat you love.